
Cloud and company arrived at the Nibelheim Reactor, where they faced an abomination called the Diabolic Variant. After vanquishing their foe, they find Murasaki, who turned up dead, but still managed to secure his ID card. With this, ![]() Cait Sith was able to get some data, but needs to go to the Shinra Manor to get the info the party really needs.
Cait Sith was able to get some data, but needs to go to the Shinra Manor to get the info the party really needs.

The Mako Research Facility will have you spending quality time controlling Cait Sith.
Shinra Manor
Once you have control, you will notice that you’re controlling Cait Sith, who will be the party leader for this section. Take the time to fully equip him, as well as Barret and Aerith, who will be accompanying your little furry friend along this adventure. Note that Cait Sith will have a few solo fights in the upcoming dungeon, so you may want to equip him with some extra defenses and healing, especially if you’ve never used him prior to this. Don’t forget to visit the Cait Sith Combat Guide page for more info on how to use him in battles.
Whenever you’re ready, start moving towards the Shinra Manor and go inside the front door. There’s nothing to find in the mansion upon entering, so head straight to the elevator in the side room. At the bottom, in the cavern area, go into the only room you can for a scene, after which, you will end up in the Mako Research Facility.
Exploring the Mako Research Facility
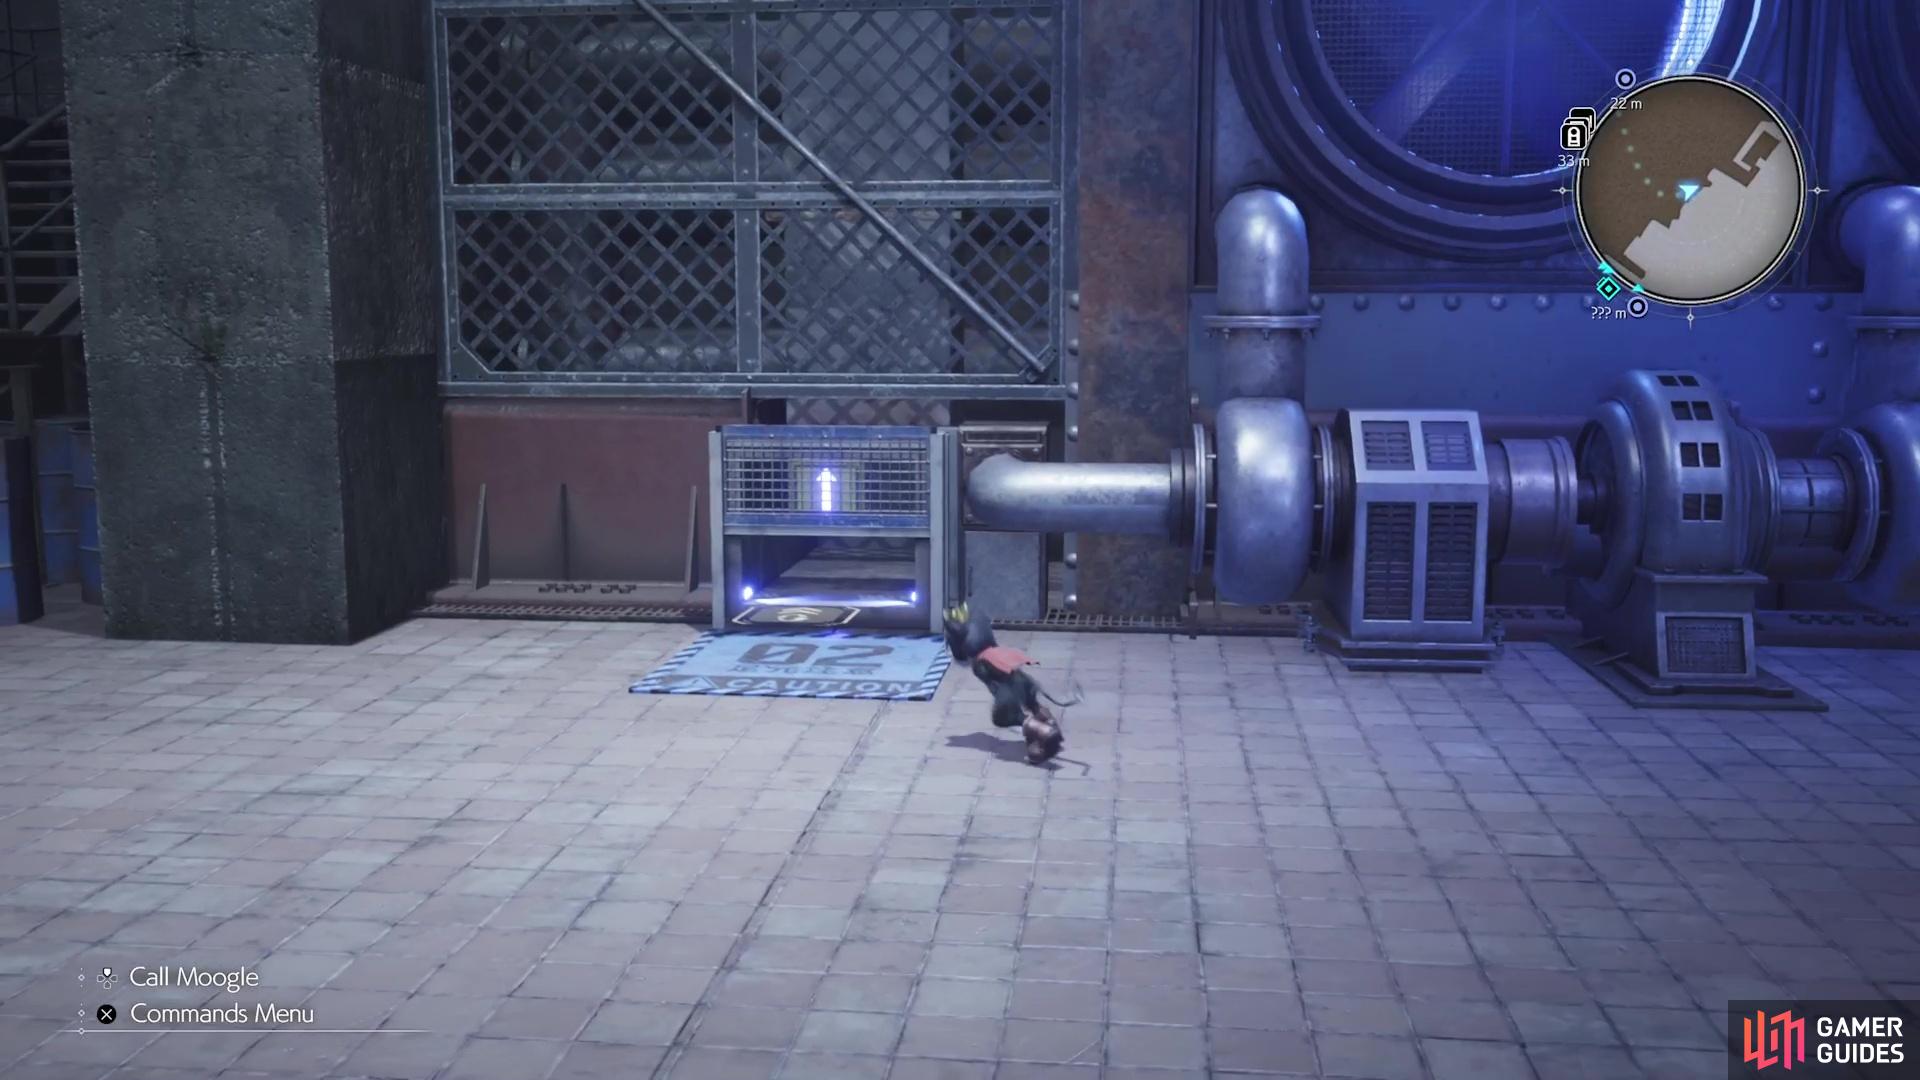
As soon as you gain control of Cait Sith, you will be right in front of an air duct, so roll through it. On the other side, head into the next room, where you will have to do battle with a Bahba Velamyu enemy. If this is your first time using Cait Sith in battle, then you should receive a brief tutorial. Once you’ve defeated the creature, it’s time to get Barret and Aerith free of their little prison. Pressing up on the D-Pad will summon your Moogle while out in the field.
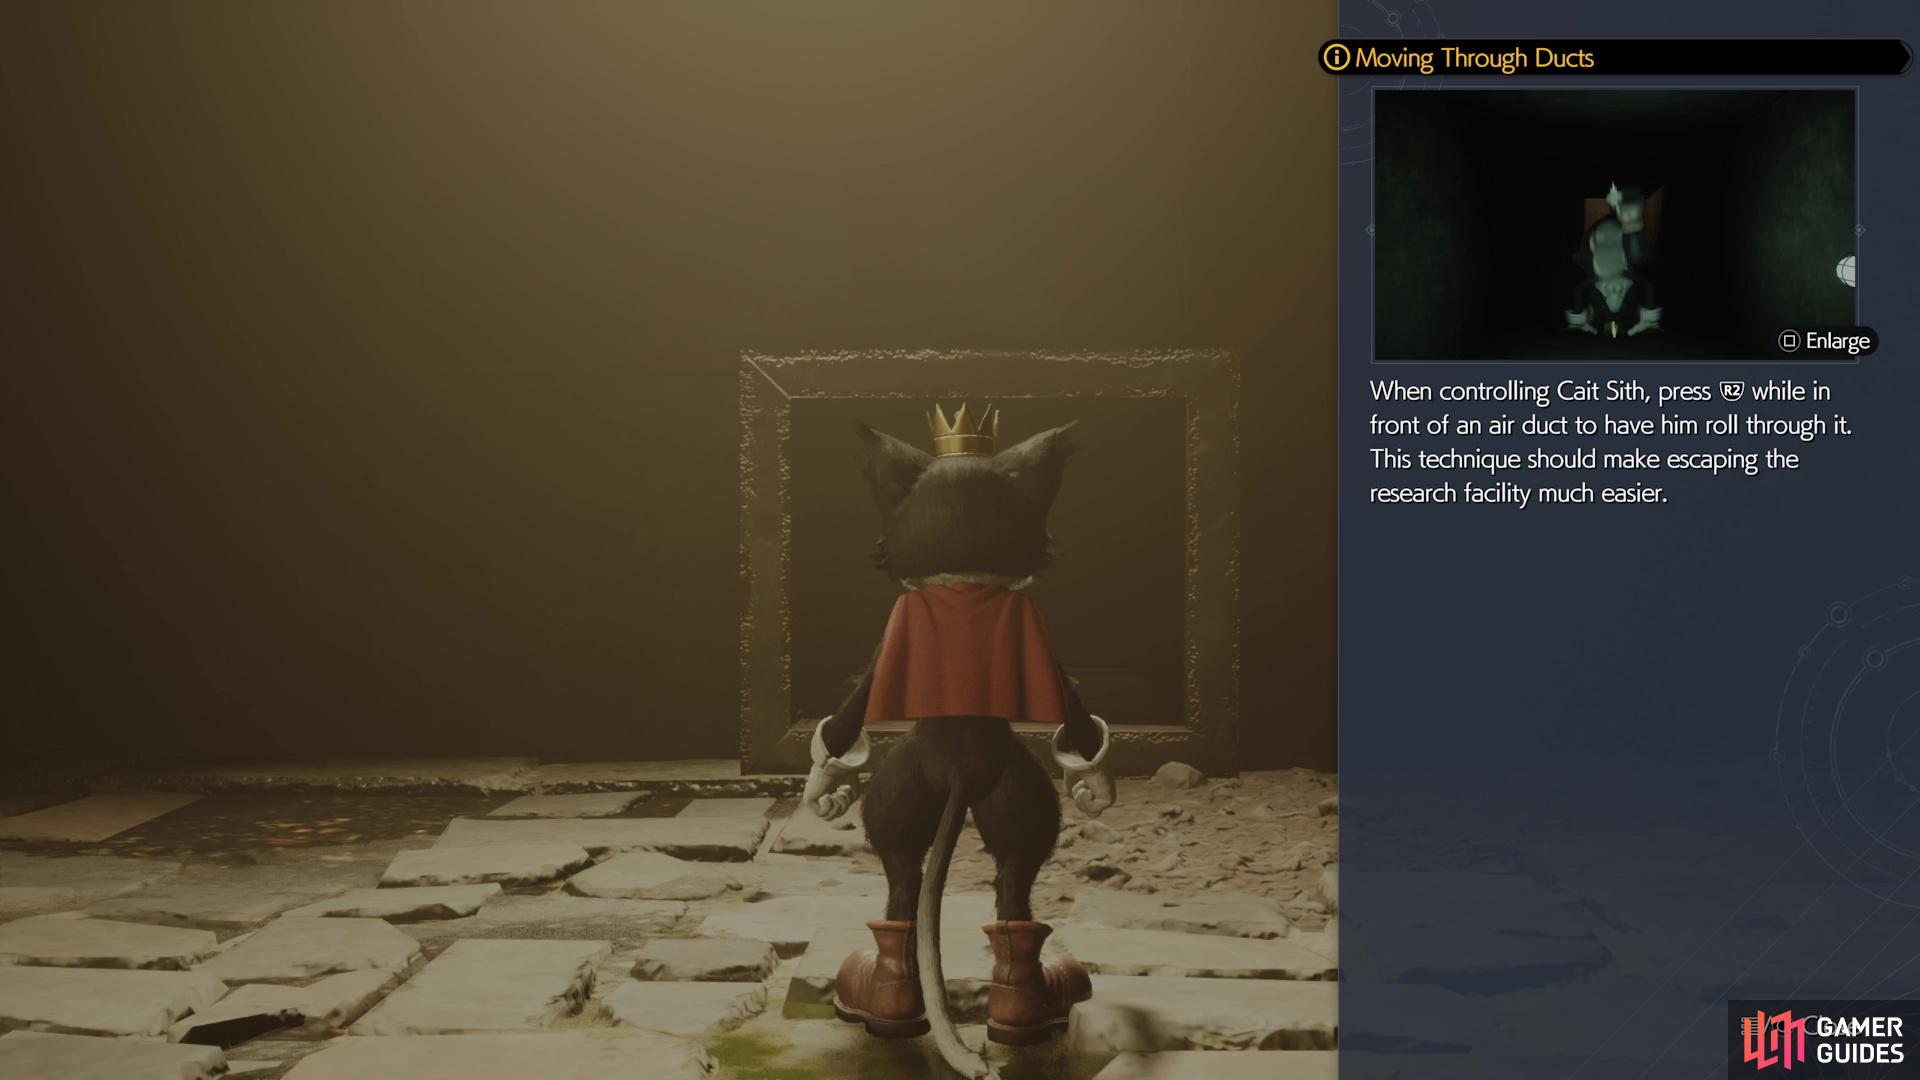


(1 of 4) Cait Sith’s small stature allows him to roll through the various air ducts.
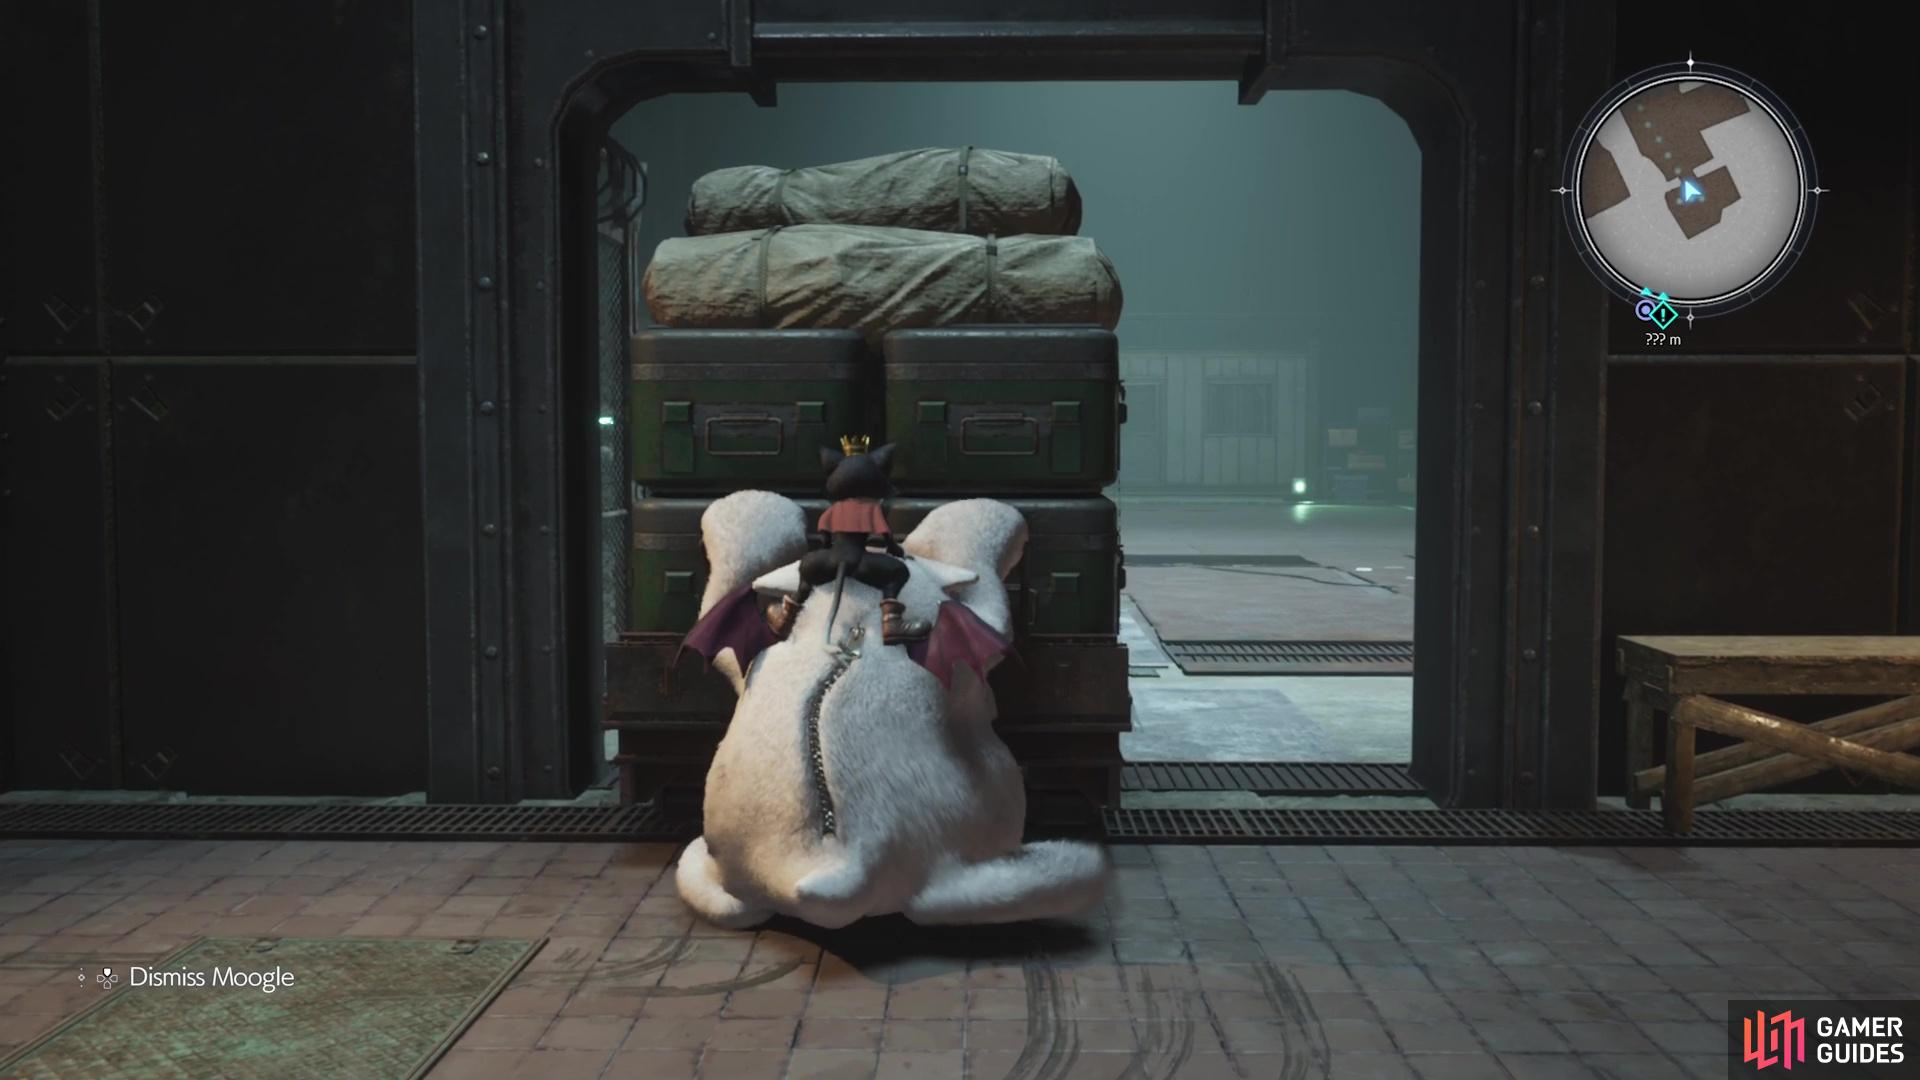
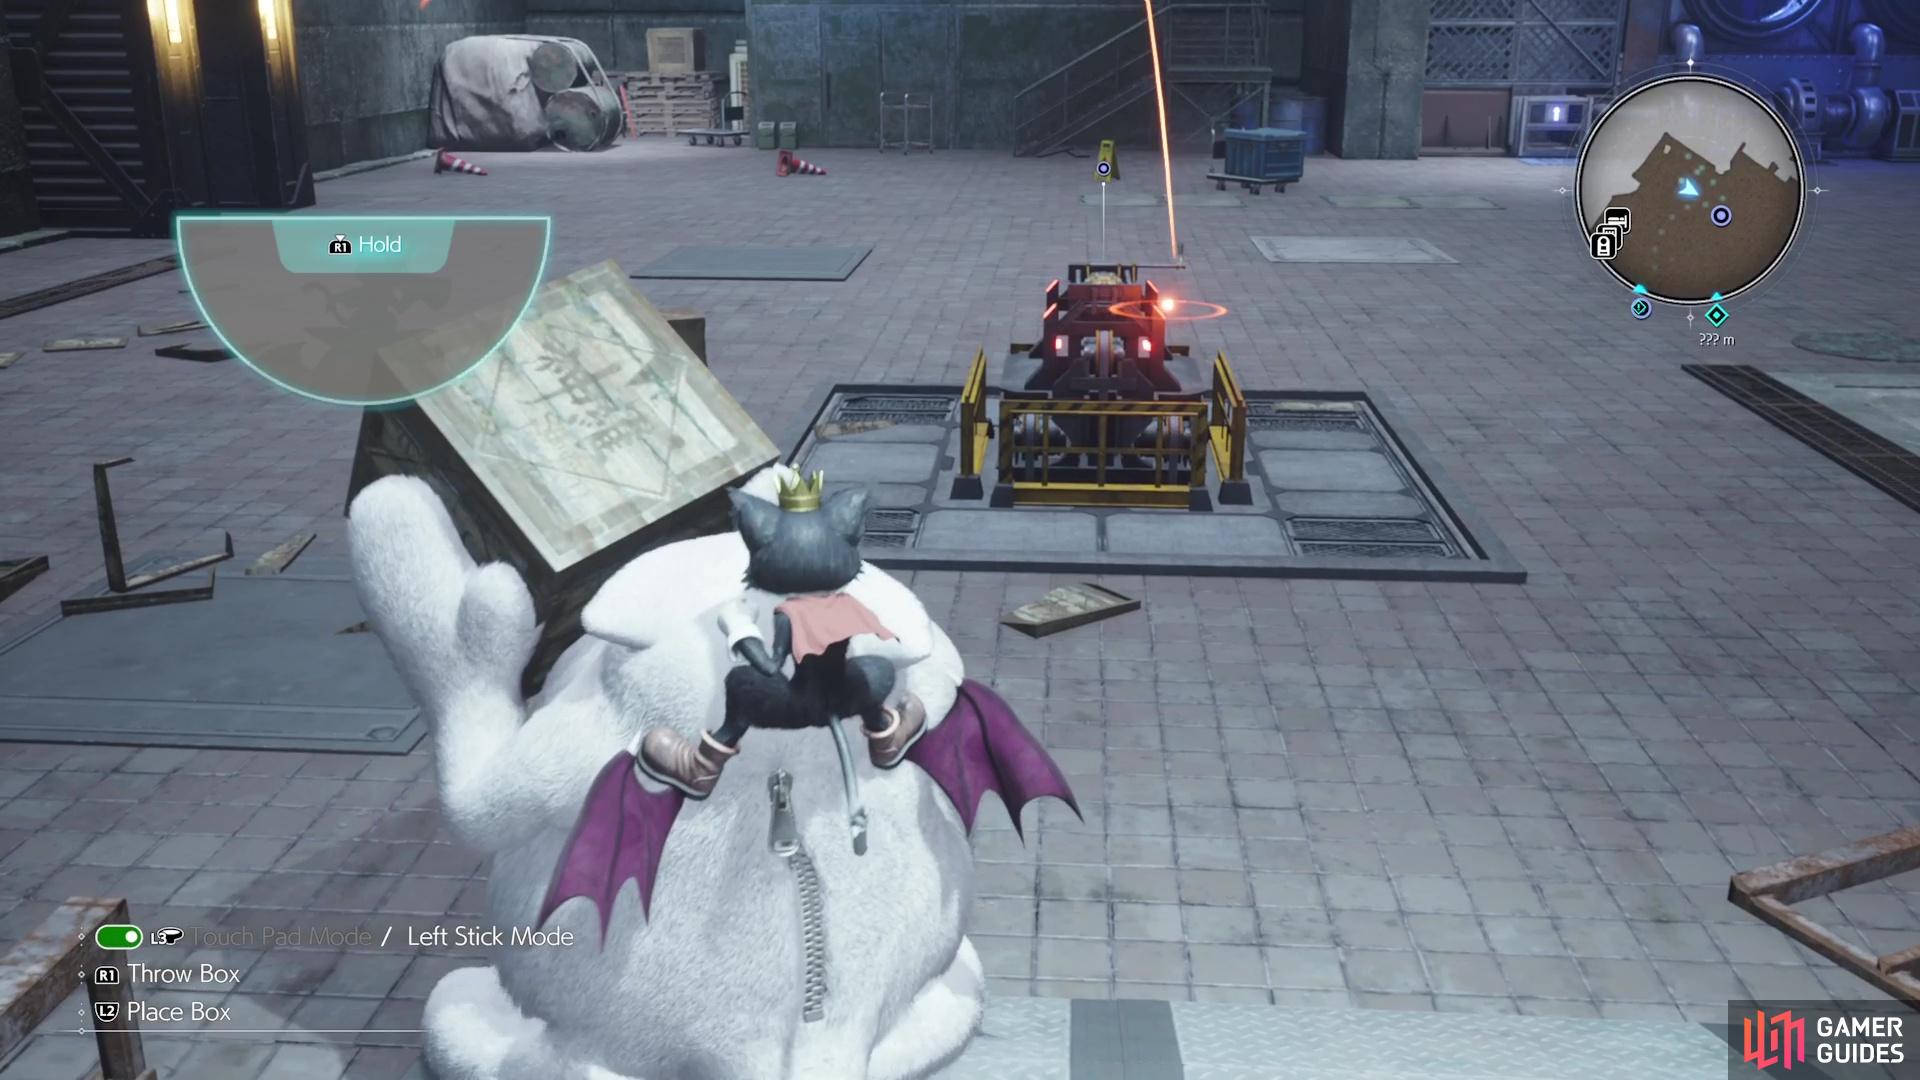
While Cait Sith is riding his Moogle friend, he will be able to pick up some heavier objects. While facing the cell door, there will be a flashing switch on the ground that you can stand on, which will dispense a crate. Hit L2 while standing next to the crate to pick it up, then press and hold R1 to aim. Whenever you want to throw the box while aiming, press the Square button. To open the cell door, look to the right of it to see a little panel with a flashing red light. That’s your target and hitting it with the box will open the door, freeing your friends.
Spawn another box and go to the southern side of the room, where you’ll see a purple chest behind another door. The switch for this door is just left of it, so hit it with the box to open it and loot the Golden Megaphone. Head north now to find some Black Bats to fight, which should go down in seconds. At the northern end, you can either head west or east. West is another locked door, but you can roll through the duct next to it to find a chest with some ![]() Revival Earrings.
Revival Earrings.
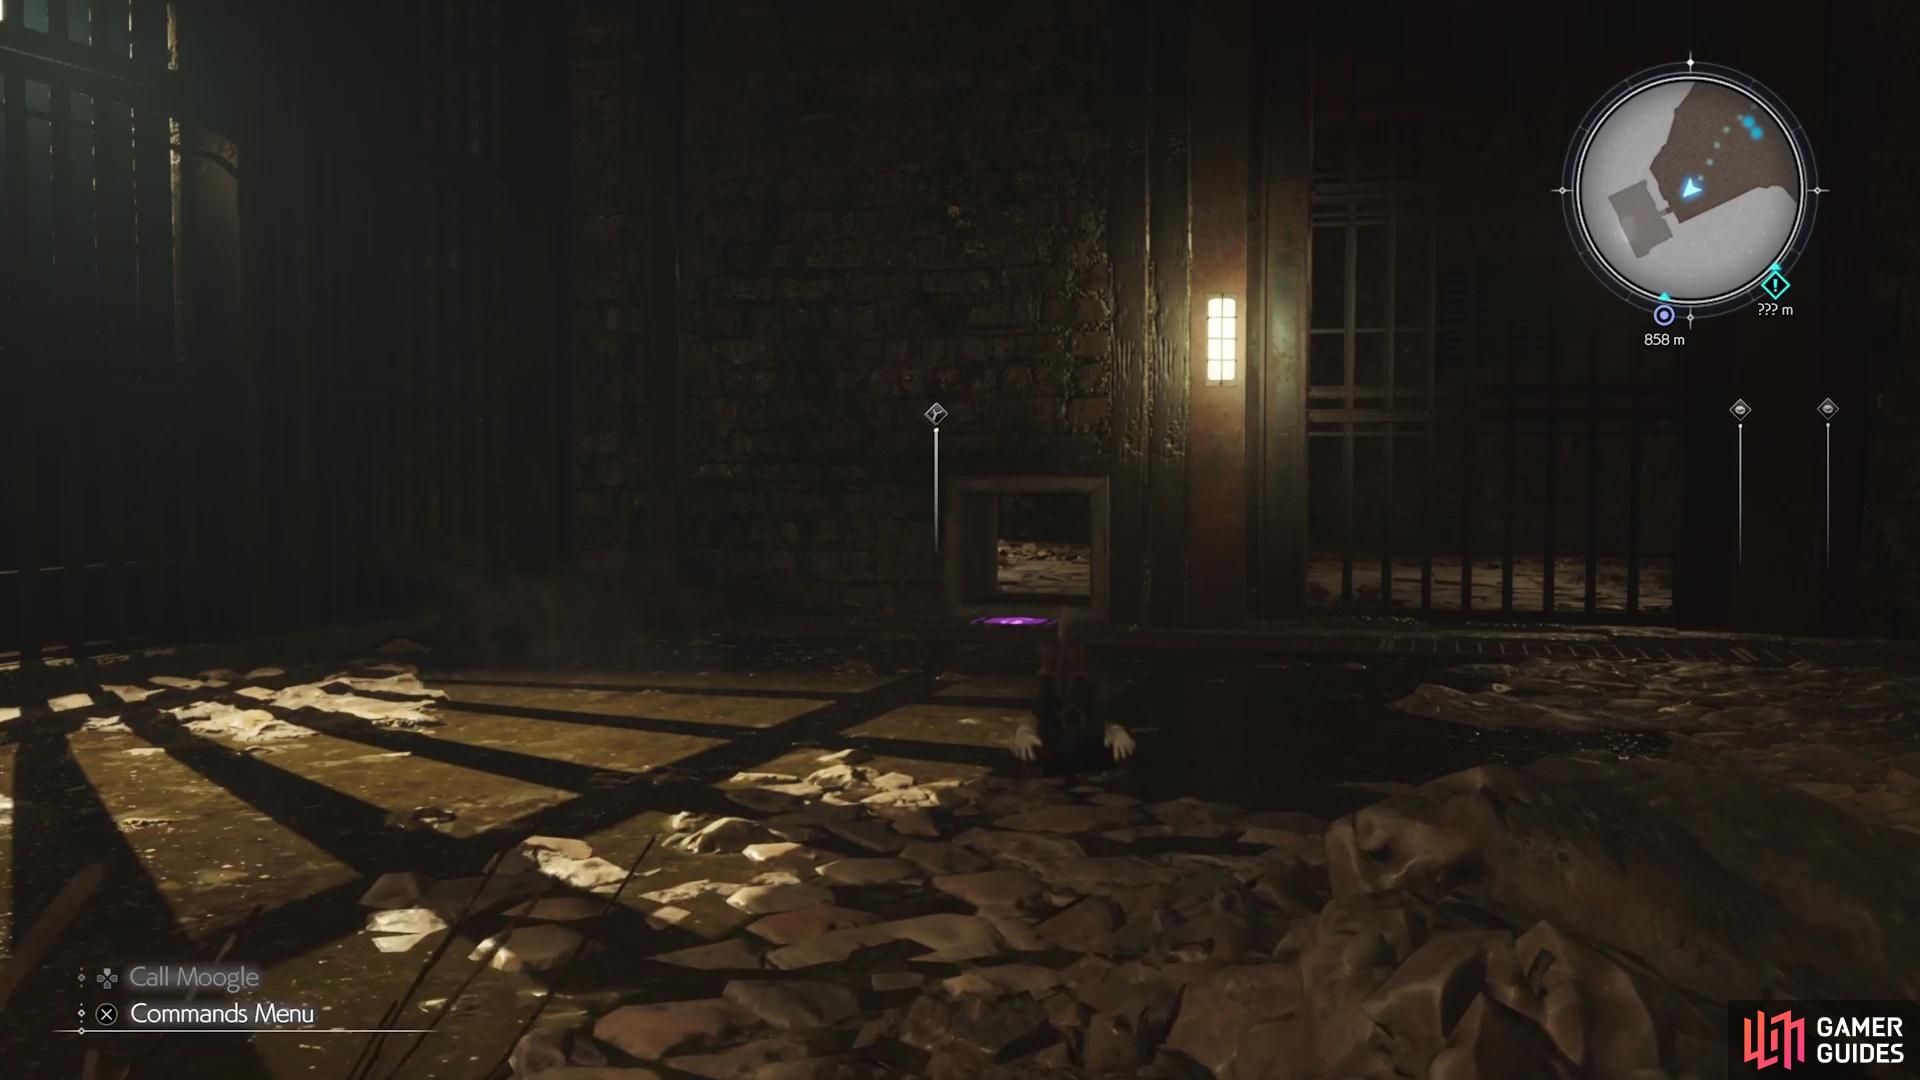

(1 of 2) Roll through this duct to find a chest with some Revival Earrings.
Roll through this duct to find a chest with some Revival Earrings. (left), You need to adjust your aim to hit this pipe that’s blocking the elevator from coming down. (right)
Go to the other side of this northern side to find a console you can interact with, which will lower an elevator. However, the elevator stops midway, as there is a pipe in the way. Summon the Moogle, go up the nearby stairs, then use one of the boxes there to break the pipe by throwing it at the obstruction. Note that you will need to pull back on the left analog stick to get the extra range needed. If you miss, there’s a button next to the console that can spawn more boxes. Take the elevator up to the next floor. There won’t be anything to do here, so continue into the larger room and defeat the monsters there.
There is another barred door here, with a vent to the side of it, so you know what to do. Defeat the enemies here, then go into the room off to the side for a chest with a ![]() Giga-Potion. There is a cart you can pull in the same little room, but you’ll need the help of your Moogle, so mount up. You only need to push the cart a little ways into the main room, as it will be acting as a cushion for boxes you need to drop via the switch on the floor just up the little set of stairs. If you don’t have the cart in the correct spot, then the box will hit the floor and break.
Giga-Potion. There is a cart you can pull in the same little room, but you’ll need the help of your Moogle, so mount up. You only need to push the cart a little ways into the main room, as it will be acting as a cushion for boxes you need to drop via the switch on the floor just up the little set of stairs. If you don’t have the cart in the correct spot, then the box will hit the floor and break.
Once you have a box you can pick up, grab it with the Moogle and look at the three vats along the wall. Above the middle one is a red flashing light, so you’ll be tossing the box at it. Doing this will open up the door and allow your party members to rejoin you. The way forward will also be open, where you’ll find a lot of boxes on the ground, so just break them all for some free items! Continue through them, fighting some more Black Bats, until you reach the room with a new enemy, the Rictus. Just use Aero on it for a quick battle and watch out for its Dizzying Breath attack.


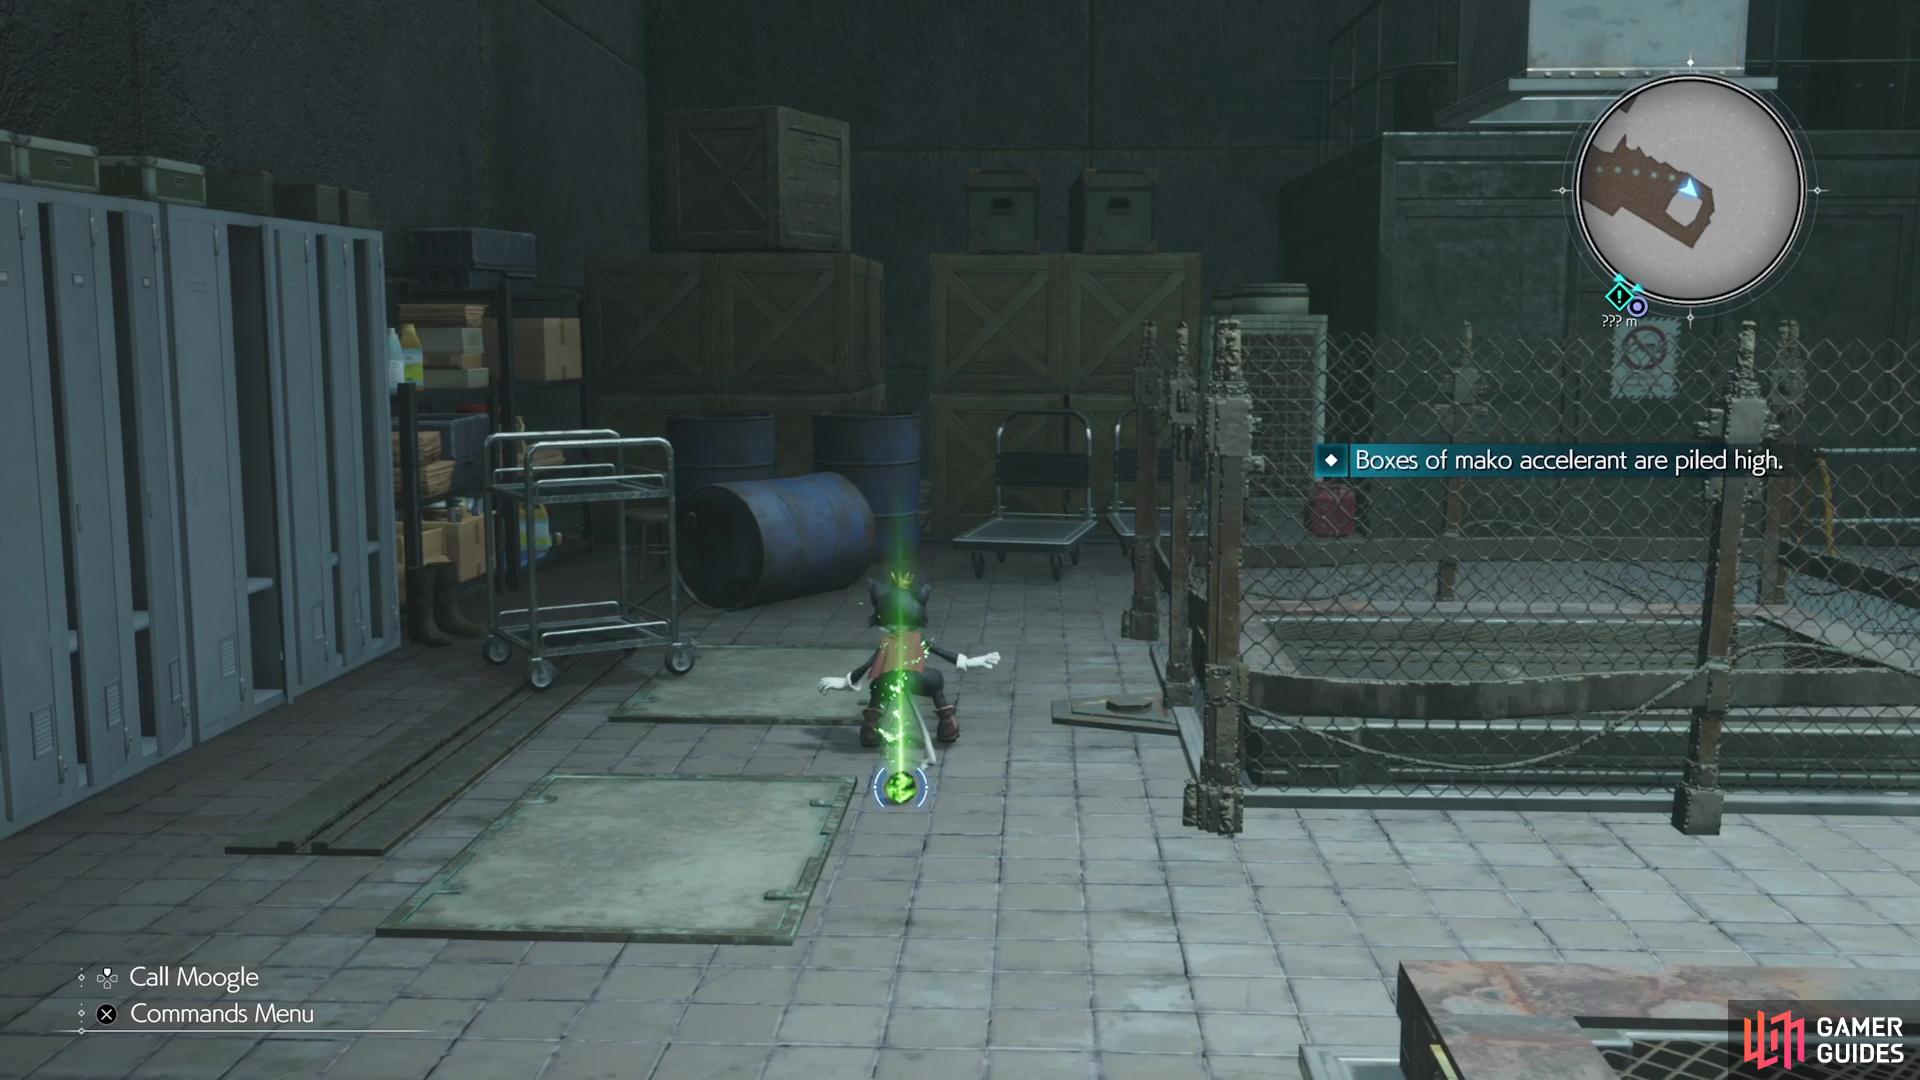


Look around to the side to find some mako accelerant boxes (the game will point this out to you) and on the floor next to them is a ![]() Barrier Materia. Now, the fun will start. If you approach the spinning thing, you will receive a message that there is insufficient power and you need to administer the accelerant to the red generator. Basically, you pick up the boxes mentioned just above and throw them in the red bowl as it spins around. You have to do it when it gets close to your position, as waiting for it to stop won’t work since you cannot throw that far.
Barrier Materia. Now, the fun will start. If you approach the spinning thing, you will receive a message that there is insufficient power and you need to administer the accelerant to the red generator. Basically, you pick up the boxes mentioned just above and throw them in the red bowl as it spins around. You have to do it when it gets close to your position, as waiting for it to stop won’t work since you cannot throw that far.
Ventilation Control
You’ll need to do this twice to open the way to the next elevator, which will take you to another large room with some more enemies, as well as a resting spot. There’s also a chest near the bench area, which contains 1,700 Gil. As you access the next console, you’ll find out that the generator for it is upstairs, so Cait Sith will be going solo once again. There is a switch that appears and you’ll need to hit it with a box, so locate the box switch in the one corner to get one. This will turn the color of the switch to blue, allowing you passage through the blue air duct.
That will be next to the fans that get pointed out and the duct will take you to the second floor. Defeat the enemies here, then look for the chest in the one corner for a ![]() Dry Ether. There’s nothing else here on the second floor, so locate the other blue duct and take it to the third floor. You’ll encounter a new enemy here, the Adjudicator, who isn’t terribly difficult, but it does have a gimmick to it. It is weak to lightning, but whatever type of attack you use to pressure it is the type it will then become immune to.
Dry Ether. There’s nothing else here on the second floor, so locate the other blue duct and take it to the third floor. You’ll encounter a new enemy here, the Adjudicator, who isn’t terribly difficult, but it does have a gimmick to it. It is weak to lightning, but whatever type of attack you use to pressure it is the type it will then become immune to.


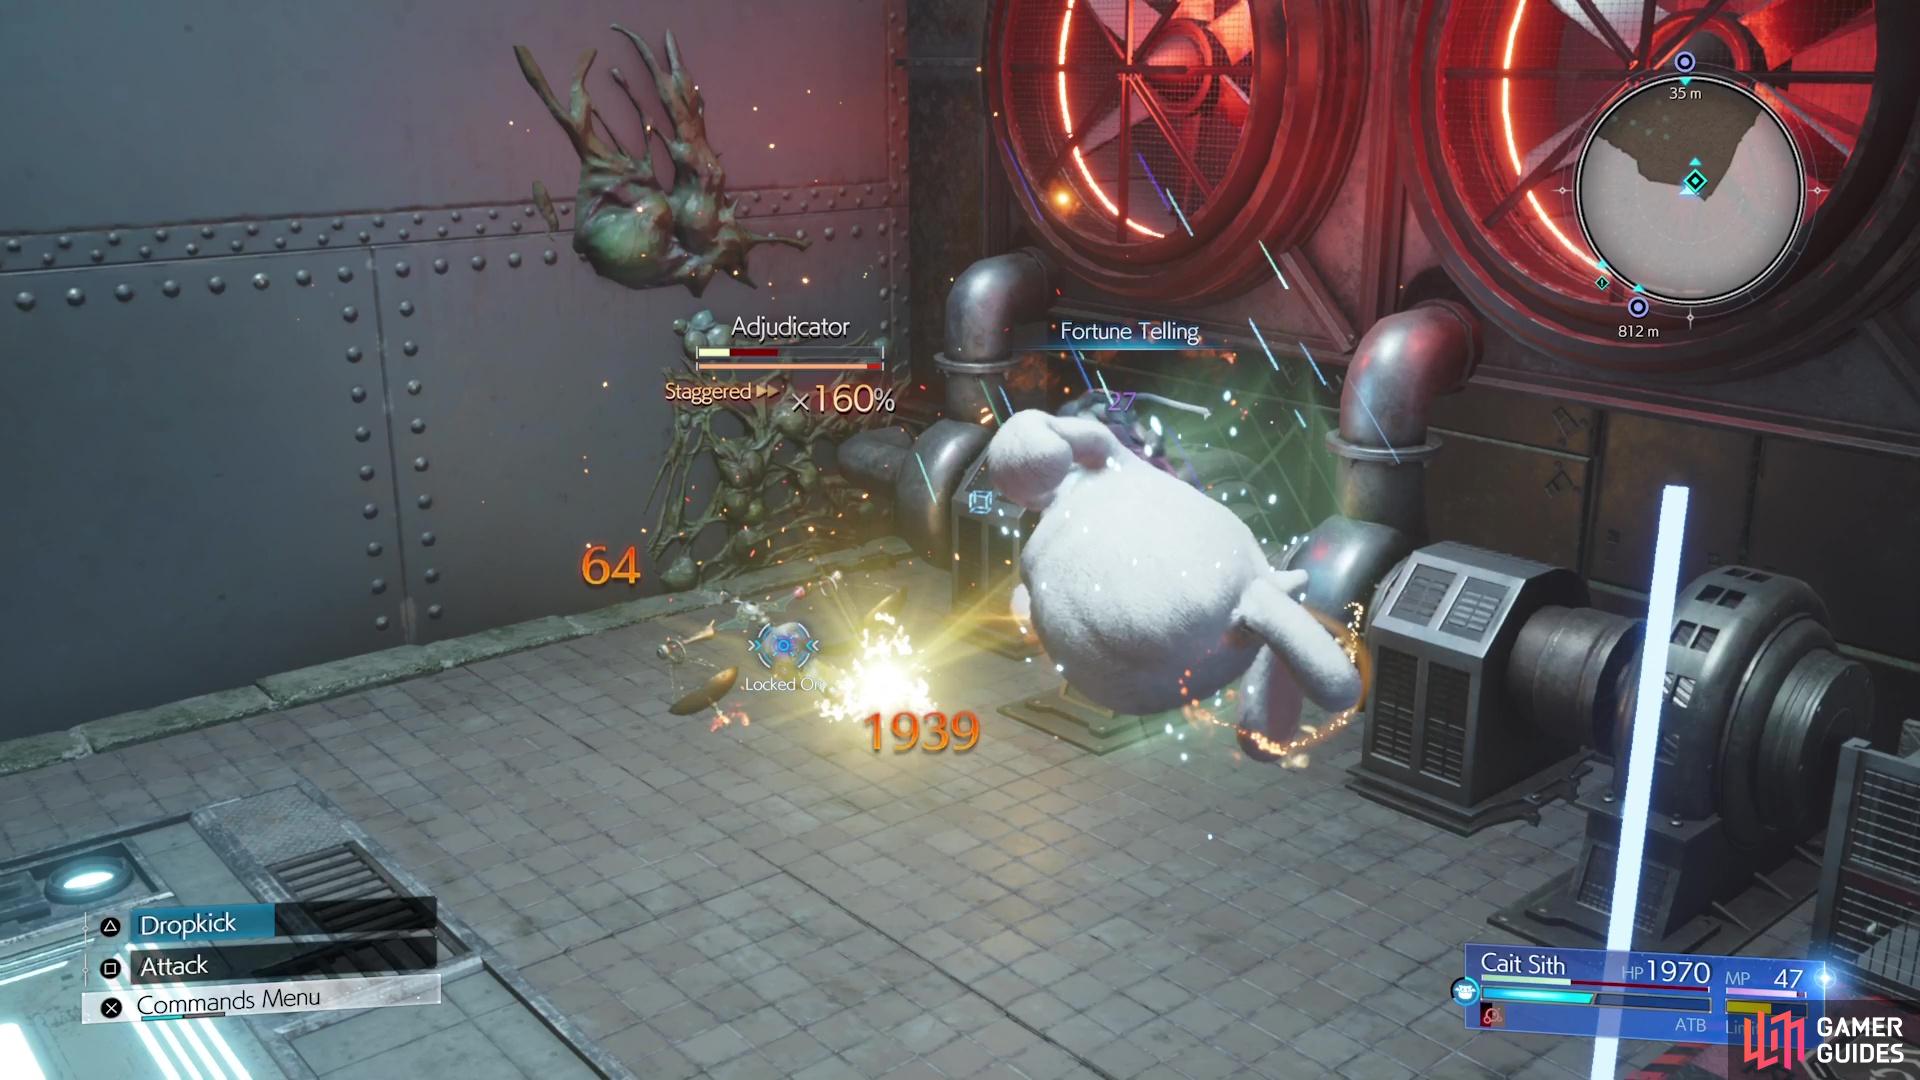

So, if you pressure it with magical damage, then it will become immune to magic and you can only use physical attacks to damage it. The best thing to do is to probably try and pressure it with physical attacks, as you can then just blast it with magical attacks after that. Of course, you could do it the other way and then spam Cait Sith’s abilities (they tend to be physical-based) to defeat it. After winning, find the next blue vent that goes upward to the fourth floor, where you’ll find an ATK to MATK Swap Materia on the floor.
Return to the third floor and grab a box with your Moogle pal, then head over to where the railing is broken. From here, you can aim and hit the switch all the way on the bottom floor, which will turn it red. This will allow you to use the red duct on the third floor, bringing you to the Materials Storage room. Here, you will have to fight two Adjudicators at the same time, so keep tabs on your HP as you do battle. Concentrate on one at a time, so you limit the damage you take. After the battle is over, loot the chest on the side of the room for a Hades Armlet.


(1 of 4) Toss a box down to the switch on the ground floor to change it back to red.
Go up the stairs and access the control panel to see an elevator nearby. In order to use it, though, you’ll have to toss a couple of boxes onto it to weigh it down. Remember that you can manually aim with the left analog stick while you’re in aiming mode. Once you have three boxes on the elevator, it will be low enough that you can get on it. Break the boxes after boarding the elevator, which will raise it to the area above. If you aren’t fully healed, do so now, as there is a miniboss (of sorts) coming up. Access the console and a monster will pop out of the nearby container, so it’s time for a fight.
Miniboss - Yin and Yang
This fight can be challenging, since you only have Cait Sith during it and he can be a little difficult to use properly. If you recall the Adjudicator fight, you had the physical and magical sides to attacking it. This also holds true for Yin and Yang here, although it will have both a magical and physical side as well. This creature will switch between Yin and Yang controlling the body throughout the fight, so it’s important to keep track of that.
Yin is the physical side of this miniboss, while Yang is the magical side. Whenever you see one of them awaken, that means that side will be taking over, and that head’s eyes will glow red. Yang has access to Blizzard, Thundara and Thundaga, so either dodge them all or try and perfect block them. When Yin is in play, it will either use melee attacks or Despondent Strike, which is a series of four melee slashes. Hit the opposite damage type to deal big damage and you will eventually stagger it.


(1 of 4) Yin and Yang will switch between their two versions throughout the fight.
This is where the battle can become very dangerous, as once it comes out of stagger, the head that wasn’t in control will start using big attacks. If you staggered it while Yang was in control, then Yin will do a lot of Despondent Strikes. If the opposite happens, then Yang will do Yang Takes Aim, which is essentially a suicide-like attack that does huge damage to Cait Sith. While staggered, it’s good to top up your HP to full, just in case (the attack is unblockable, too, and quite difficult to dodge).
The only plus about Yang Takes Aim is it will leave the creature with hardly any health left, so only a few more strikes from your end will quickly wrap up this battle. As soon as you defeat the enemy and assume direct control, save your game, as there is an upcoming minigame that can reward you with an item that is required for the platinum trophy.
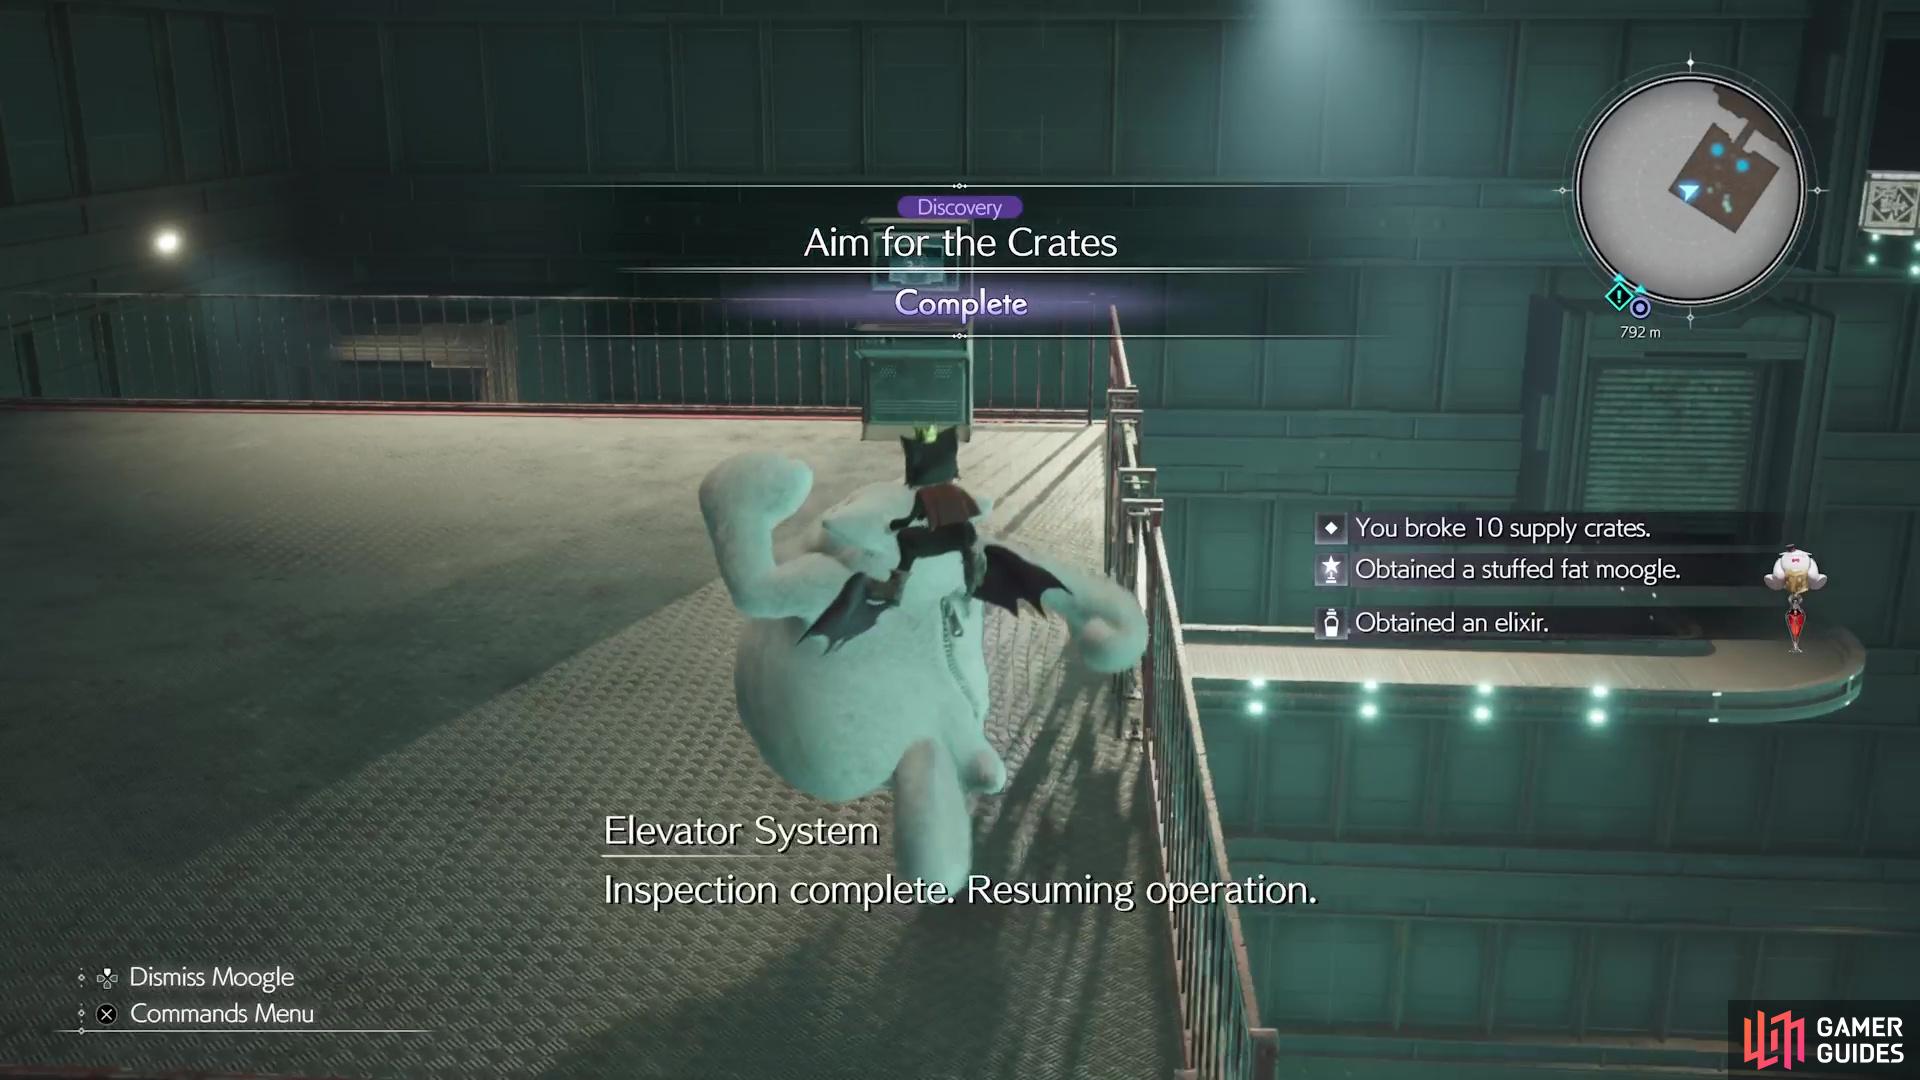
Aim for the Crates Minigame
Ride the next elevator and it will stop about midway, for “safety inspection.” This causes a bunch of boxes to fall down on the platform, with different ones appearing on a conveyor nearby. The goal here is to break 10 of the supply crates on the conveyor before time runs out. If you aim solely at the crates when you’re tossing the boxes, then you won’t hit any. You need to lead the shot a little bit before you throw, as the crates are moving.
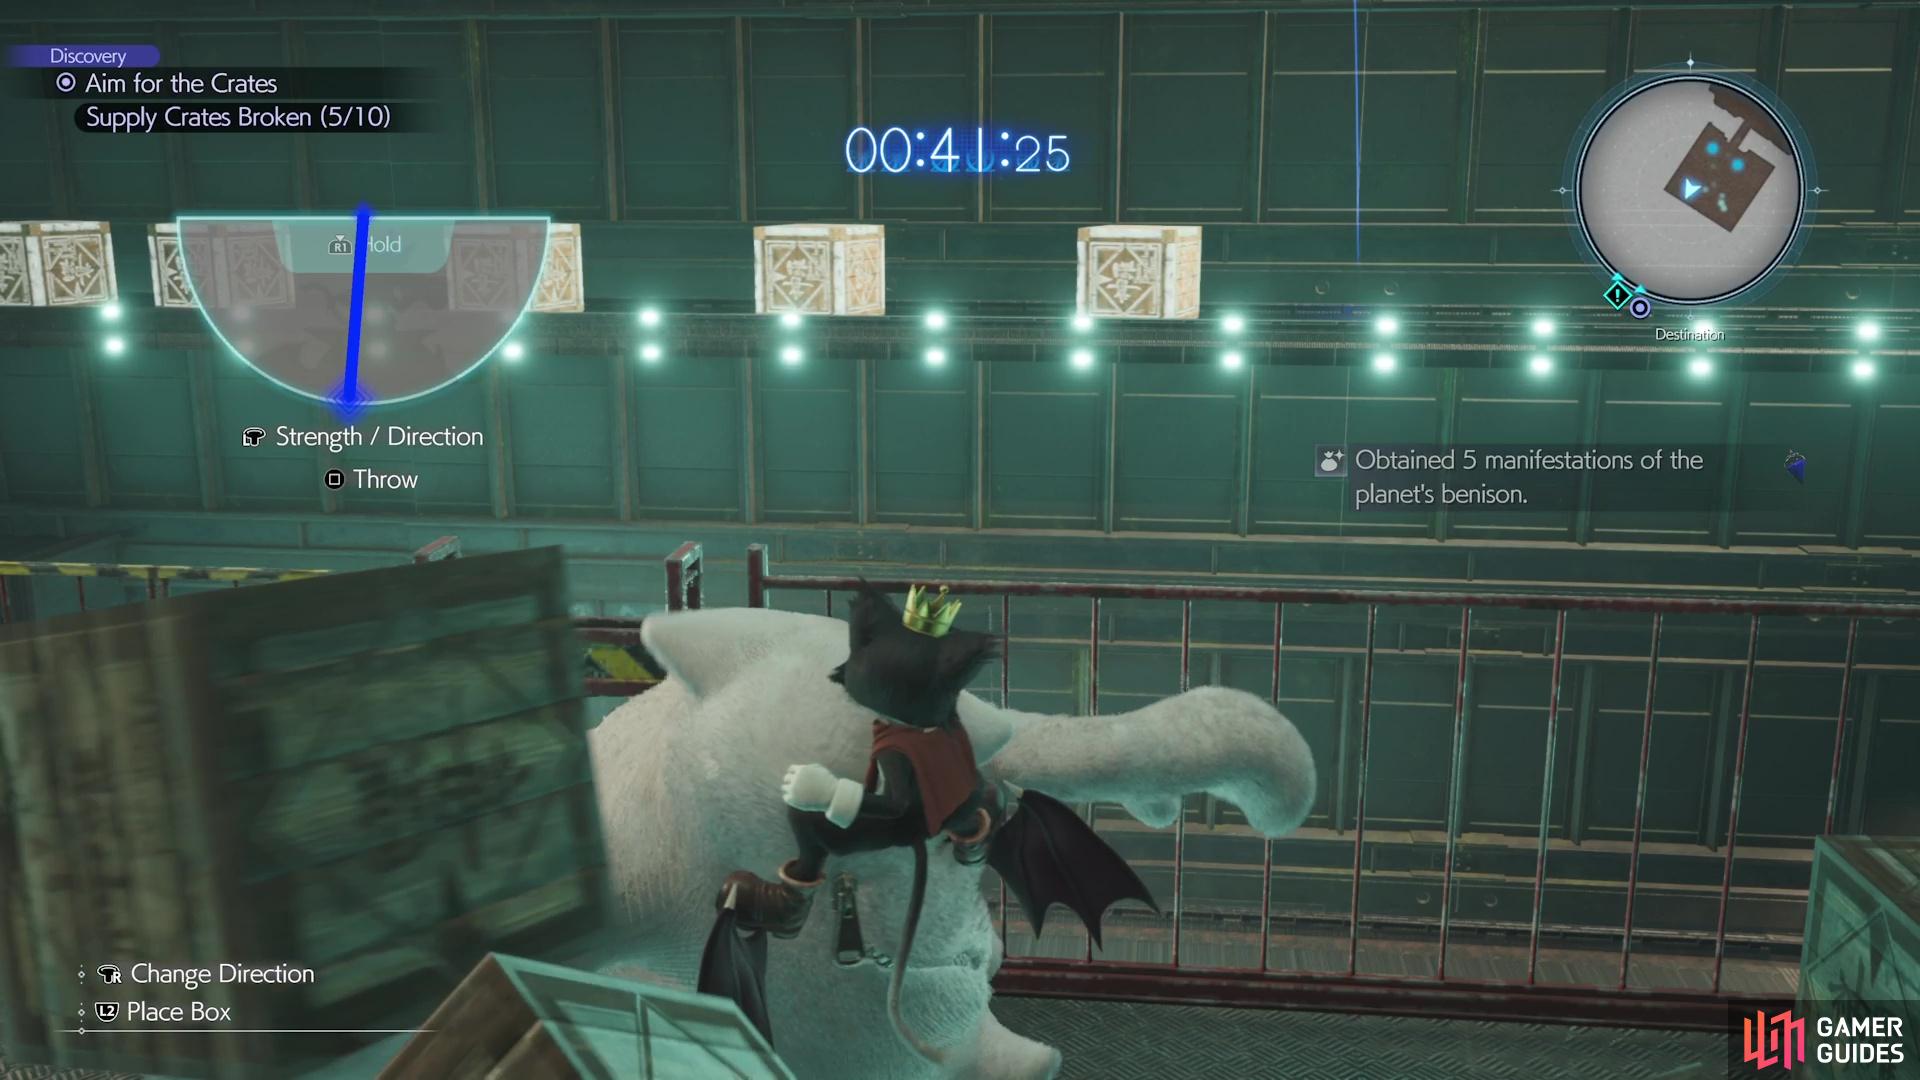

(1 of 3) You’ll have to aim a little ahead of the crate to hit it.
Using the lights on the conveyor as guidance, aim a good full 1-2 lights ahead of the crate you’re aiming to hit (1 1/2 should be good enough). Getting ten crates within the time limit will reward you with a Stuffed Fat Moogle, one of the items needed for Johnny’s Treasure Trove. Other than that, you’ll get the usual assortment (albeit random) of free items from the crates.
Vault Door Password Location
Whether you succeed or not, the elevator will finally start moving again and bring you to one final room. There’s a bench to rest on here, as well as the other assortments, so take advantage. Access the terminal next to the vault door, only to be told that you need a password. This password is hidden inside the room somewhere, so you’ll need to find it. Thankfully, it’s not hard to locate, so start by going to the southeastern side of the room to find some carts you can move.
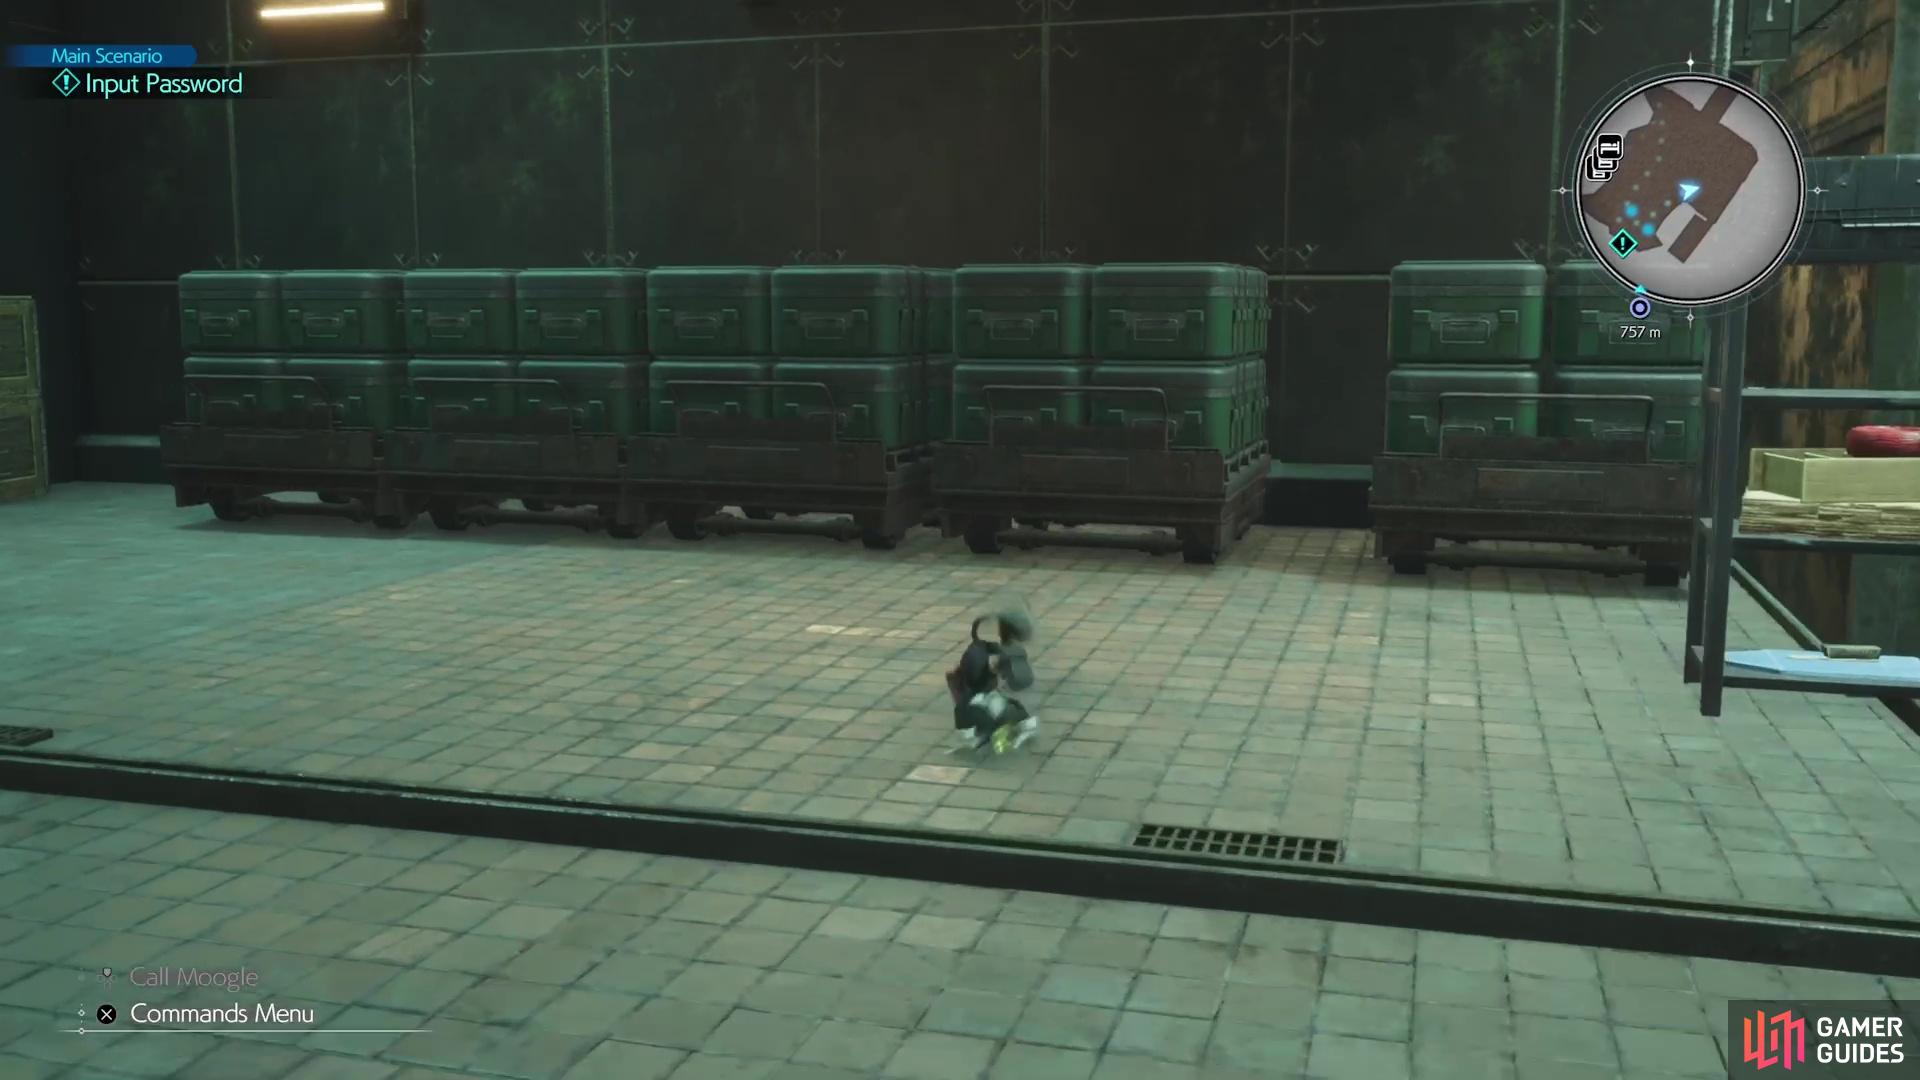


(1 of 4) There are a bunch of carts you can move along the one wall.
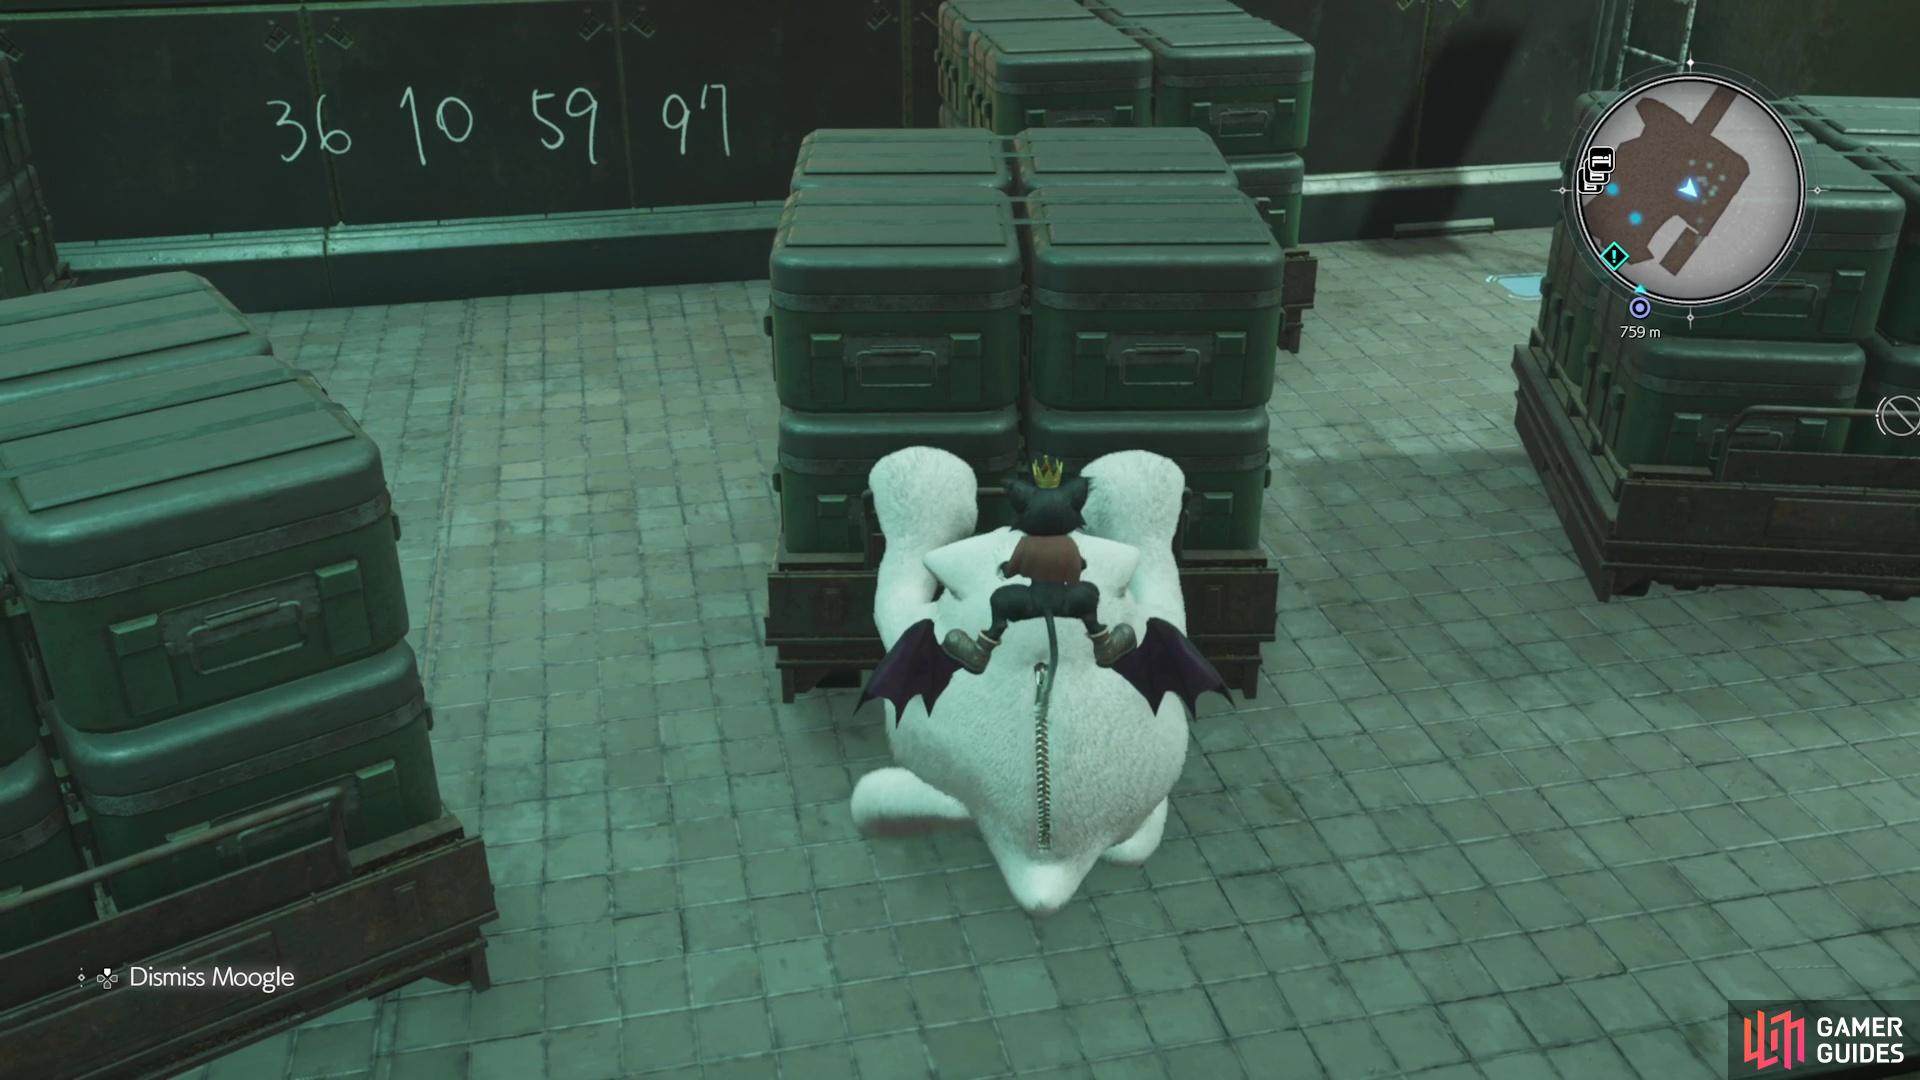
The first one you should move is the one closest to the door, which will reveal a ladder. Climb this to get to the platform above, where there’s a chest that contains a Giga-![]() Potion. From there, move the rest of the carts away from the wall to find a series of numbers written on it. The numbers written on the wall are 36, 10, 59, and 97, in that order.
Potion. From there, move the rest of the carts away from the wall to find a series of numbers written on it. The numbers written on the wall are 36, 10, 59, and 97, in that order.
Return to the vault door and interact with it to get an option to input some numbers. Do the ones listed above, in that order, to finally open it. Make sure you’re prepared, though, as setting foot in the next room will trigger the boss fight!

 Sign up
No Comments