
A From Software game without a hidden or hard-to-reach area is like a car without wheels, so it shouldn’t be a surprise when you find out that Elden Ring’s Shadow of the Erdtree has one. Although there are a few places that are difficult to reach in the game, they don’t require the amount of steps it takes to reach the ![]() Abyssal Woods. Read on to find out exactly what you need to do to get there.
Abyssal Woods. Read on to find out exactly what you need to do to get there.
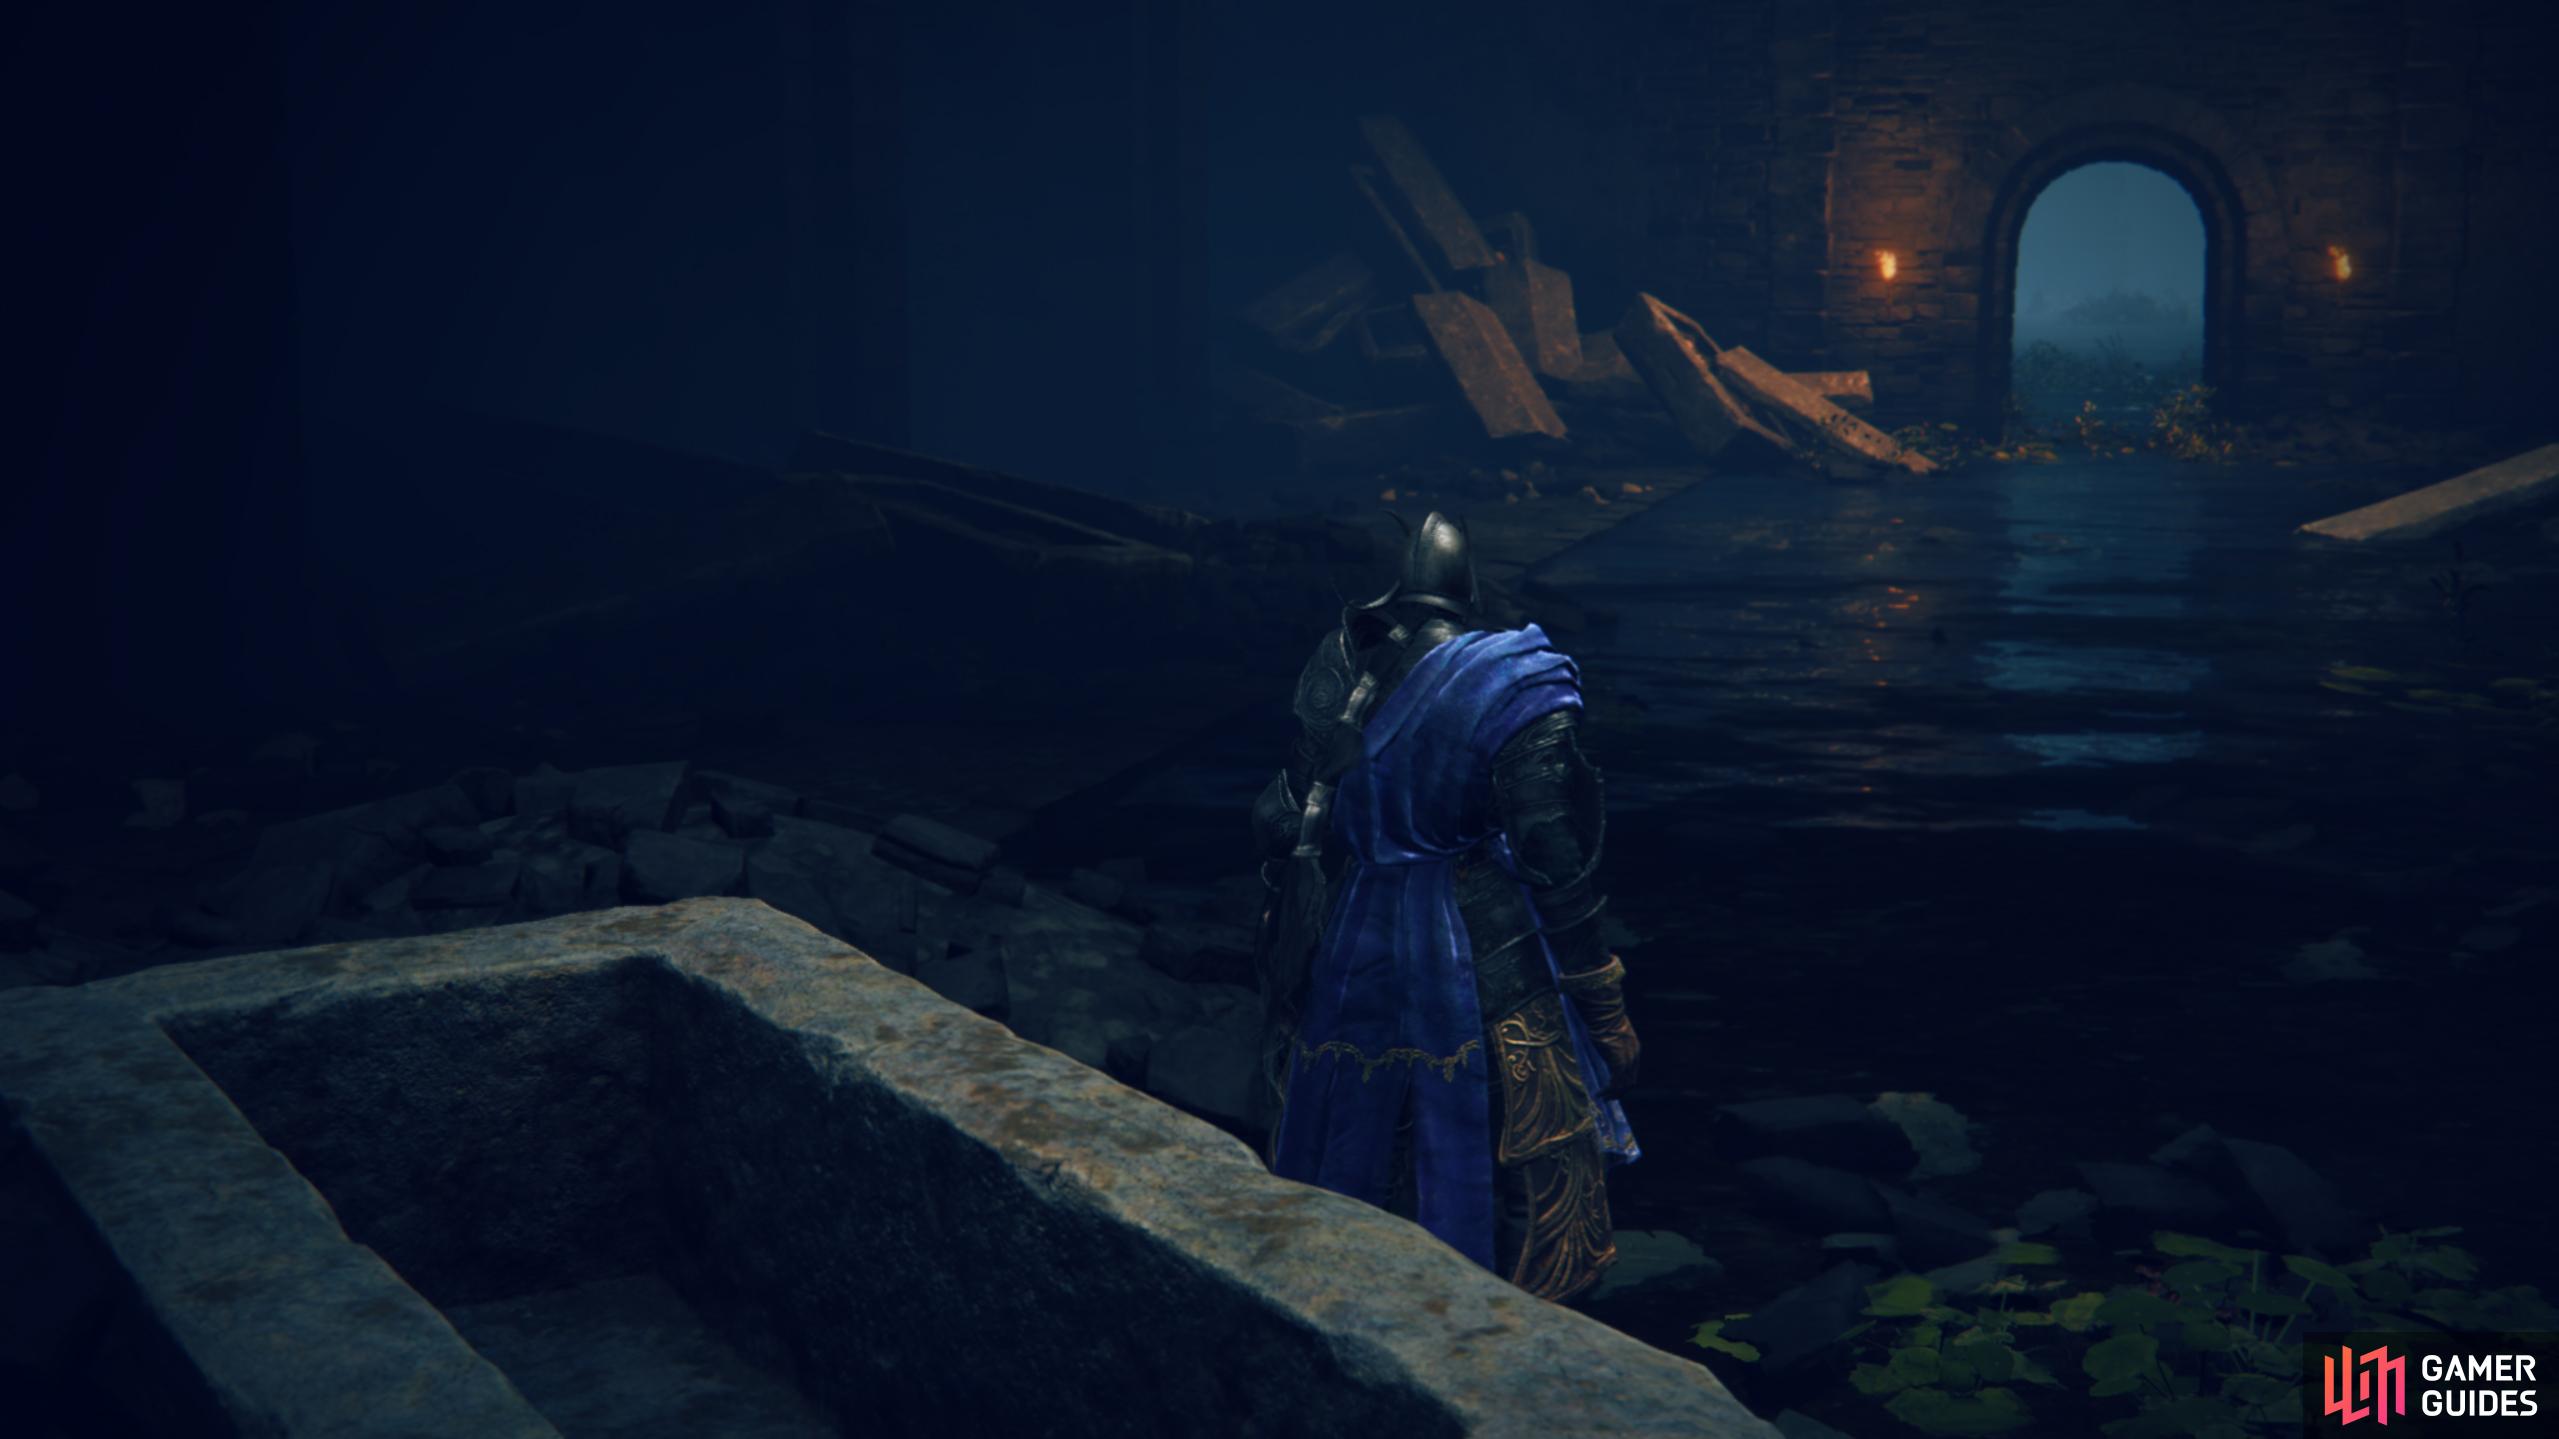
Where does this coffin lead to I wonder?
What is the Abyssal Woods?
The Abyssal Woods is an optional area, but it does have a couple of ![]() Scadutree Fragments, a few crafting books, and a weapon, so if you like to collect everything, you’ll want to go there. Note that when you enter the Abyssal Woods, your steed will be too scared to be called out there, meaning you’ll have to traverse the area on foot. Abyssal Woods is a dark, misty, place where you’ll frequently encounter enemies known as
Scadutree Fragments, a few crafting books, and a weapon, so if you like to collect everything, you’ll want to go there. Note that when you enter the Abyssal Woods, your steed will be too scared to be called out there, meaning you’ll have to traverse the area on foot. Abyssal Woods is a dark, misty, place where you’ll frequently encounter enemies known as ![]() Winter Lanterns who can only be hurt by parrying and riposting them. This makes your foray through the forest a tad bit more difficult.
Winter Lanterns who can only be hurt by parrying and riposting them. This makes your foray through the forest a tad bit more difficult.
How to Get to the Abyssal Woods
Before you can get to the Abyssal Woods, you’ll need to get to ![]() Shadow Keep, situated in the north. When you reach the keep, make your way to the
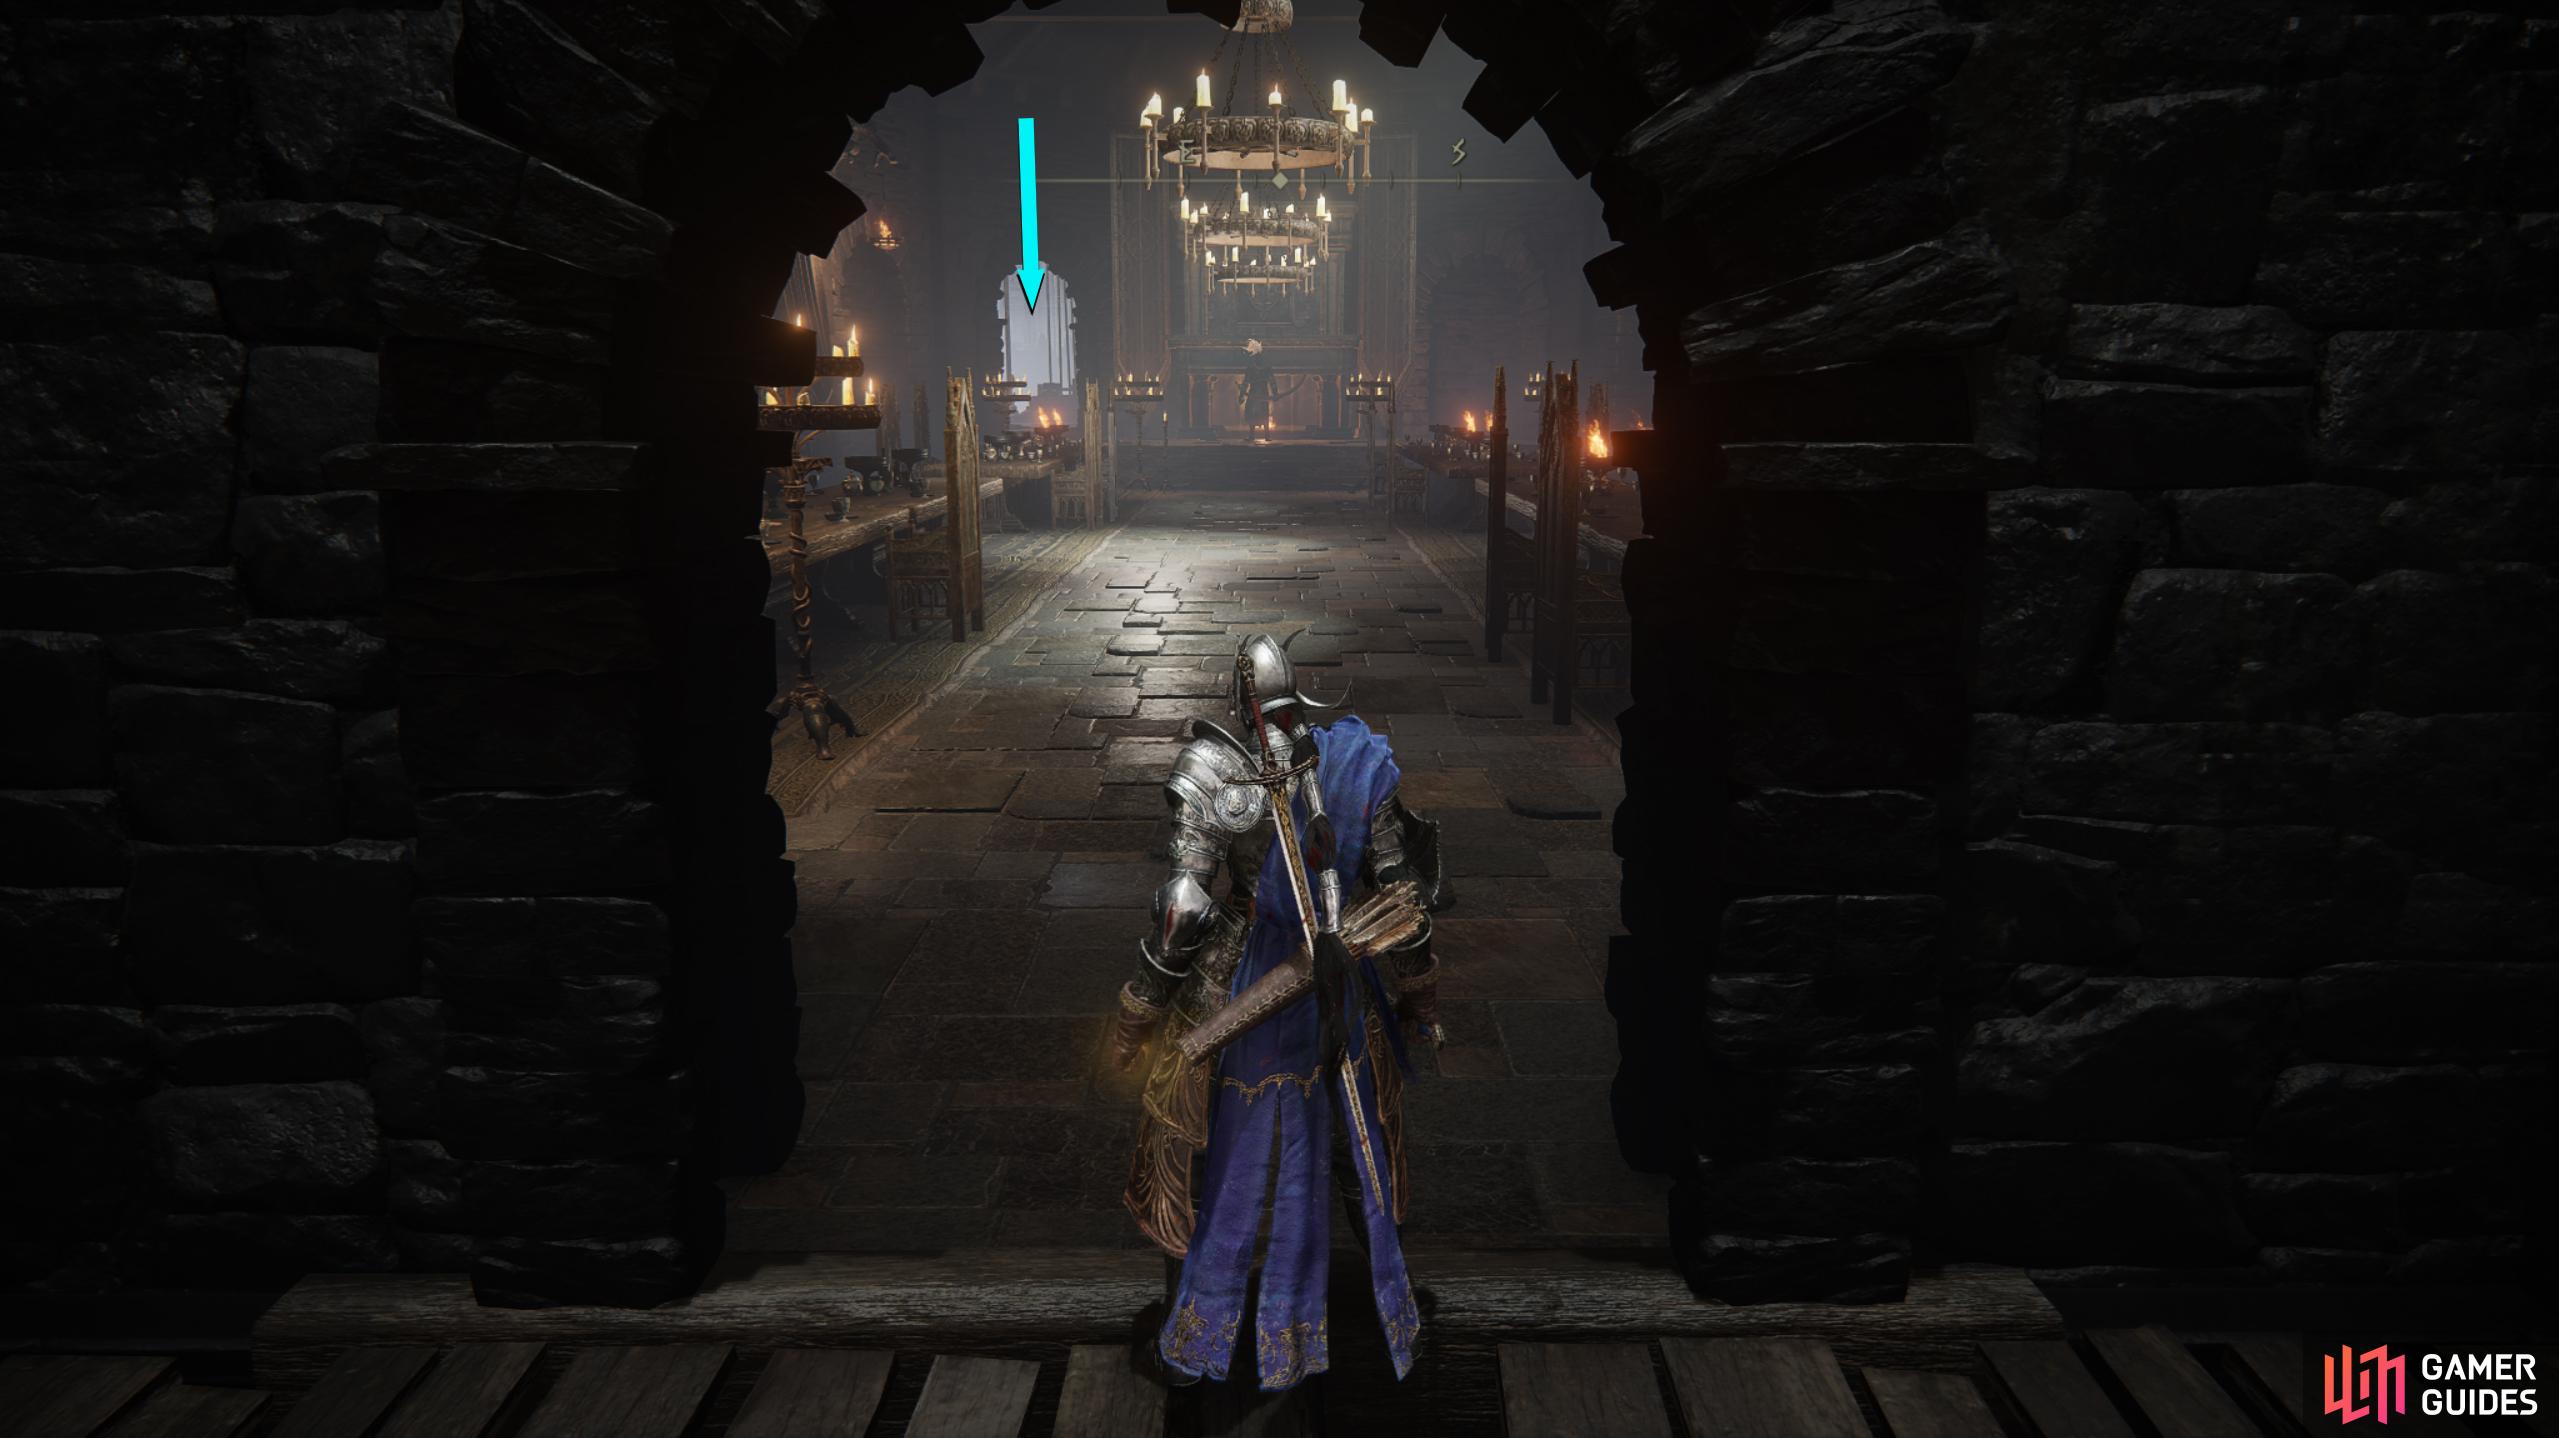
Shadow Keep, situated in the north. When you reach the keep, make your way to the ![]() Main Gate Plaza, site of Grace. From there, head through the doorway to the northwest, run past the ghost, and go up the stairs. In the next room, you’ll have a few
Main Gate Plaza, site of Grace. From there, head through the doorway to the northwest, run past the ghost, and go up the stairs. In the next room, you’ll have a few ![]() Messmer Soldiers to take care of. Dispatch them, and head up the wooden stairs to the northeast. As you make your way up, be weary to your right as there is another soldier waiting in the doorway ready to ambush you.
Messmer Soldiers to take care of. Dispatch them, and head up the wooden stairs to the northeast. As you make your way up, be weary to your right as there is another soldier waiting in the doorway ready to ambush you.
At the top, there will be four more soldiers, two to your left and two to your right. Defeat them and continue up the wooden stairs to the northeast. When you reach the dining room, you’ll have a couple of ![]() Black Knights to deal with, one with a hammer, and one with a bow. Once again, defeat the enemies and head through the open doorway to the left of the fireplace, which will take you outside.
Black Knights to deal with, one with a hammer, and one with a bow. Once again, defeat the enemies and head through the open doorway to the left of the fireplace, which will take you outside.


(1 of 4) Head northwest from the Main Gate Plaza (Shadowkeep) site of Grace.
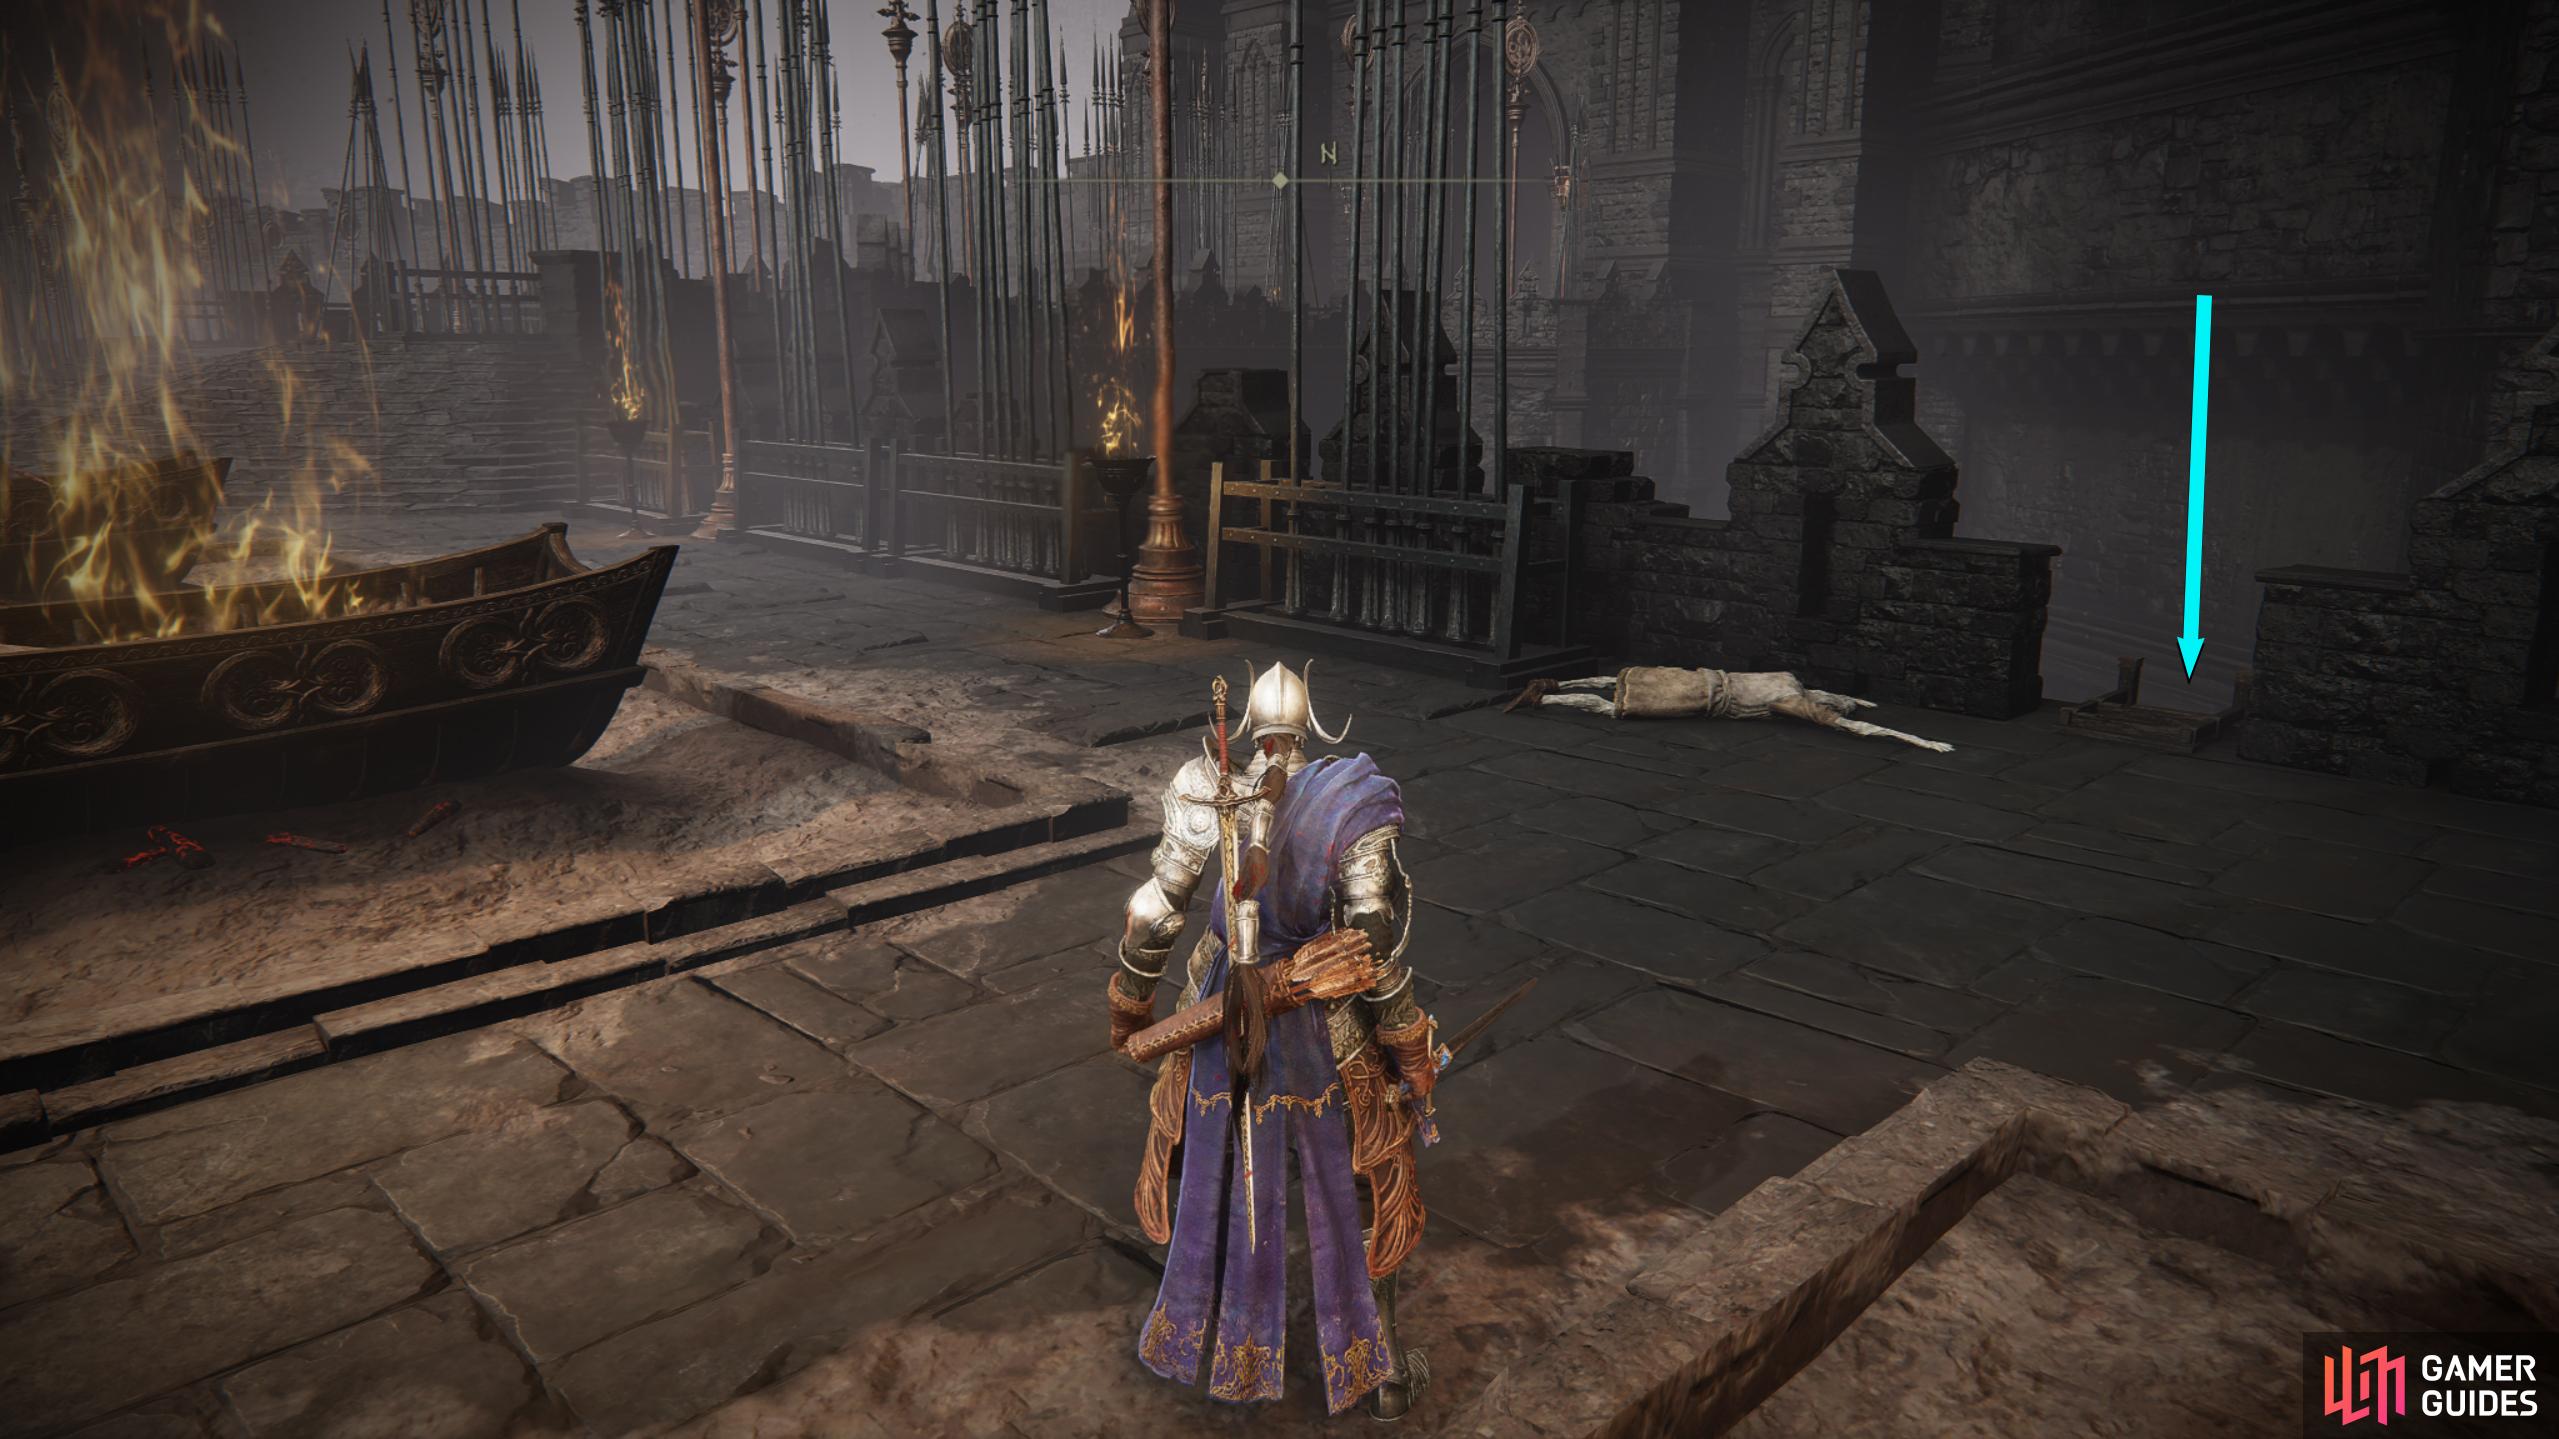
Head across the eastern bridge and then go southeast toward the burning boats. Be aware that this area has a lot of enemies as well as loot, so you may want to clear the area first. From the burning boats, follow the series of boats northwest while dealing with any enemies that ambush you, and when you get to the end of the path where you’ll find another set of burning boats, you’ll find a ladder against the left wall (northeast). Take the ladder down and follow the narrow ledge northwest until you reach the waterfall. This waterfall obscures an entrance to another room, so head through the waterfall facing southwest, and go down the following ladder to reach a waterway.
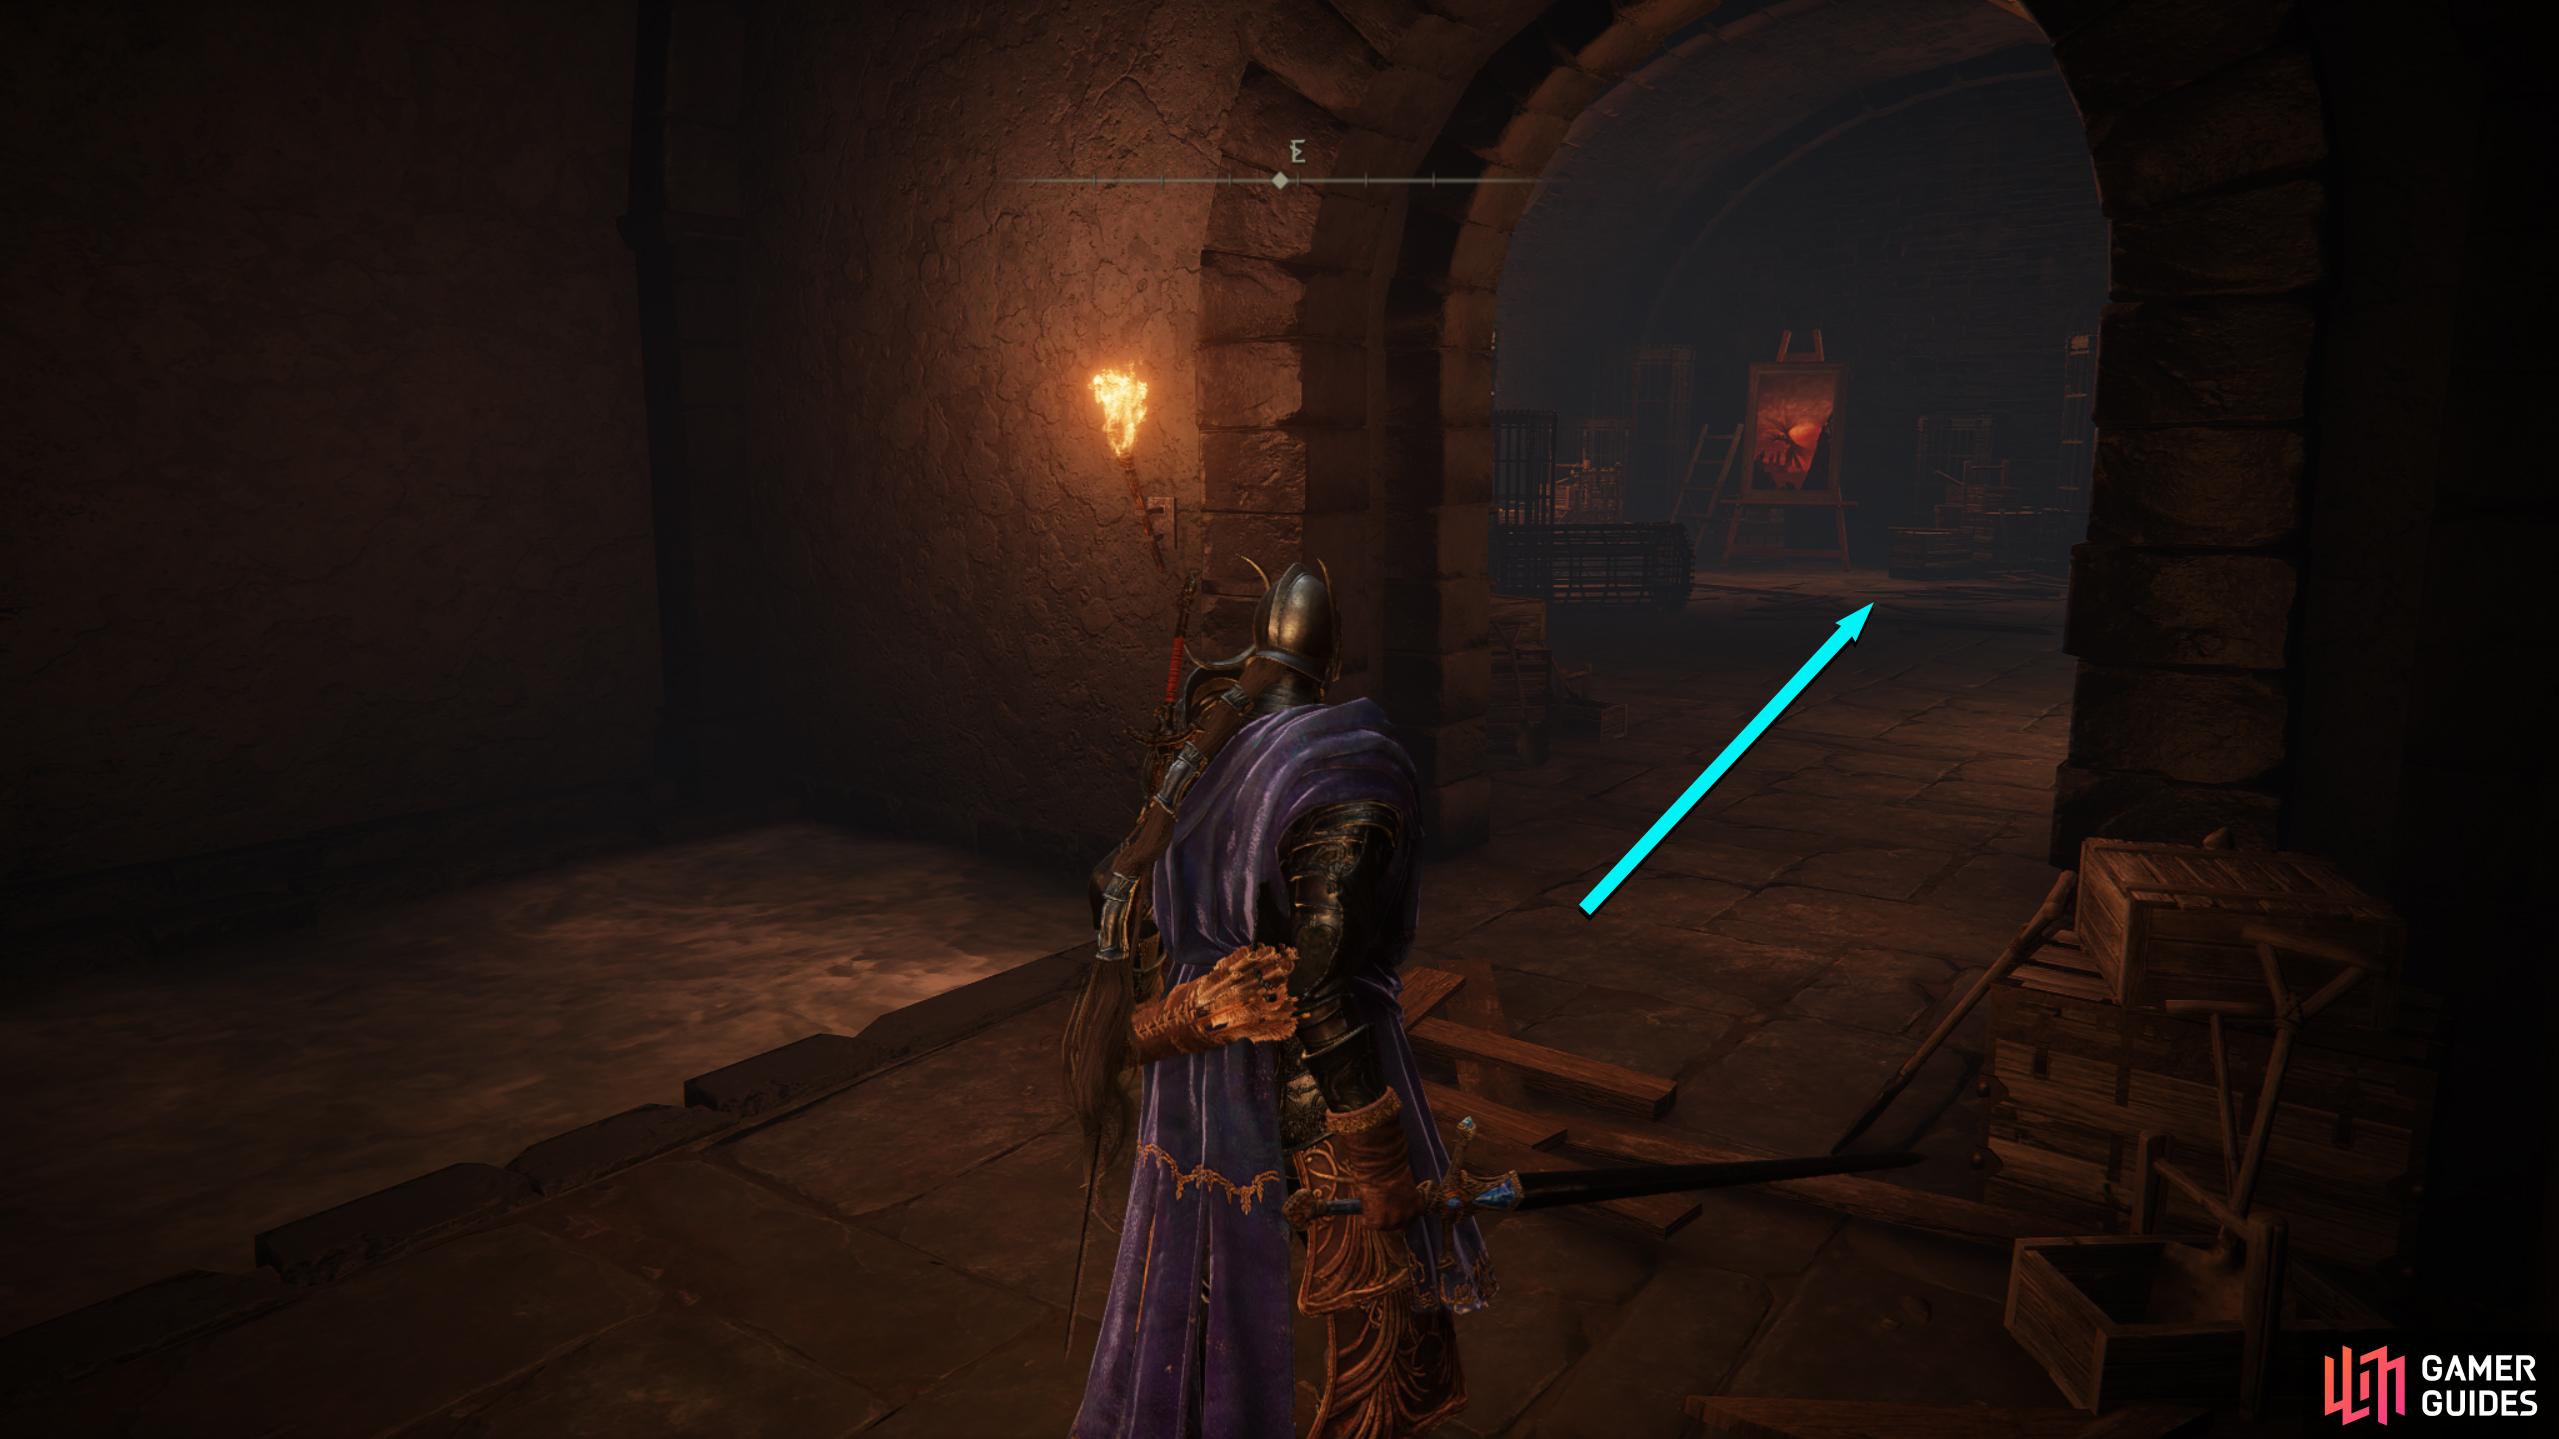
Follow the path southeast into the next room where you’ll find a painting at the back. Although this room looks like a dead end, there is a hidden wall to the southwest of the painting, in between the two barrels, that can be unveiled with a simple tap of your weapon. Head through the hidden doorway and follow the waterway down until you find an ominous coffin. You know what to do here, get into that coffin!


Exit the room, and interact with the Castle Watering Hole site of Grace to the left of the doorway before jumping on your steed. Go southeast until you reach the waterfall, and interact with another site of Grace on the left path, which will unlock the Recluses’ River Upstream Grace. Head south down the narrow path and jump over the nearby gap before jumping the larger gap shortly after. Make sure you’re on your steed to make this jump, as it’s quite the distance.
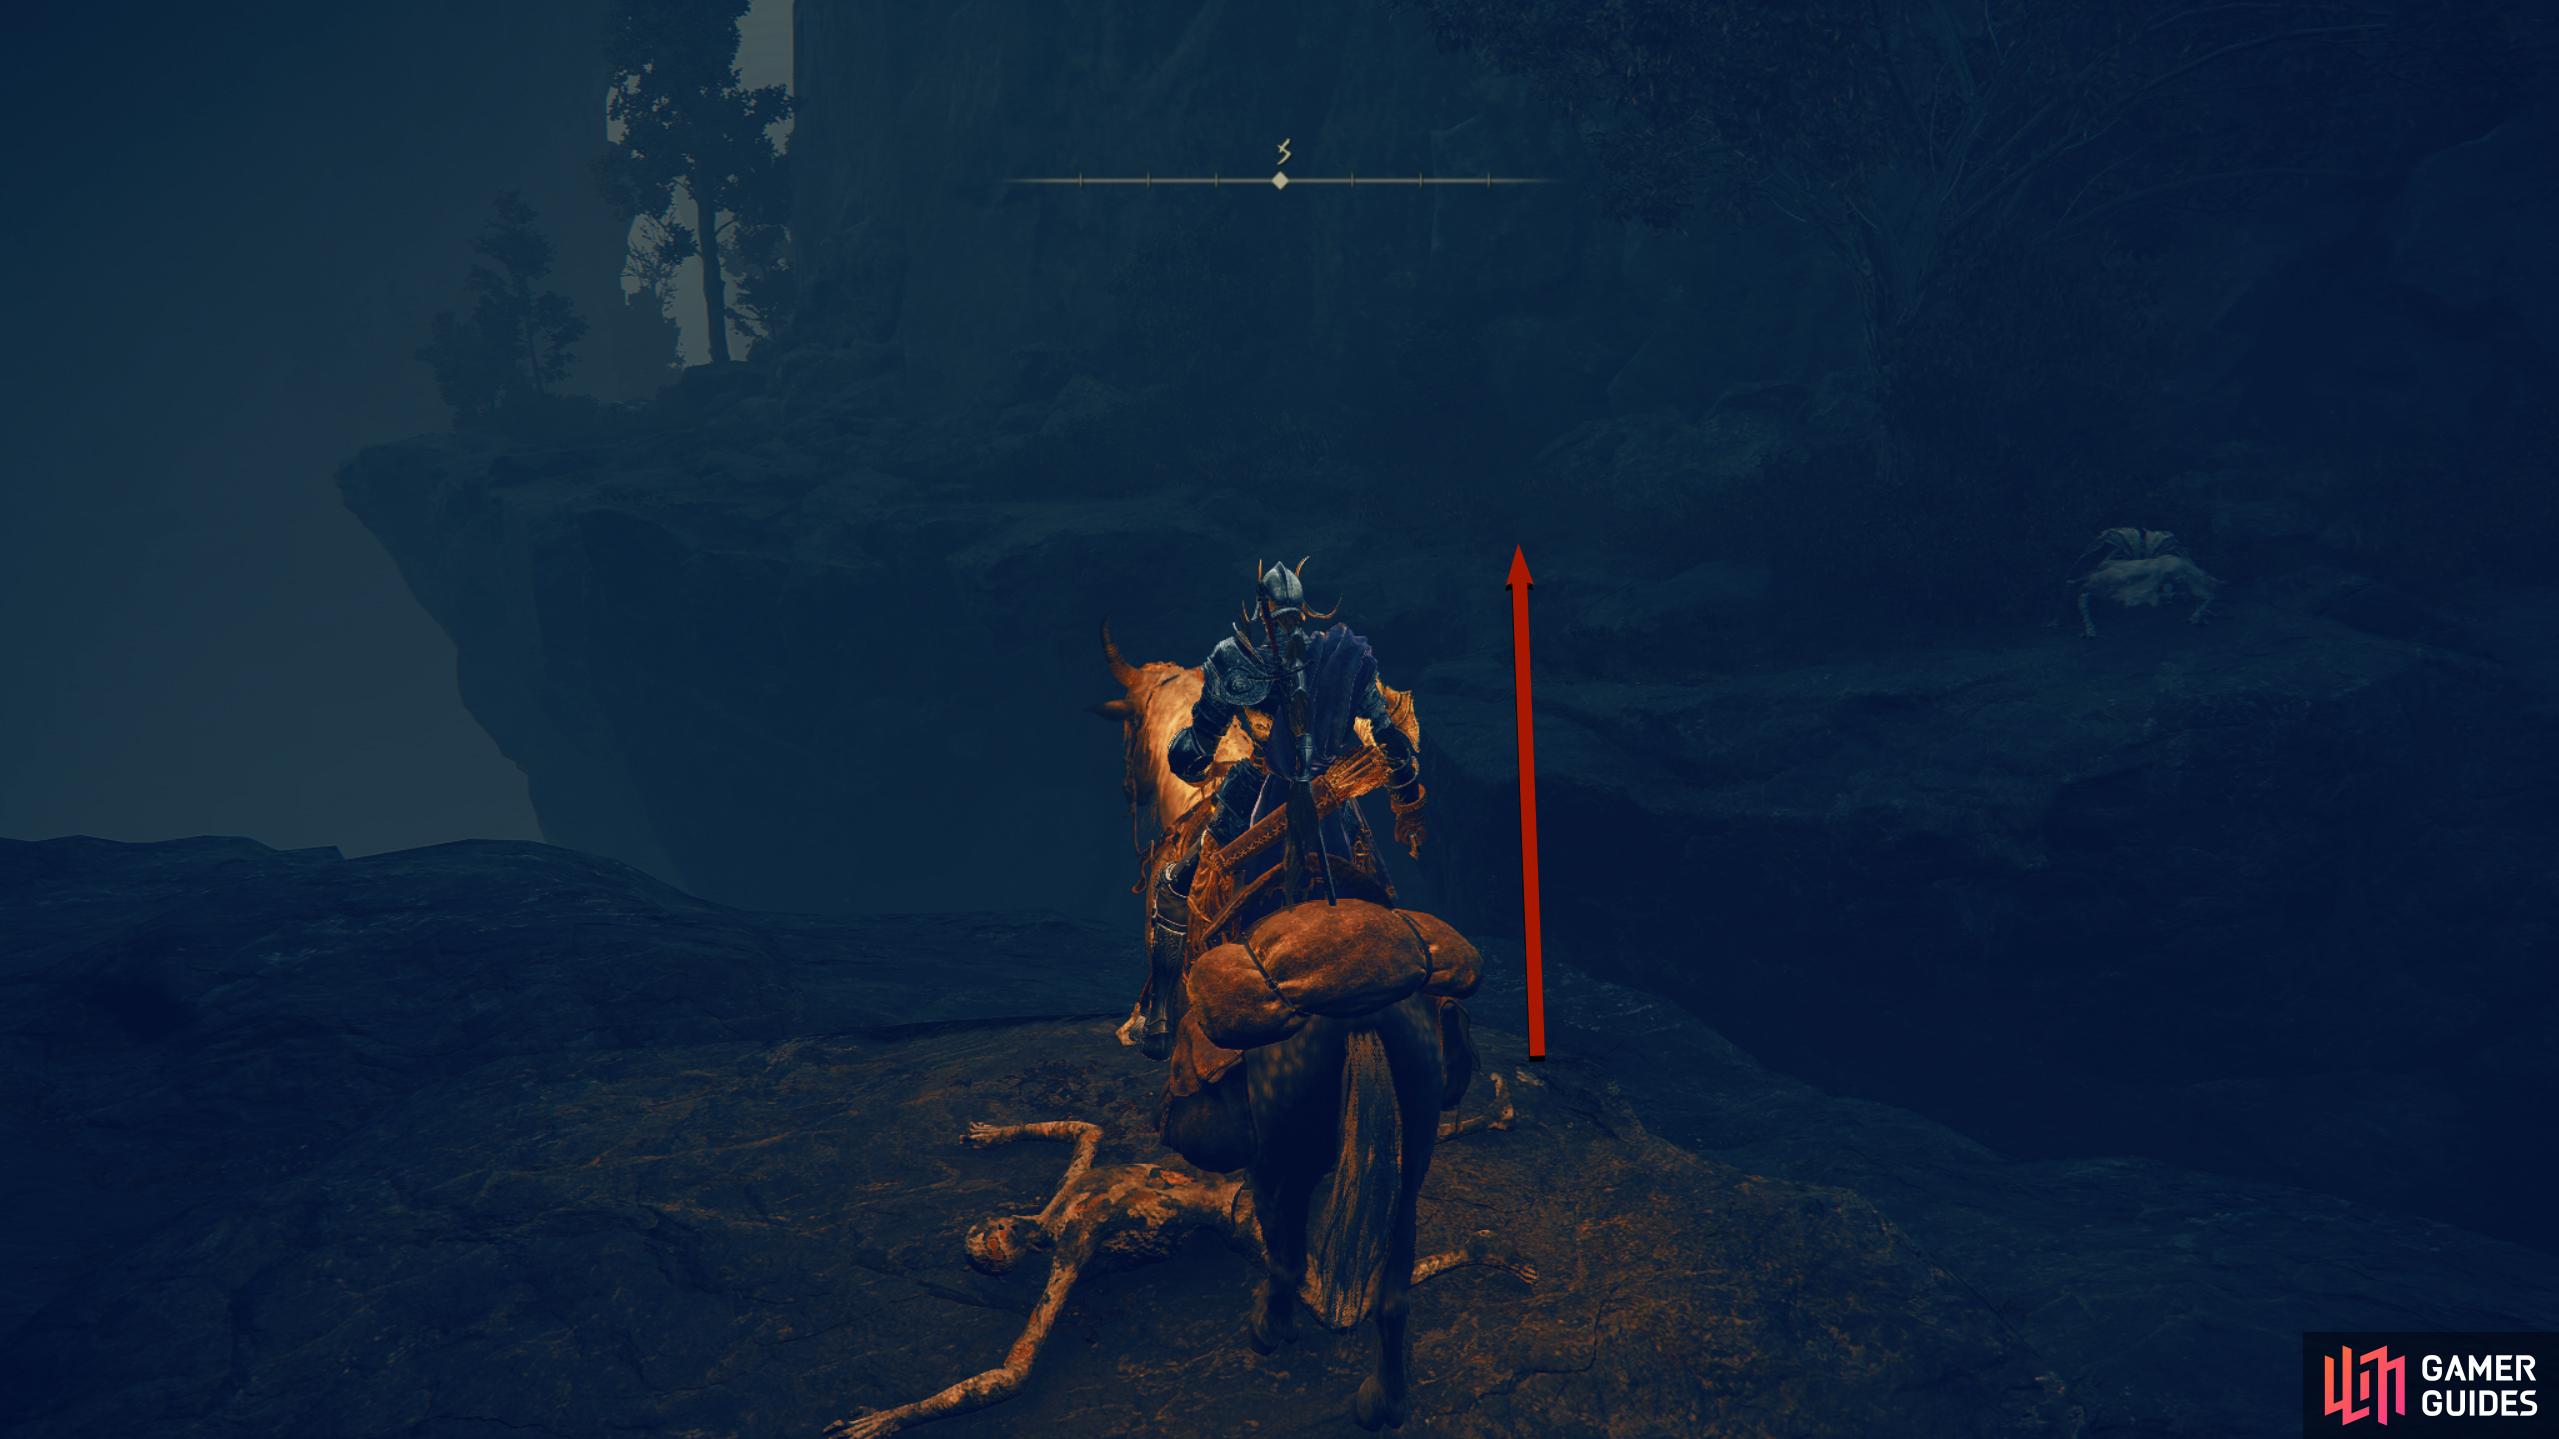
Continue south until you reach some ![]() Man-Fly enemies, defeat them, and jump across to the right path (use your horse). Stay on the path while heading south/southeast, and you’ll eventually run out of the path. Look below you to the southeast to find the Recluses’ River Downstream site of Grace. Look down over the cliff below you to the east, and you will see headstones protruding out of the wall. Use these to make your way down to the water area below.
Man-Fly enemies, defeat them, and jump across to the right path (use your horse). Stay on the path while heading south/southeast, and you’ll eventually run out of the path. Look below you to the southeast to find the Recluses’ River Downstream site of Grace. Look down over the cliff below you to the east, and you will see headstones protruding out of the wall. Use these to make your way down to the water area below.


(1 of 4) Head southeast to find the Recluses’ River Upstream site of Grace.
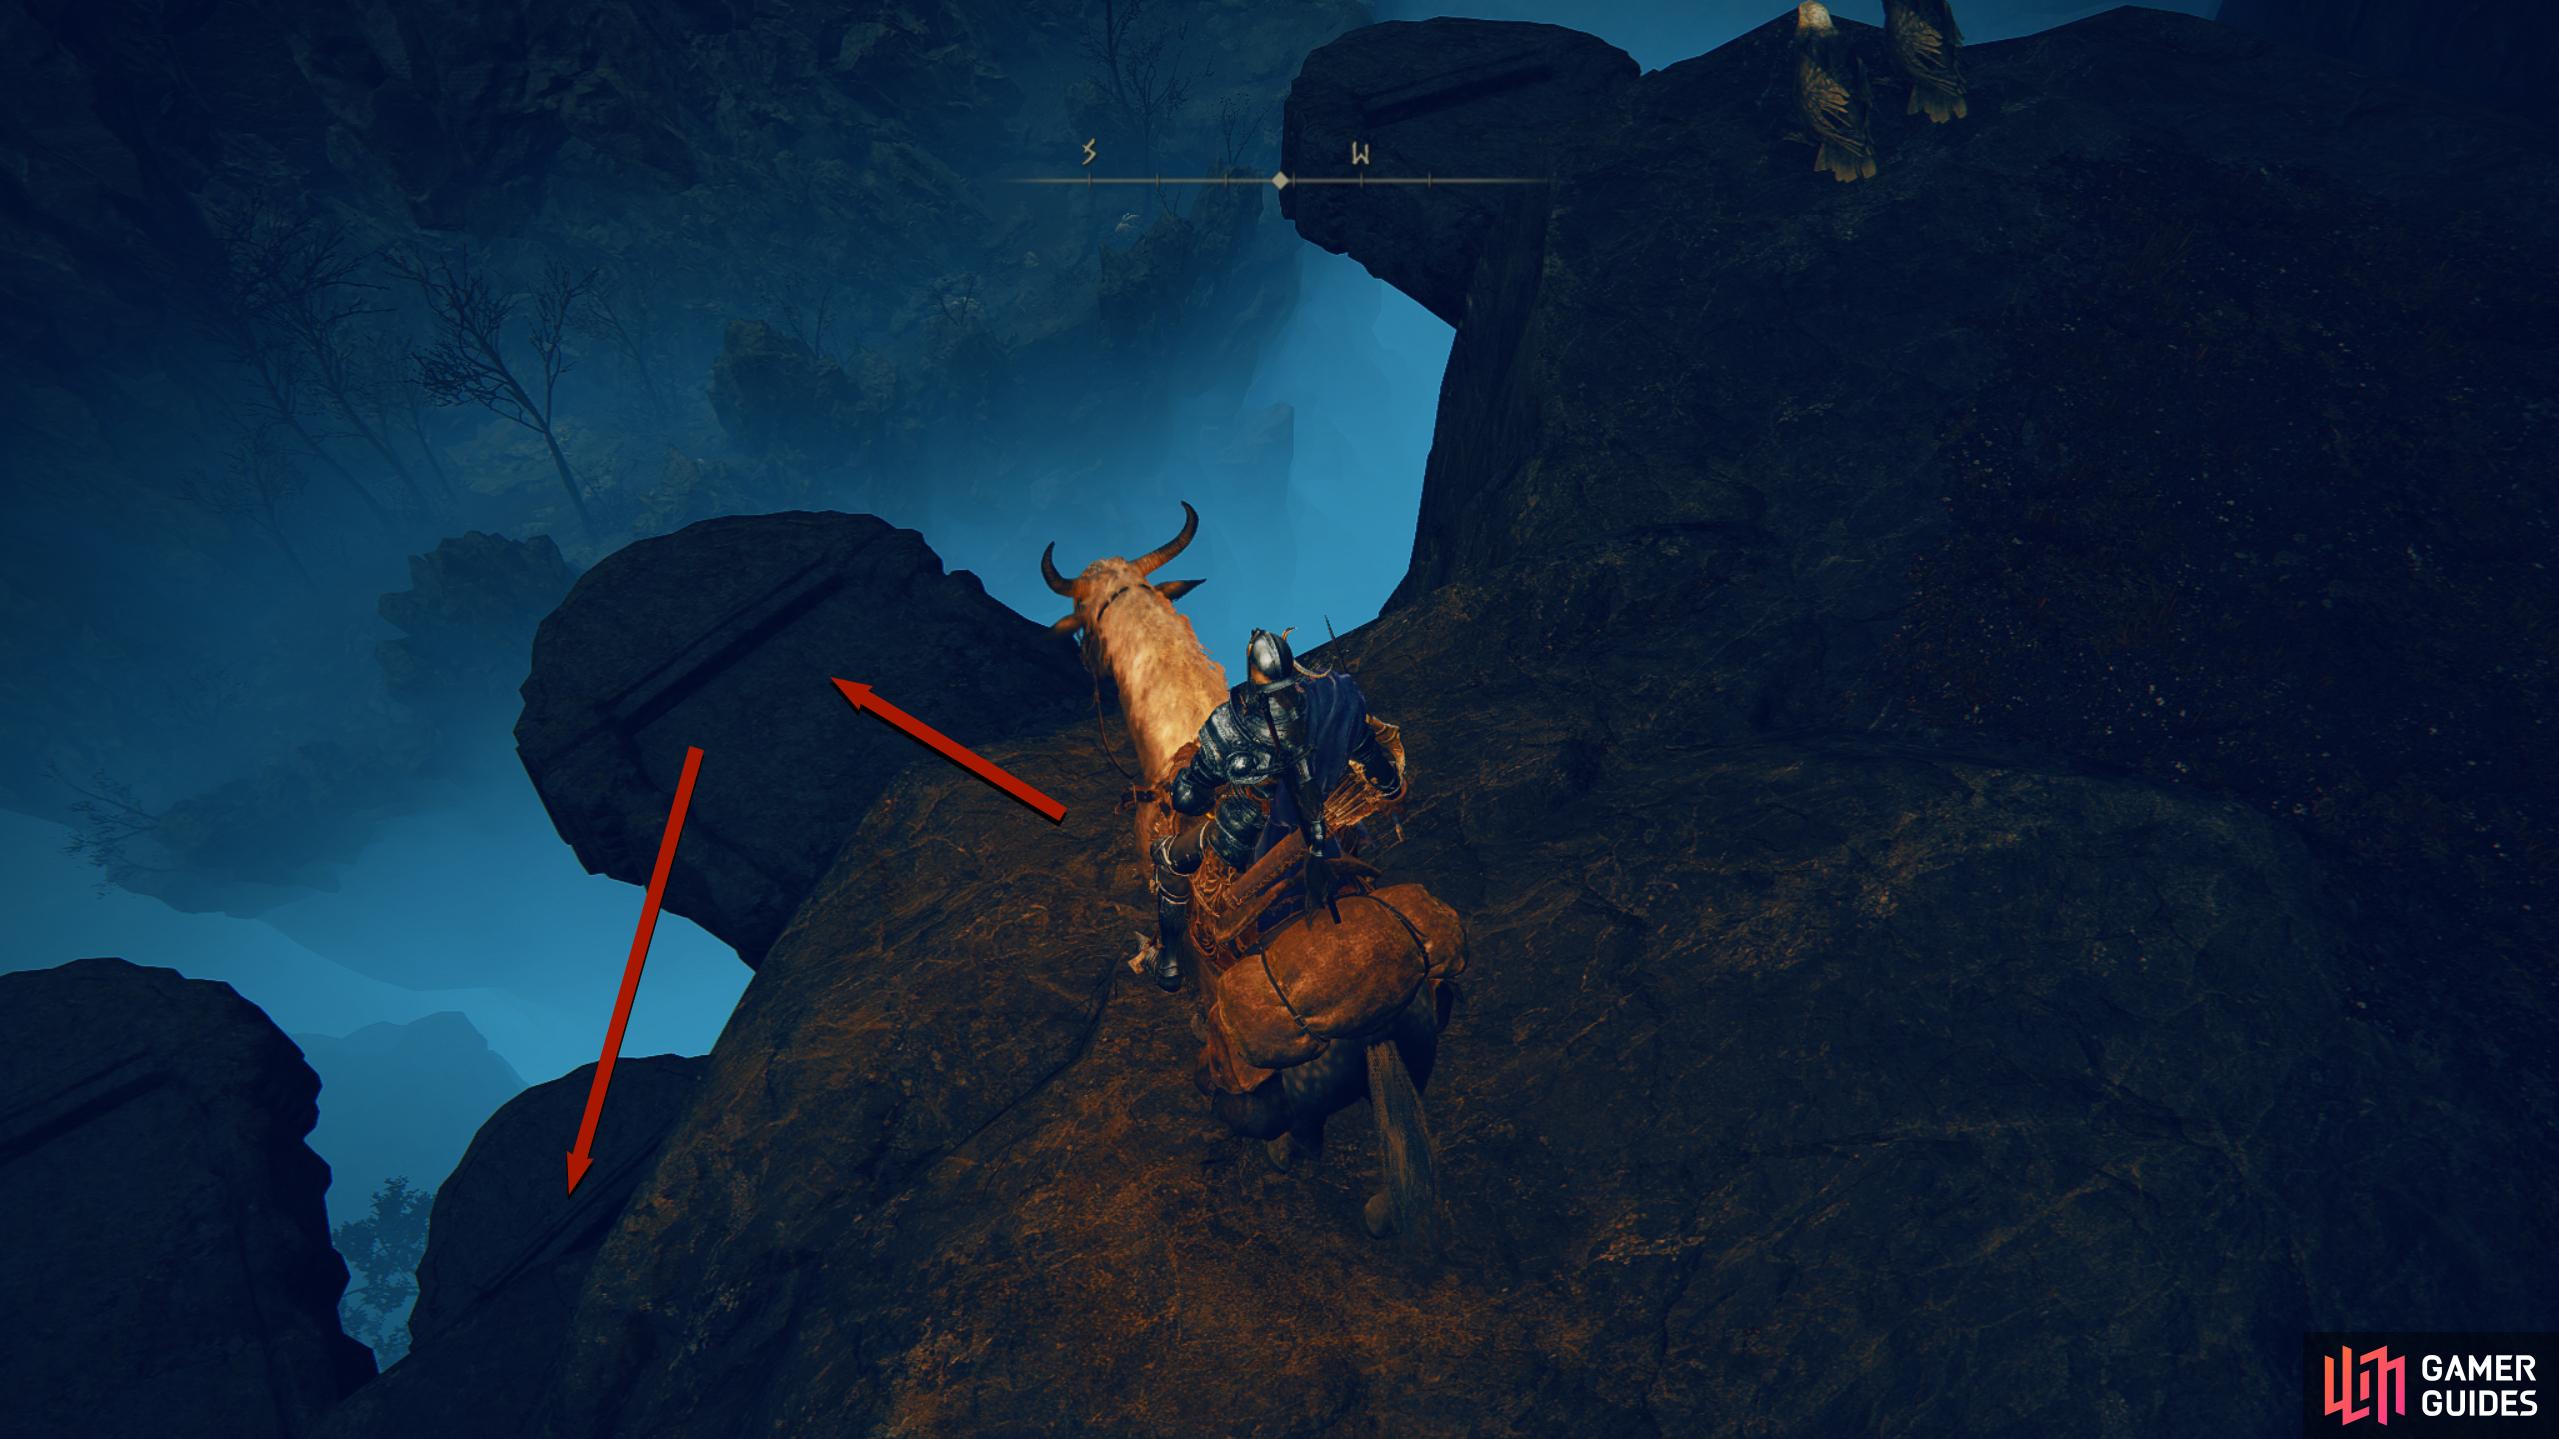
In the water area, go east toward another waterfall, where you’ll find more headstones to go down just past it. Make your way down to the bottom, and follow the wall east/northeast, where you’ll find a couple of braziers. This will take you to the ![]() Darklight Catacombs.
Darklight Catacombs.


(1 of 4) At the end of the southern path, drop to find the Recluses’ River Downstream Grace.
Darklight Catacombs Walkthrough
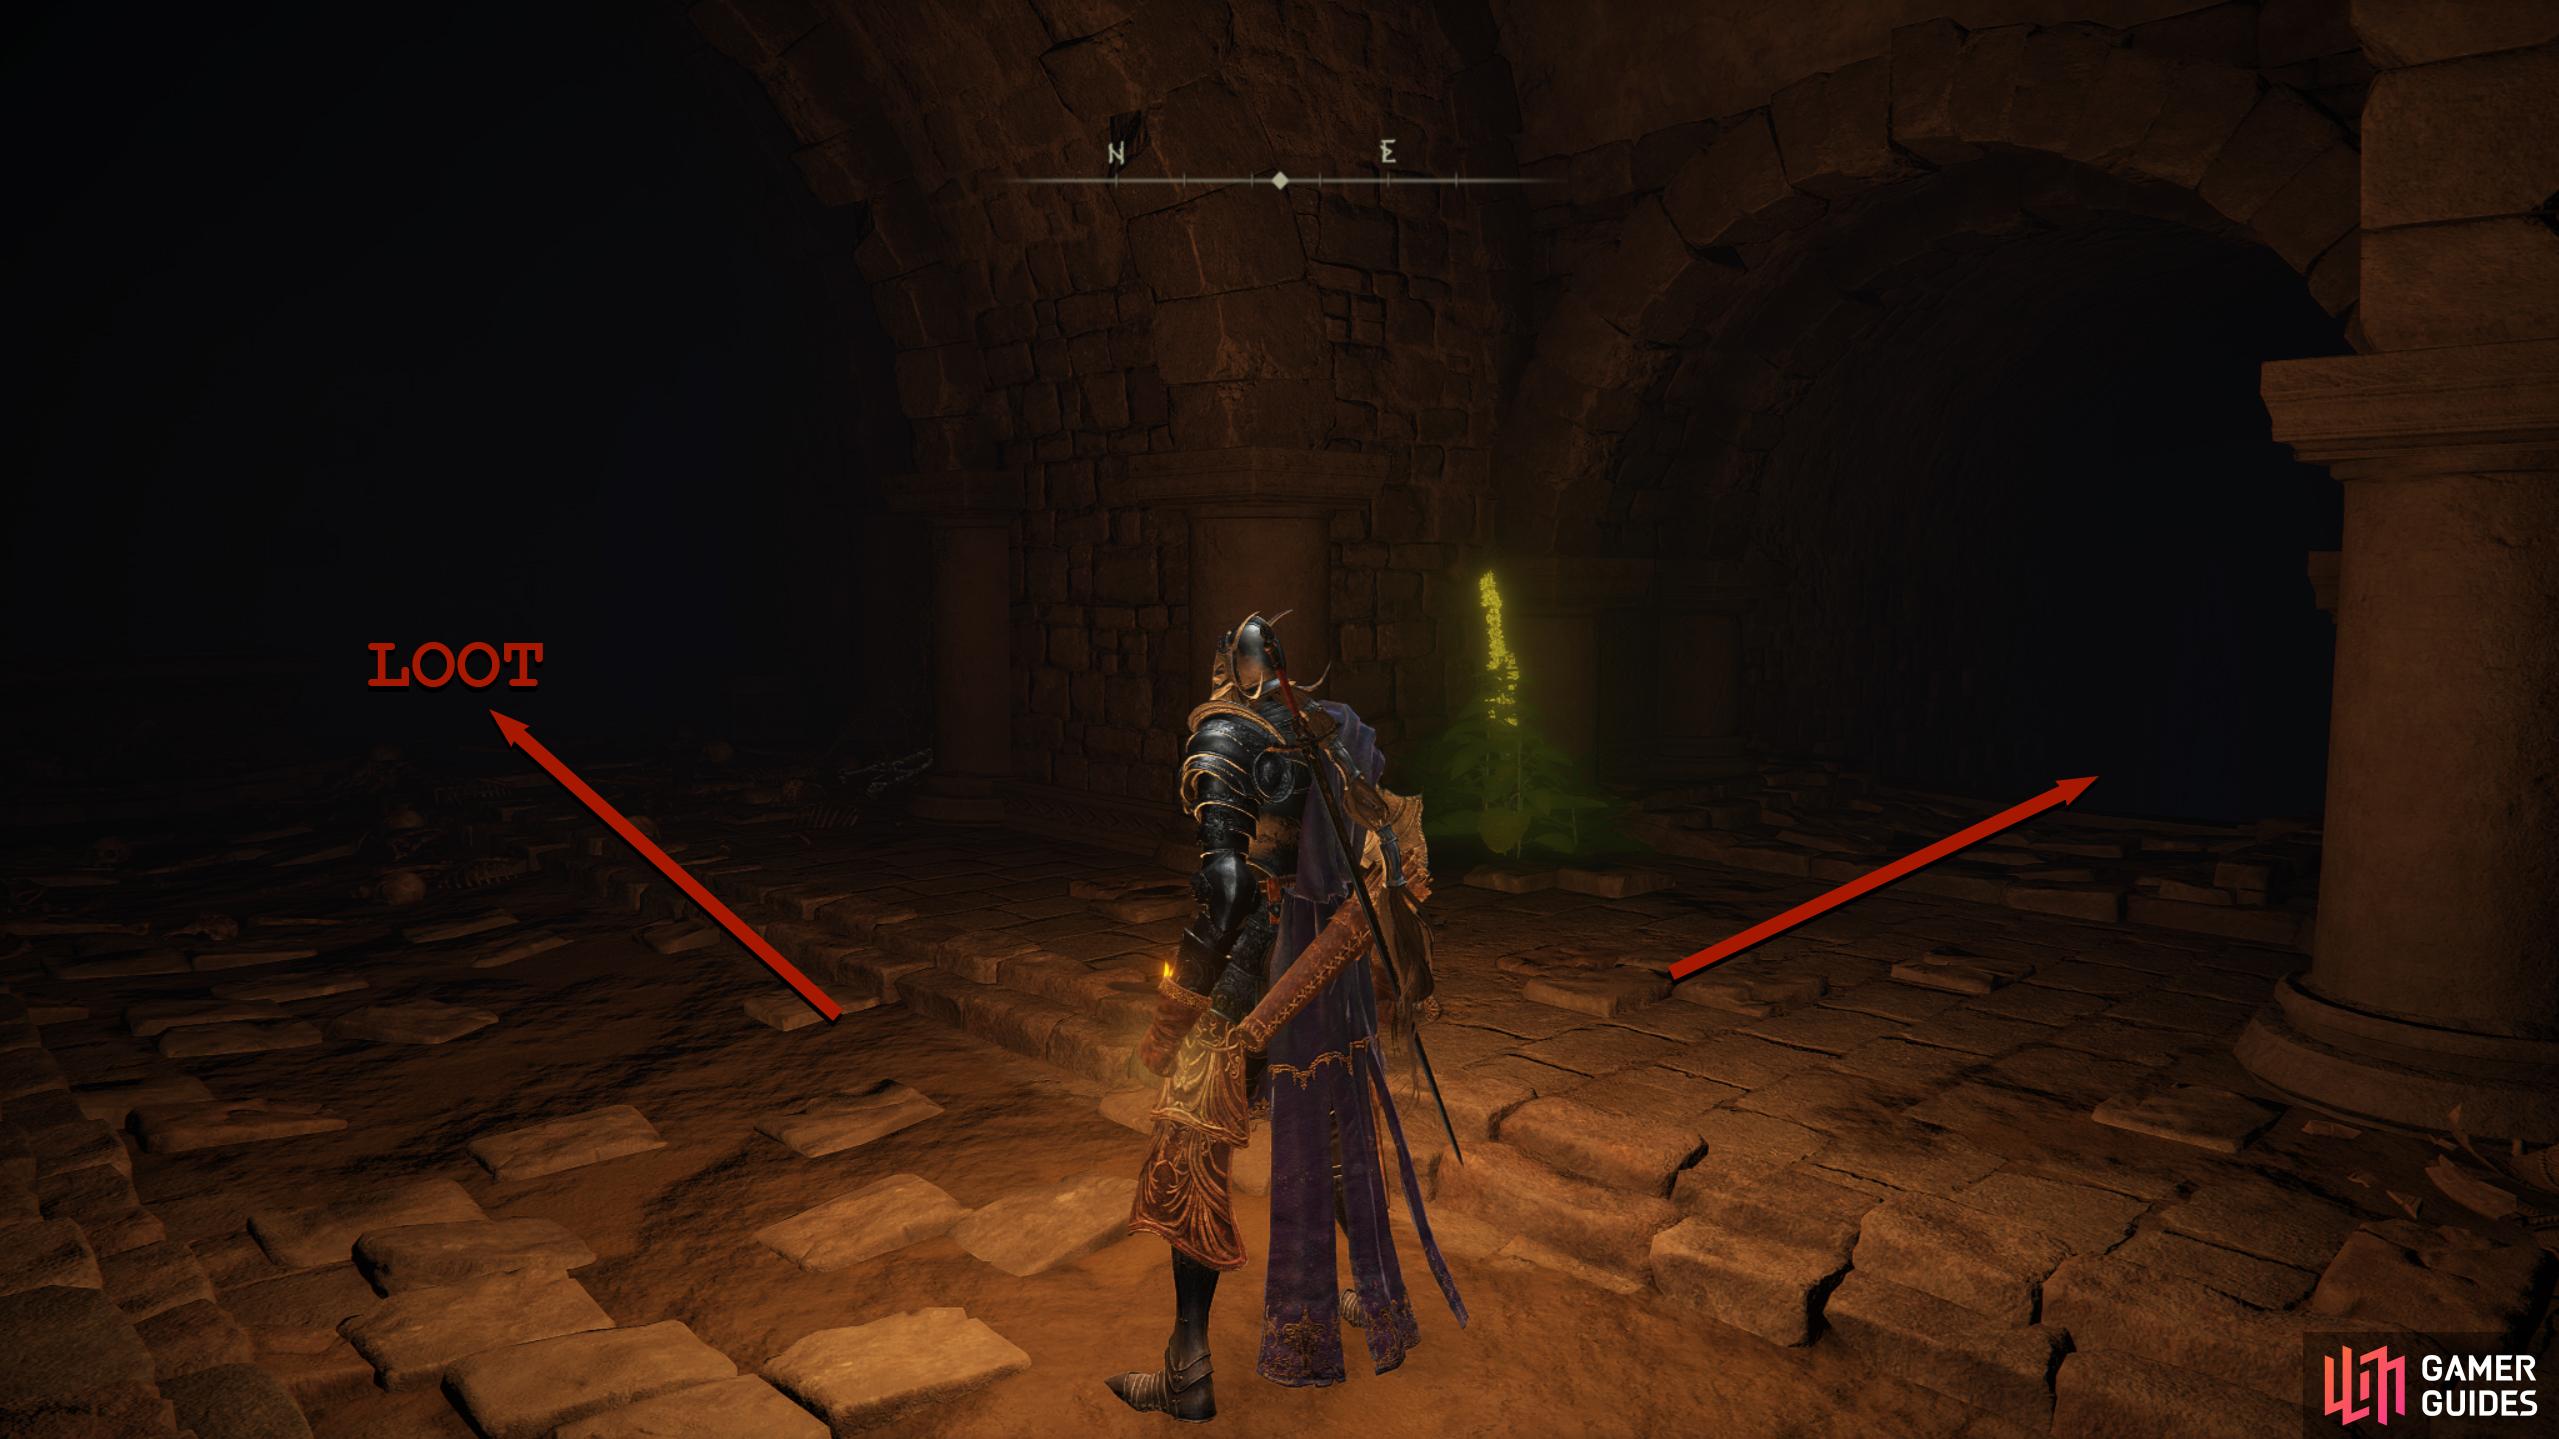
Unfortunately, you’ll need to go through here to reach the Abyssal Woods, and yes, there is a boss at the end of them. Anyway, the only way forward at the start is to take the elevator down. Head north, stand on the button in the center and ride it down where you’ll find the site of Grace. As you head north, you’ll soon find out that it’s extremely dark down here, fitting considering its name. Turn on your lantern, proceed north, and loot the coffin to get a Grave Glovewort [5] but be careful of the imp that will ambush you as you enter the room. Leave the room, take the eastern stairs down, and follow the linear path until you reach the next room.
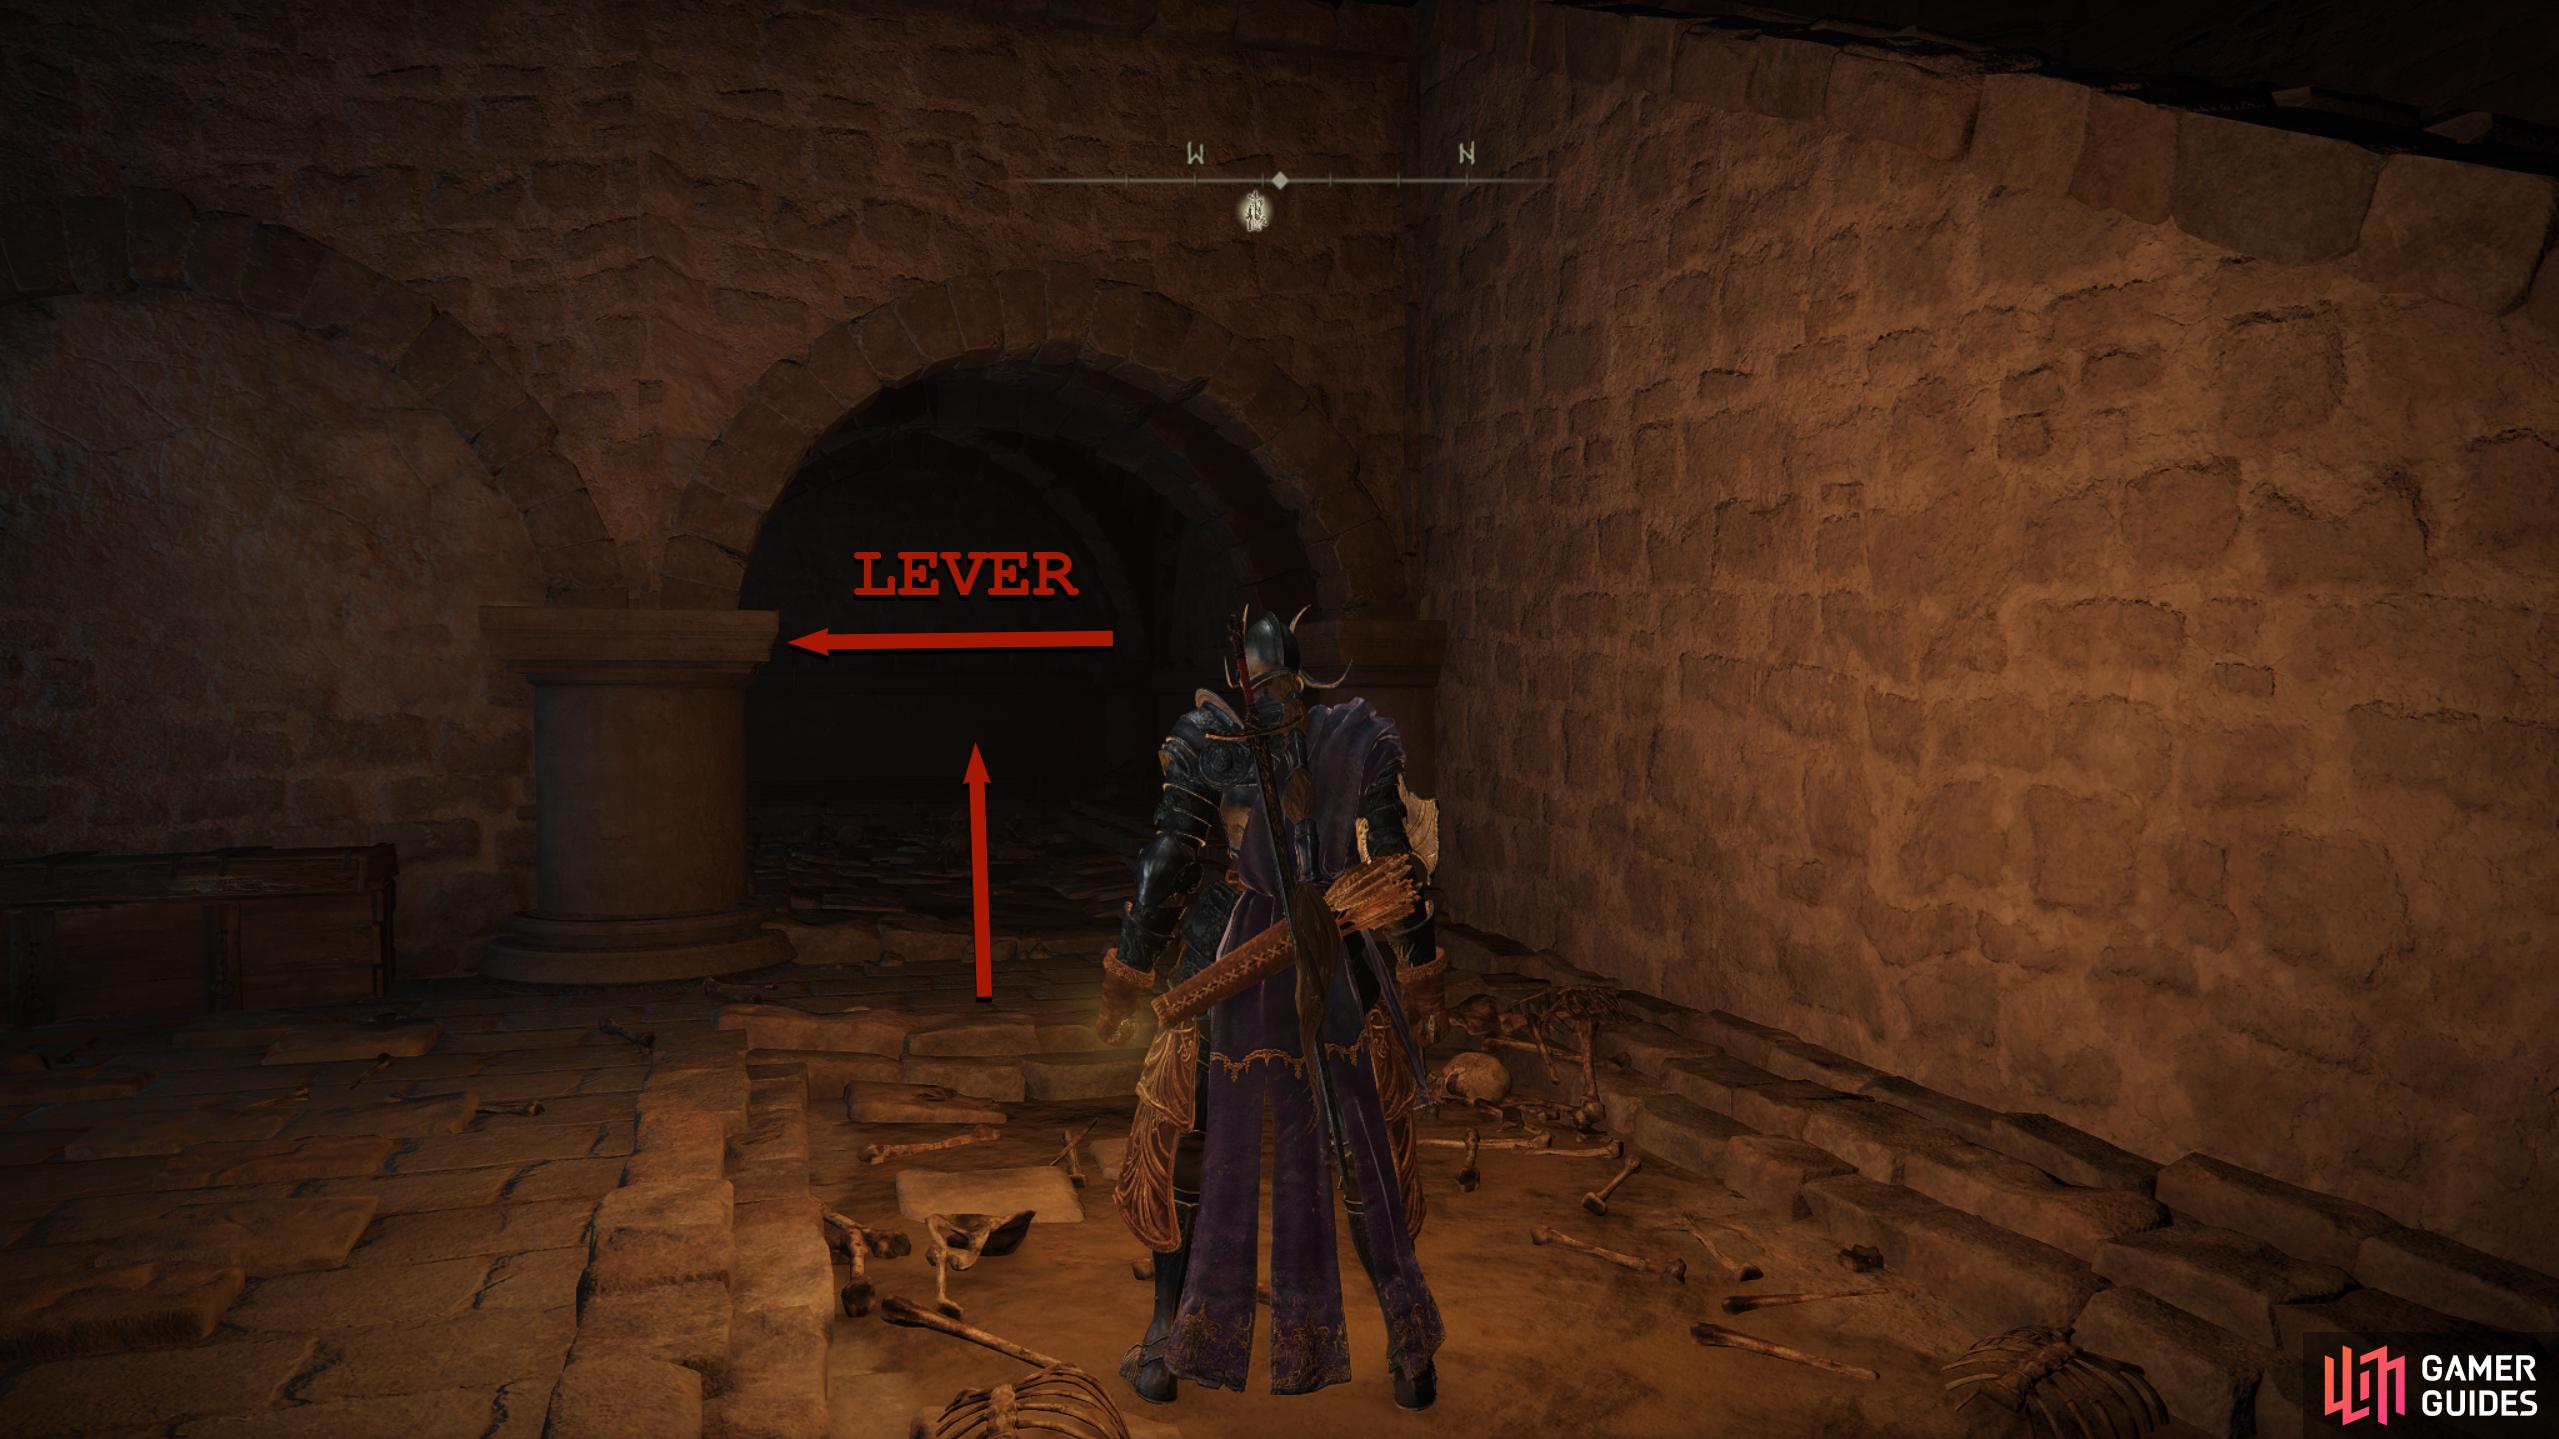
In this room, you’ll encounter a few imps scattered around the area. The first thing you want to do here is find the lever. Walk forward until you drop to the floor below, immediately turn around, and go through the archway to the northwest, next to the stairs. At the end of this path is a lever; interact with it to light up the room.


Head back into the other room, go through the southern doorway, and follow the path through the northeastern doorway to the ladder at the end of the stairs. Take the ladder down followed by another ladder, and head west through the room, defeating the mage at the end before going through the northern doorway. Follow the path north down the slope to find an elevator, take it down, and continue west, interacting with the Summoning Statue along the way. The next room has a staircase to the north and a room to the west. The western room has a Ghost Glovewort [2] to pick up, but you will be ambushed by an imp. The stairs continue progressing through the dungeon.
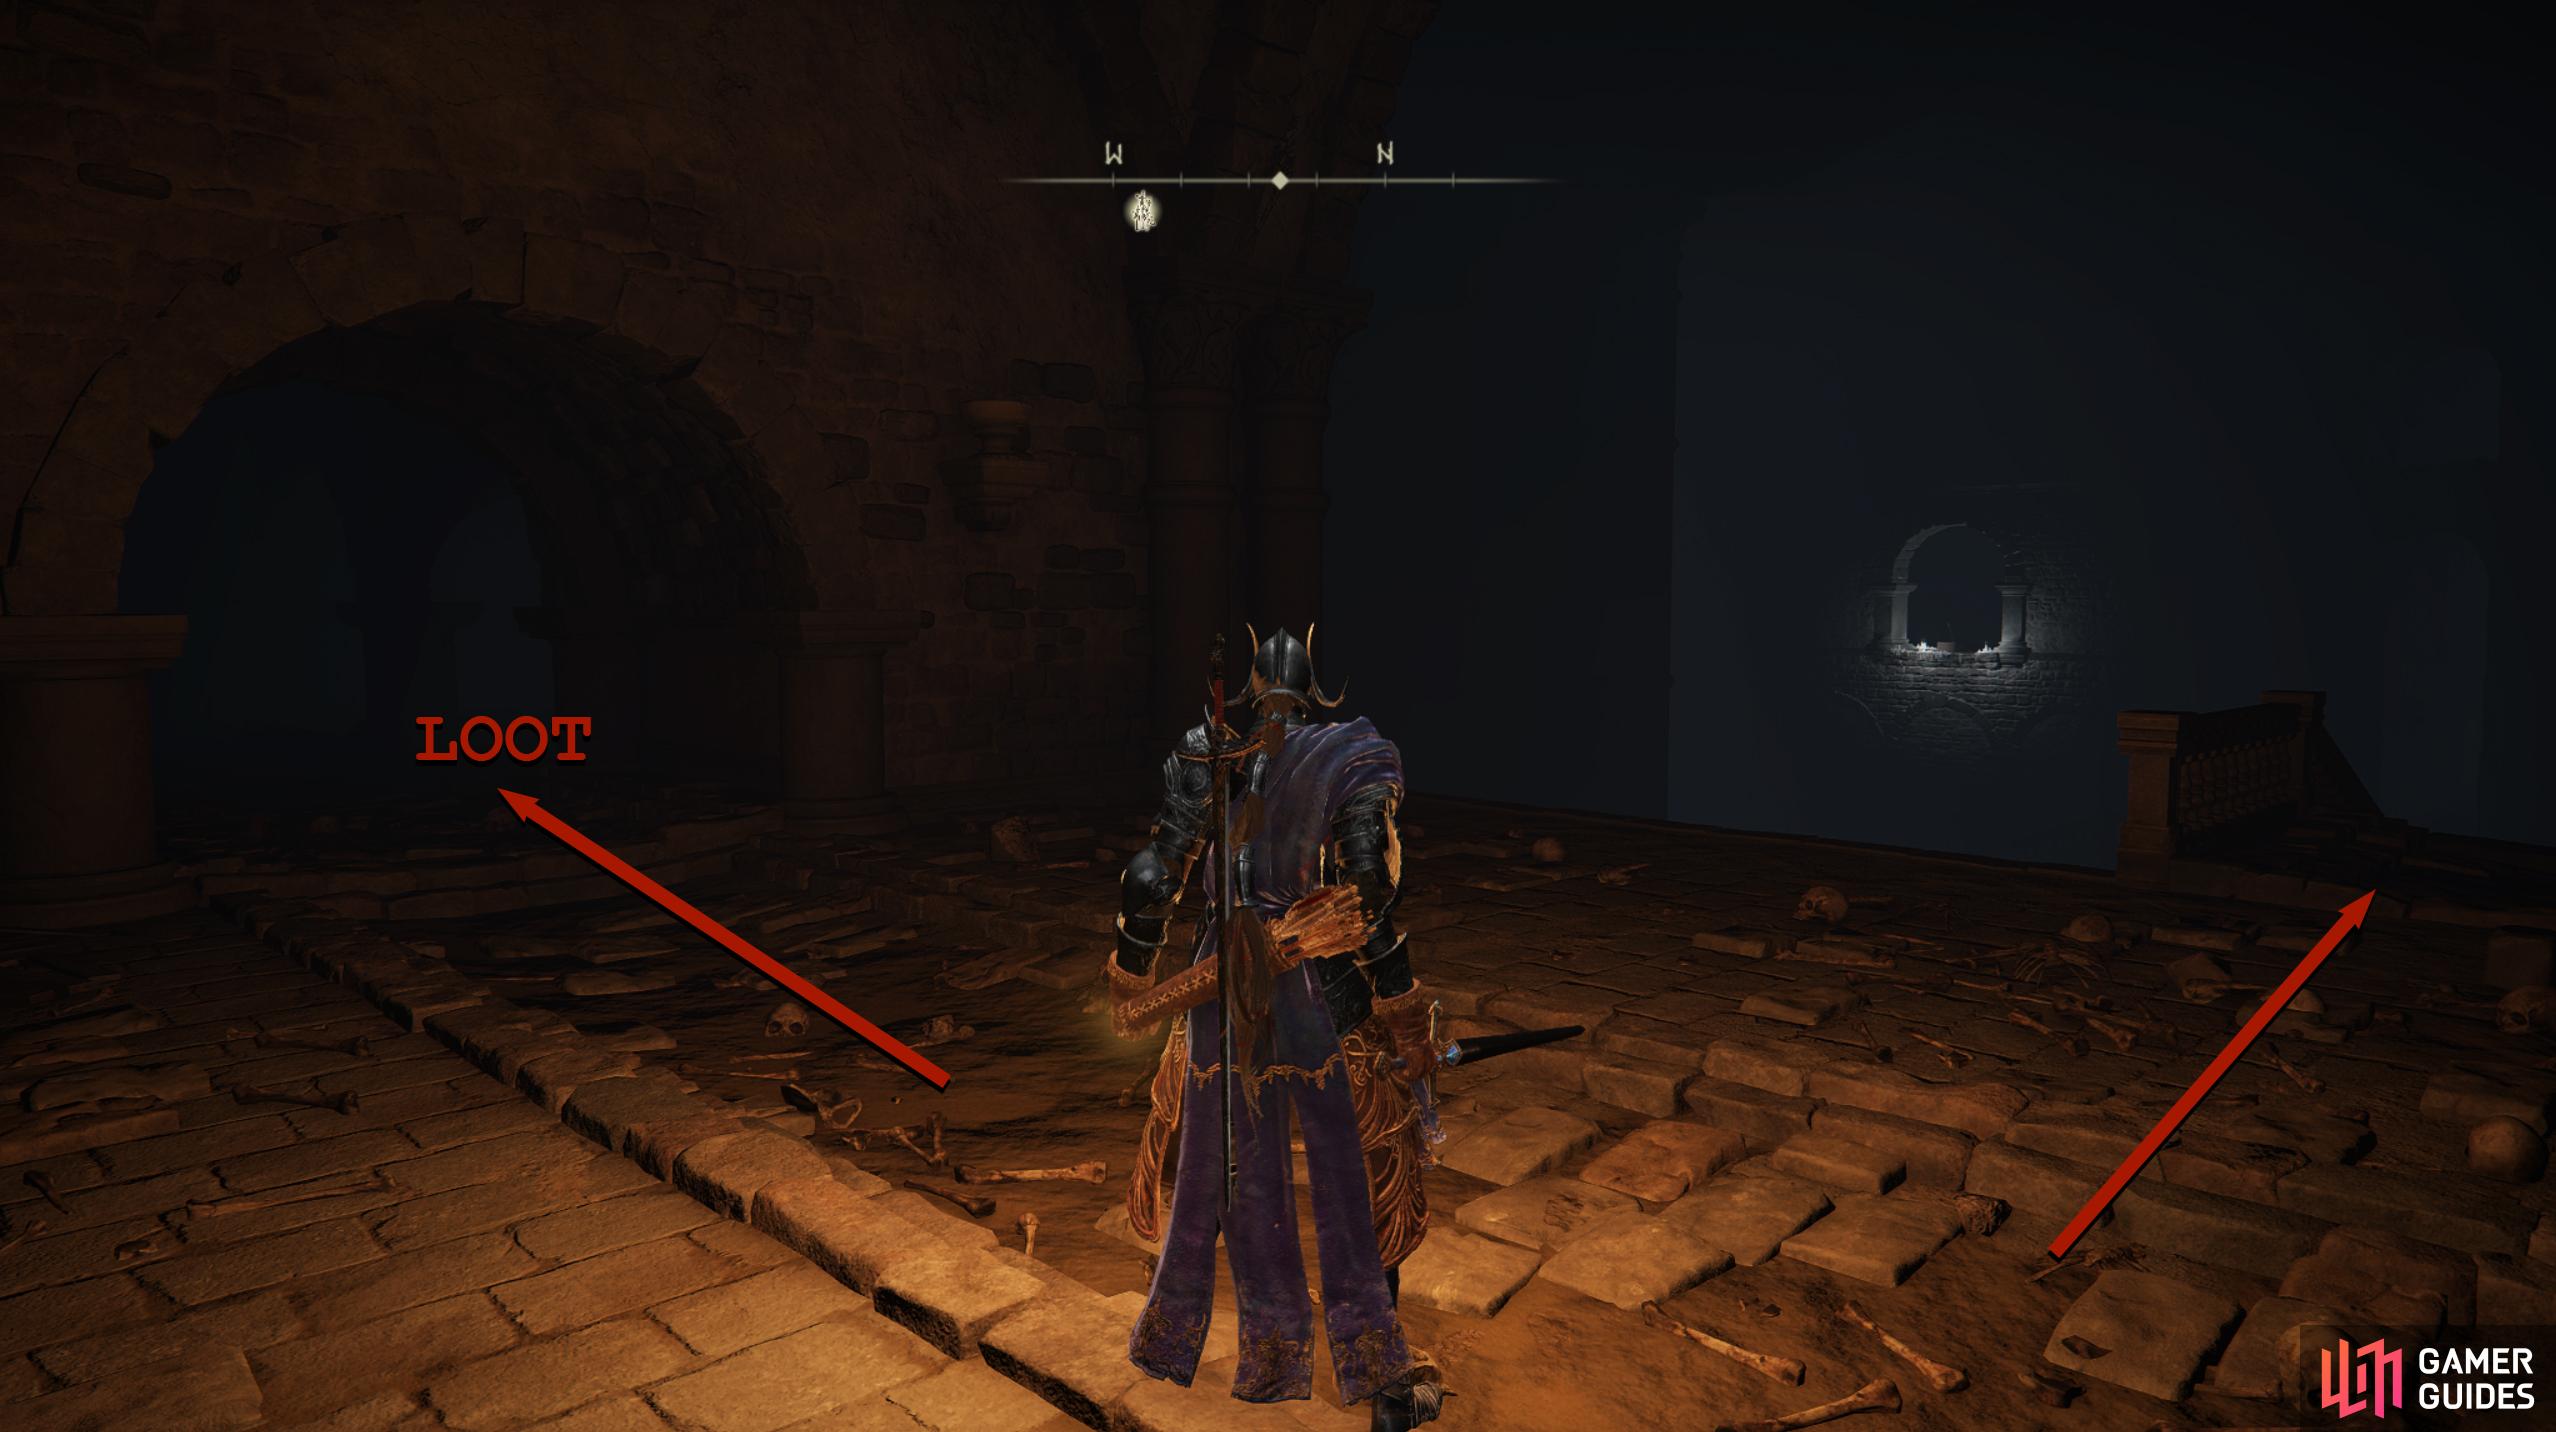
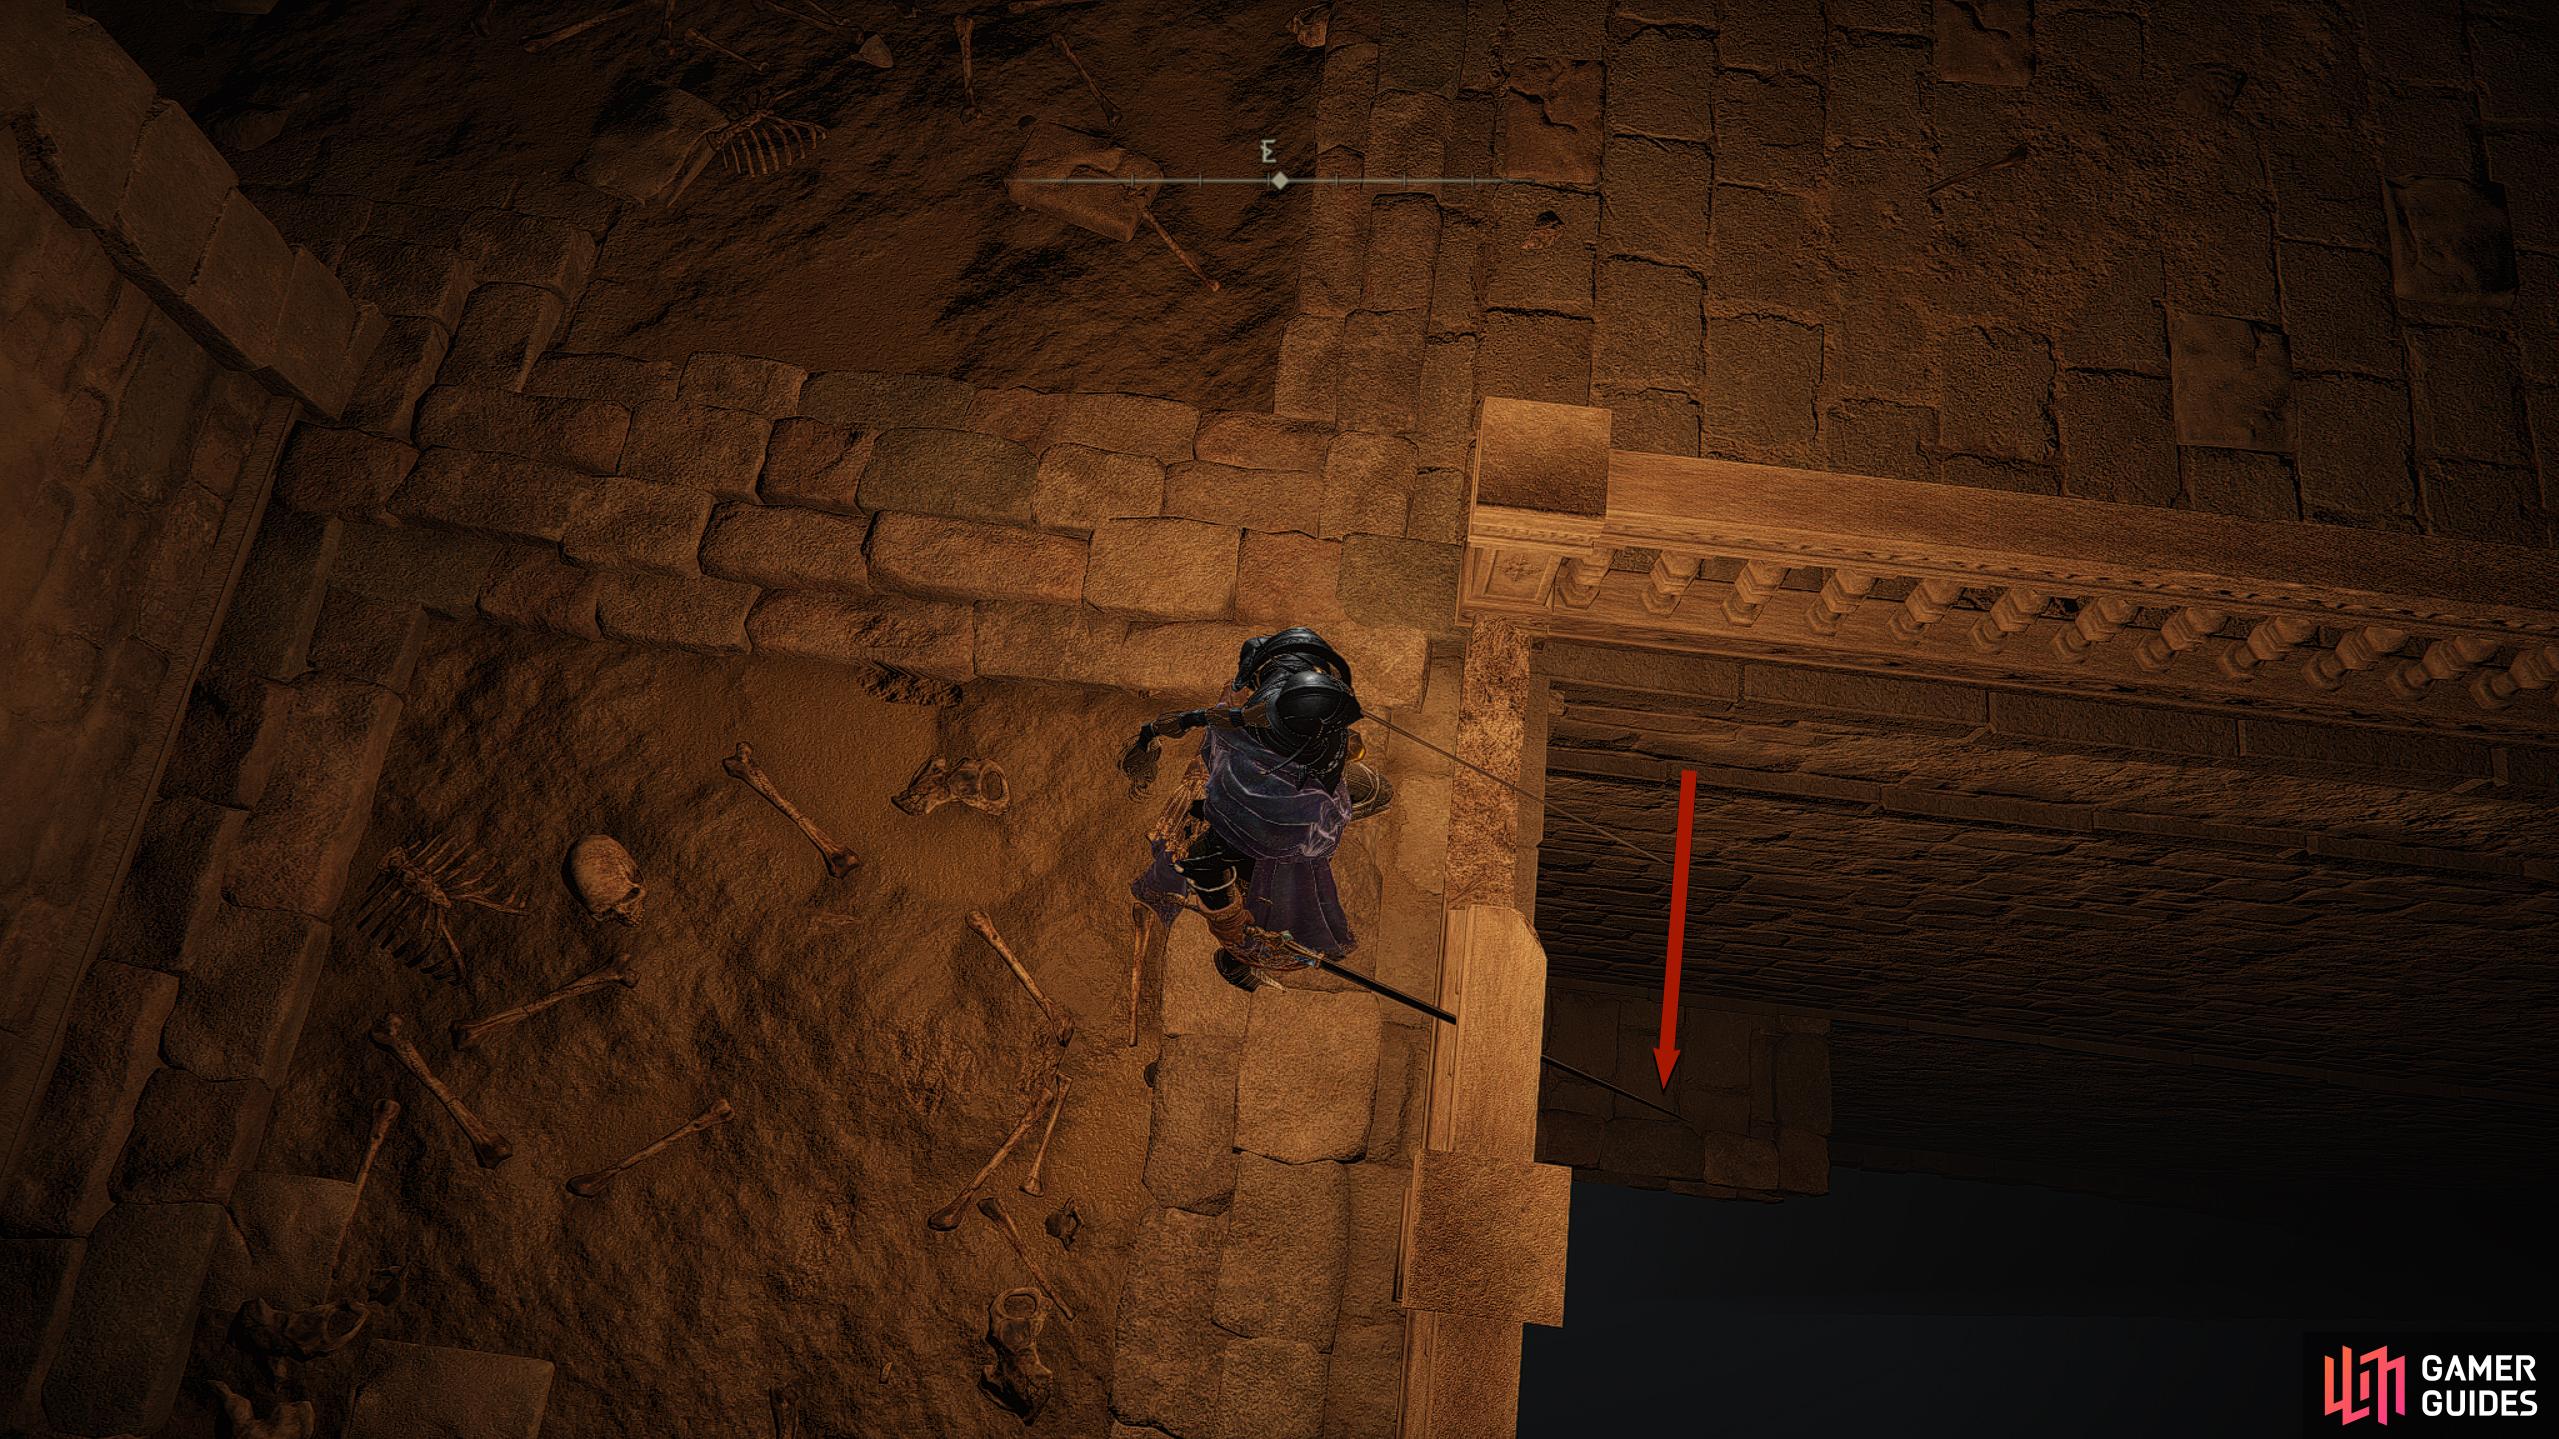
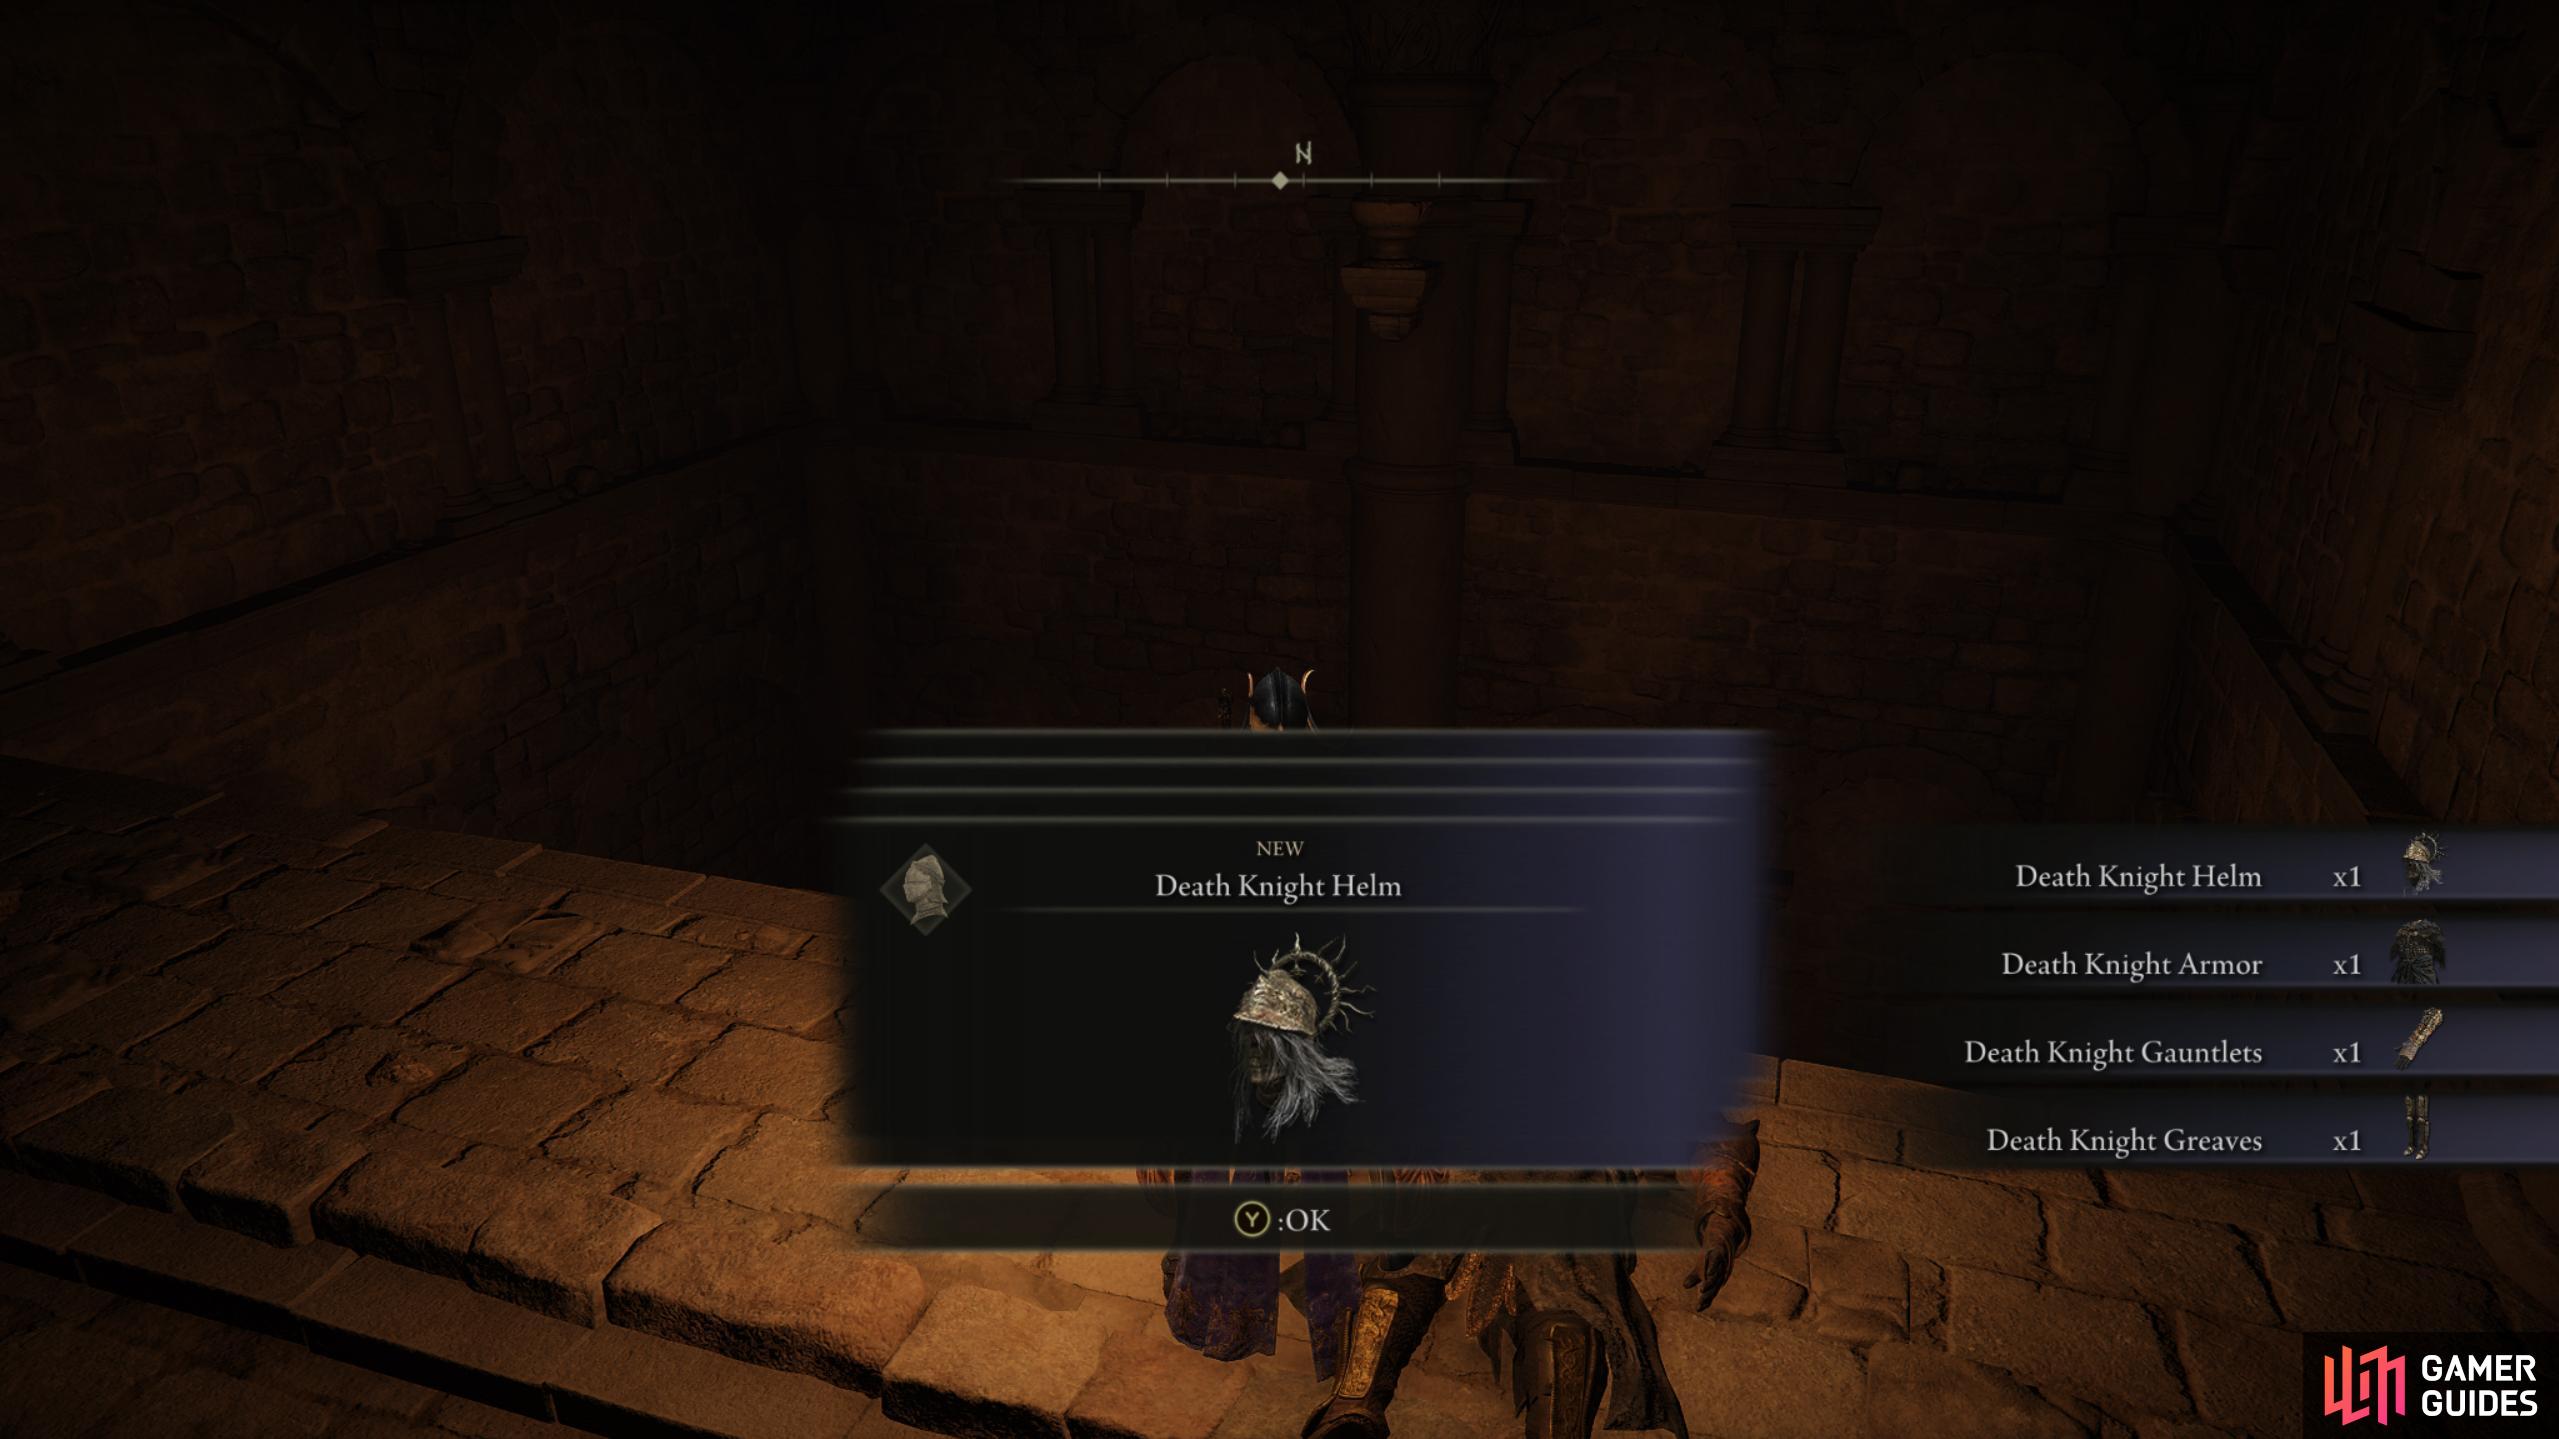
Pick up the item if you want it and head down the northern stairs. At the bottom of the stairs is an imp to your left, dispatch it, and continue around the corner. As you turn the corner, you should notice a small gap in the railing. Look down and drop onto the narrow ledge before entering the doorway. In here, you’ll find a corpse with the ![]() Death Knight armor set to your north. Collect the set and head through the southern doorway, defeating the enemies (imp and mage) along the way. The southern doorway will lead to a ladder onto another narrow ledge. Take it down and go through the doorway to the east. To your left, you’ll find a corpse containing a Ghost Gloveworth [9]. Pick it up and drop into the room below while taking out the imp below you.
Death Knight armor set to your north. Collect the set and head through the southern doorway, defeating the enemies (imp and mage) along the way. The southern doorway will lead to a ladder onto another narrow ledge. Take it down and go through the doorway to the east. To your left, you’ll find a corpse containing a Ghost Gloveworth [9]. Pick it up and drop into the room below while taking out the imp below you.

(1 of 4) You can find a Ghost Glovewort to the west. Meanwhile, the stairs lead further on.
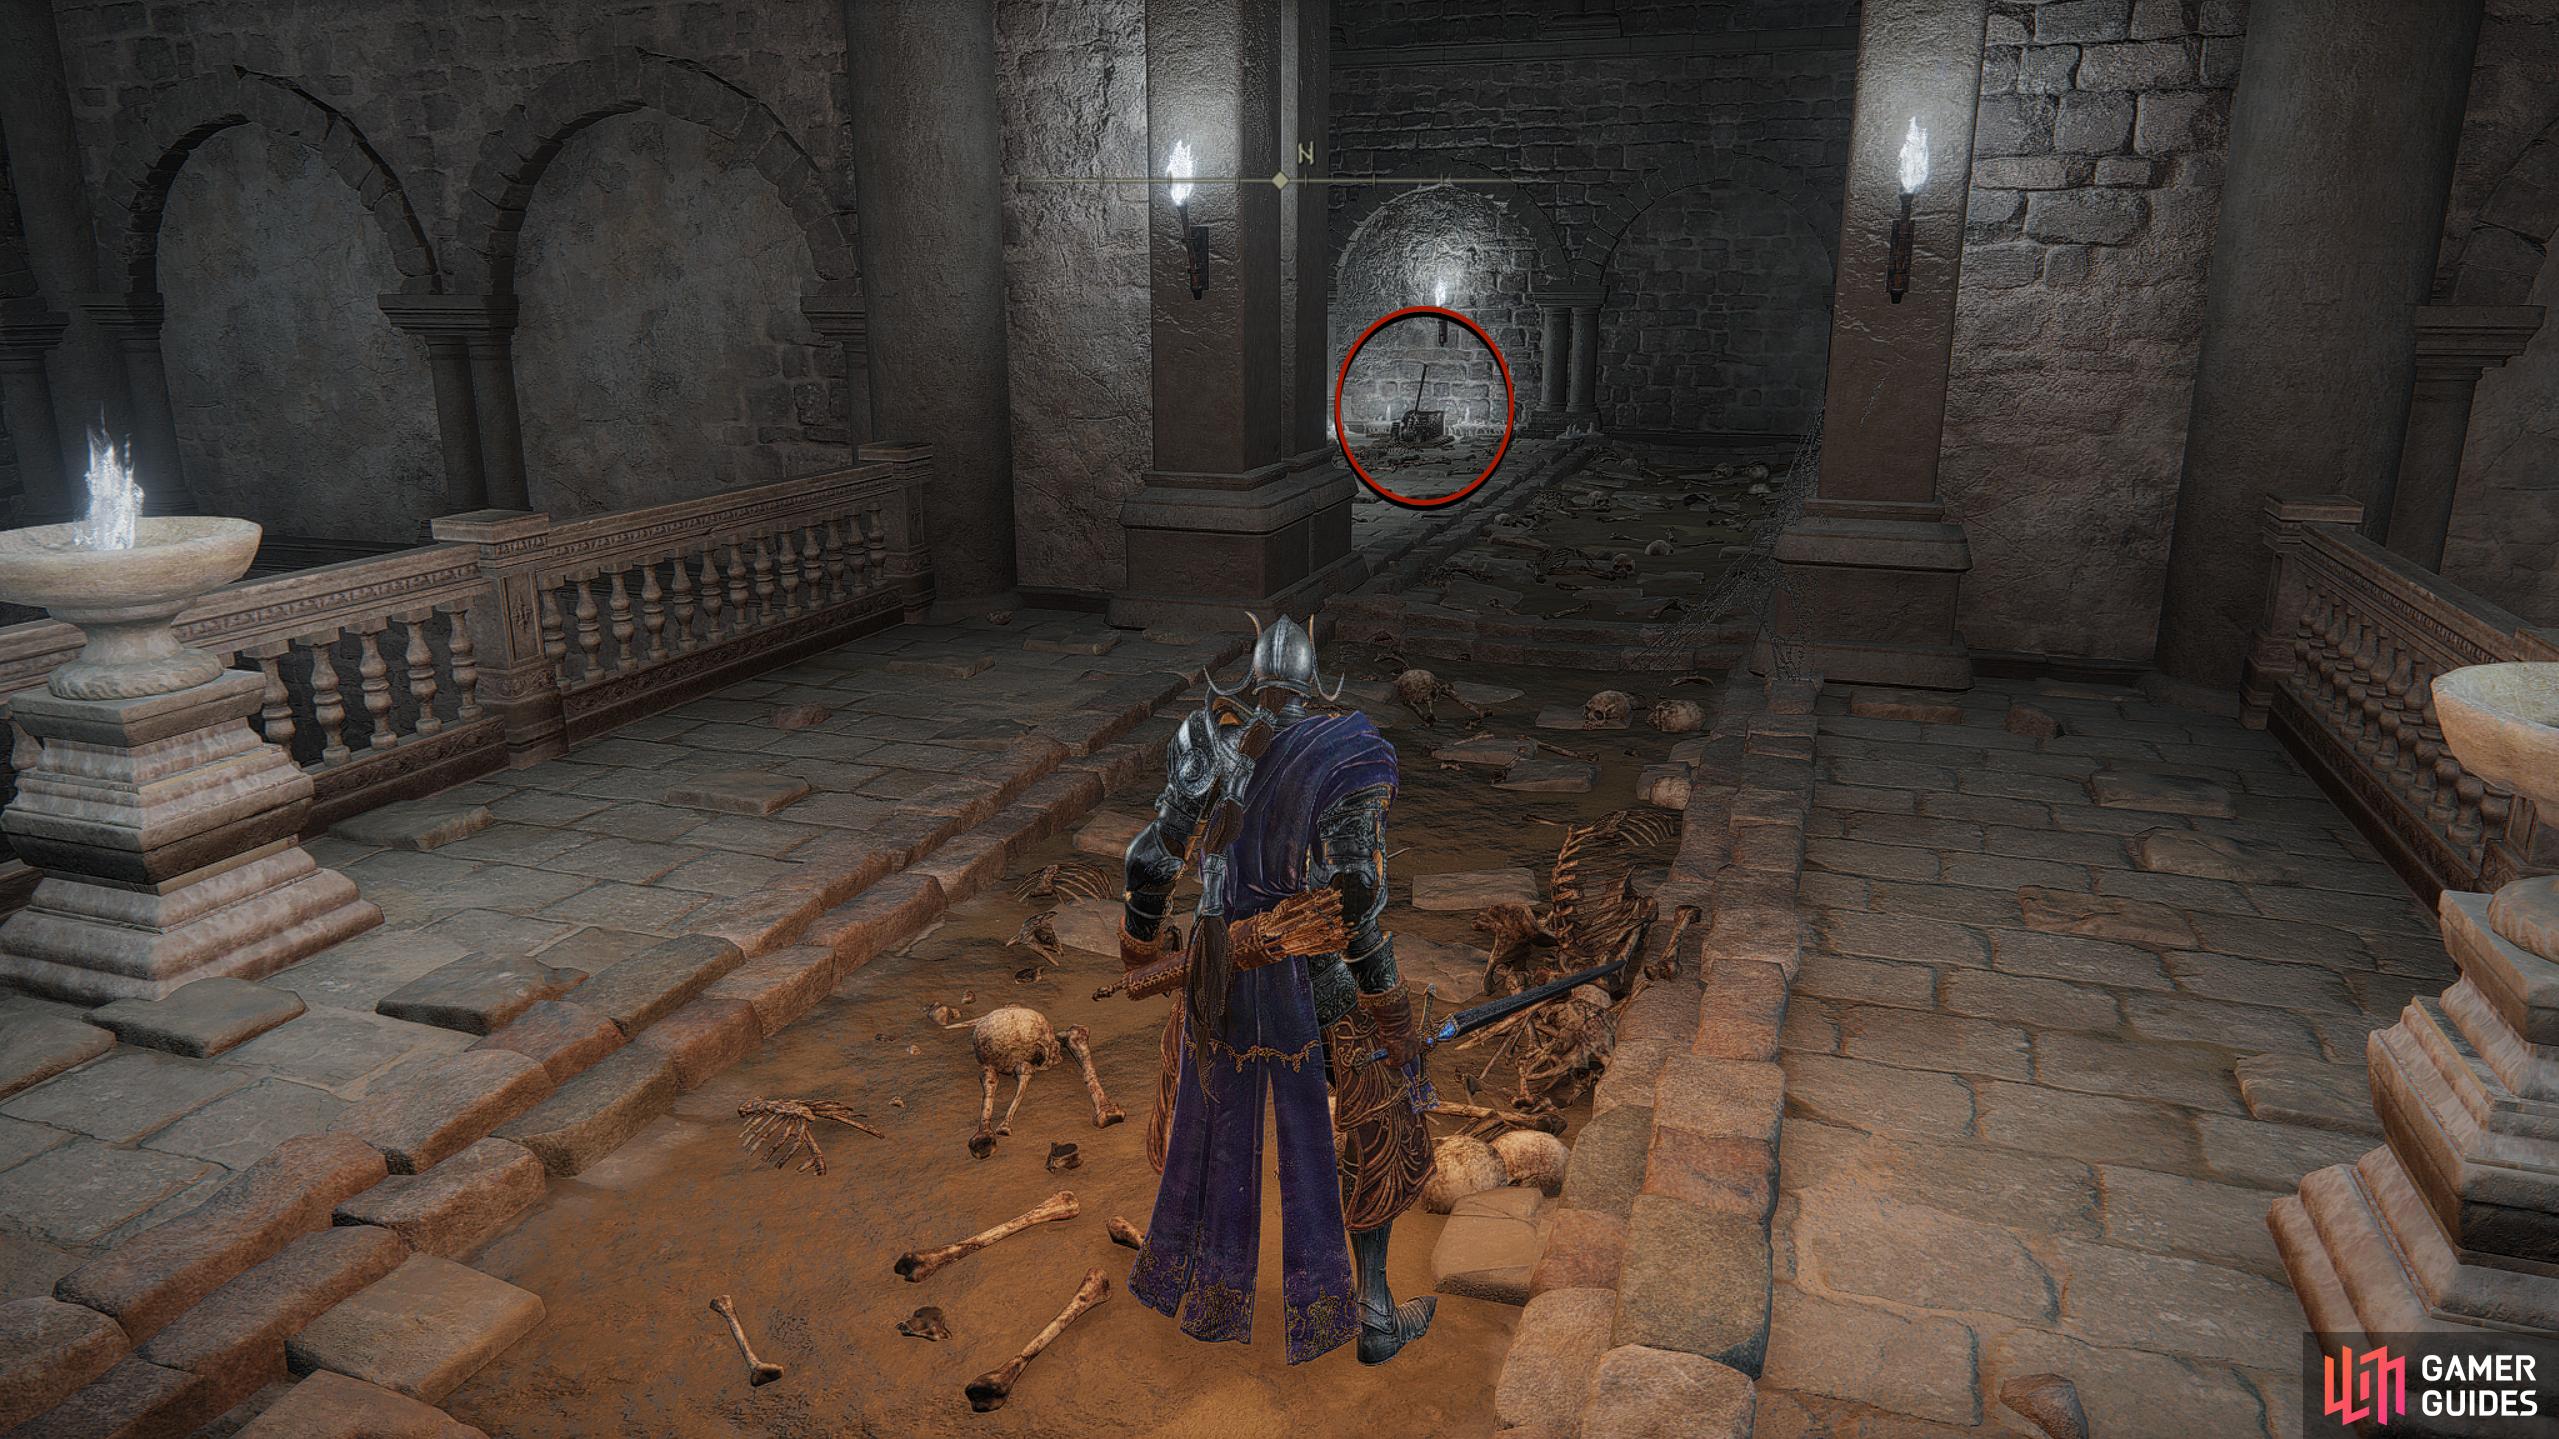
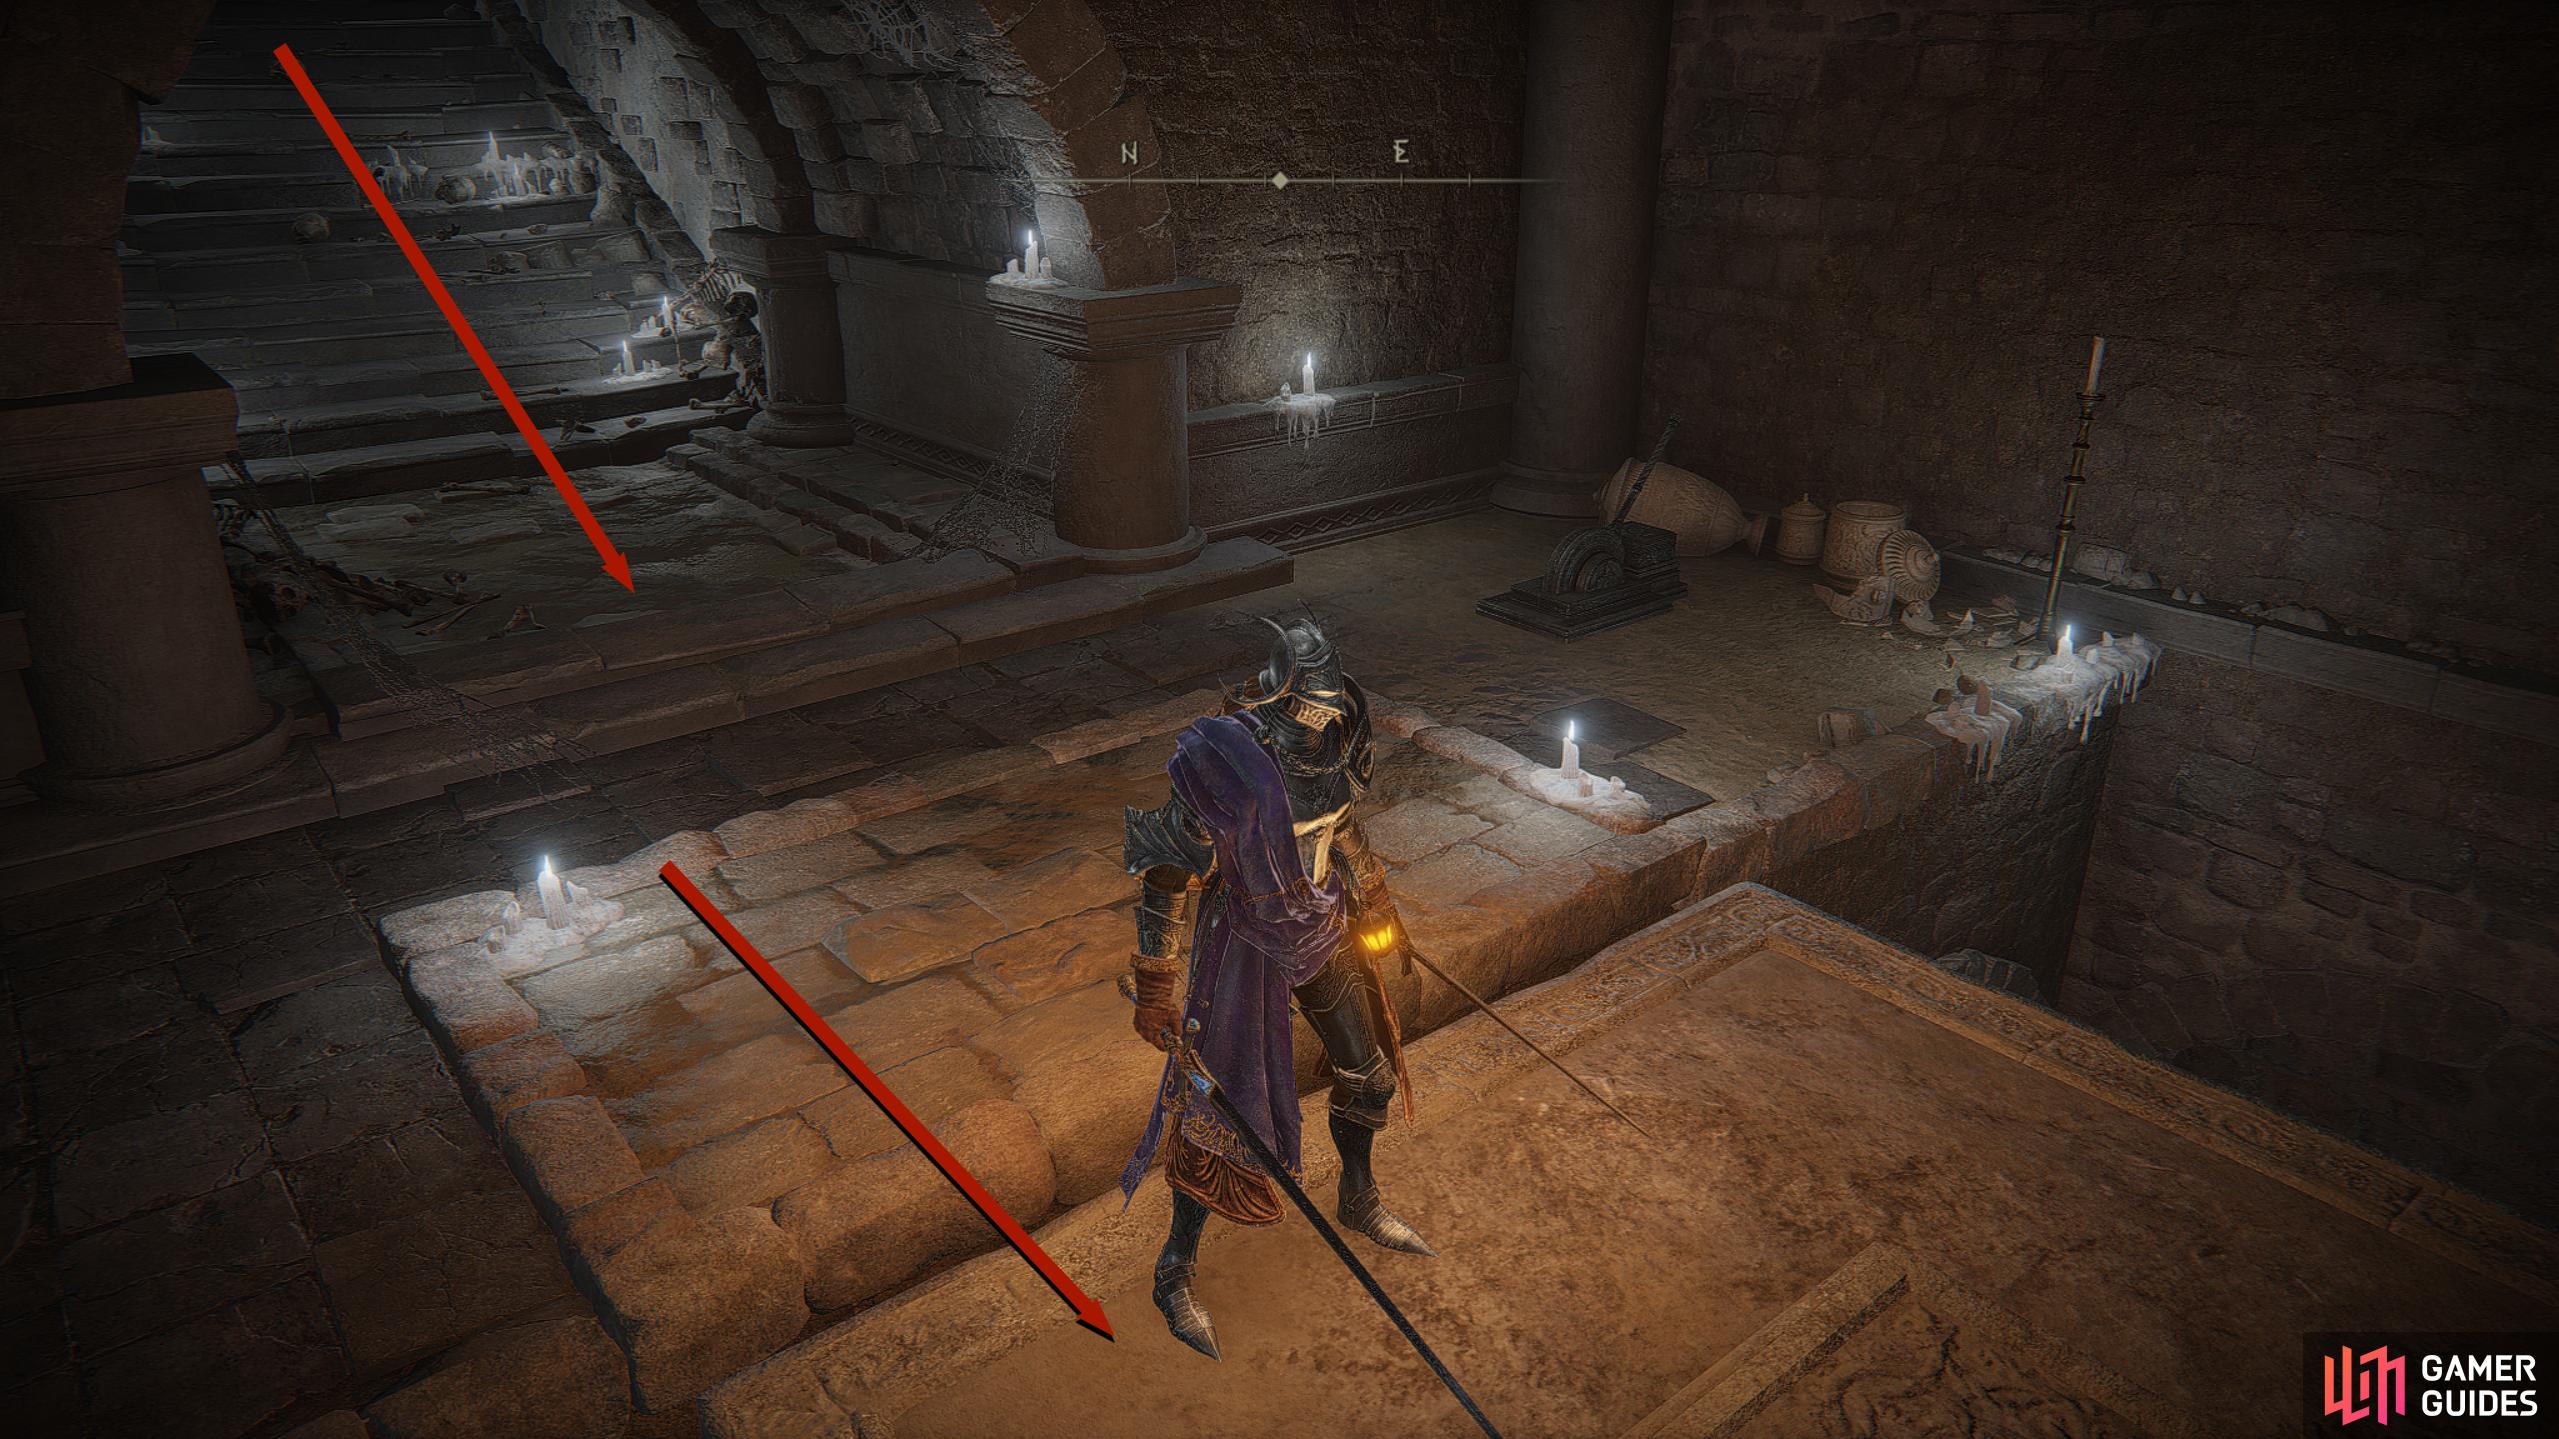
Take the elevator down to your east and follow the path into the next room. You’ll come up against a Bigmouth Imp, who you’ll see opposite you when you enter the room. Think of this enemy as a cannon that can fire large fire orbs at you. Run east toward the Bigmouth while avoiding the smaller imps, and head across the bridge to the north to find a lever that will lower the pedestal that the Bigmouth is sitting on and turn on the lights.
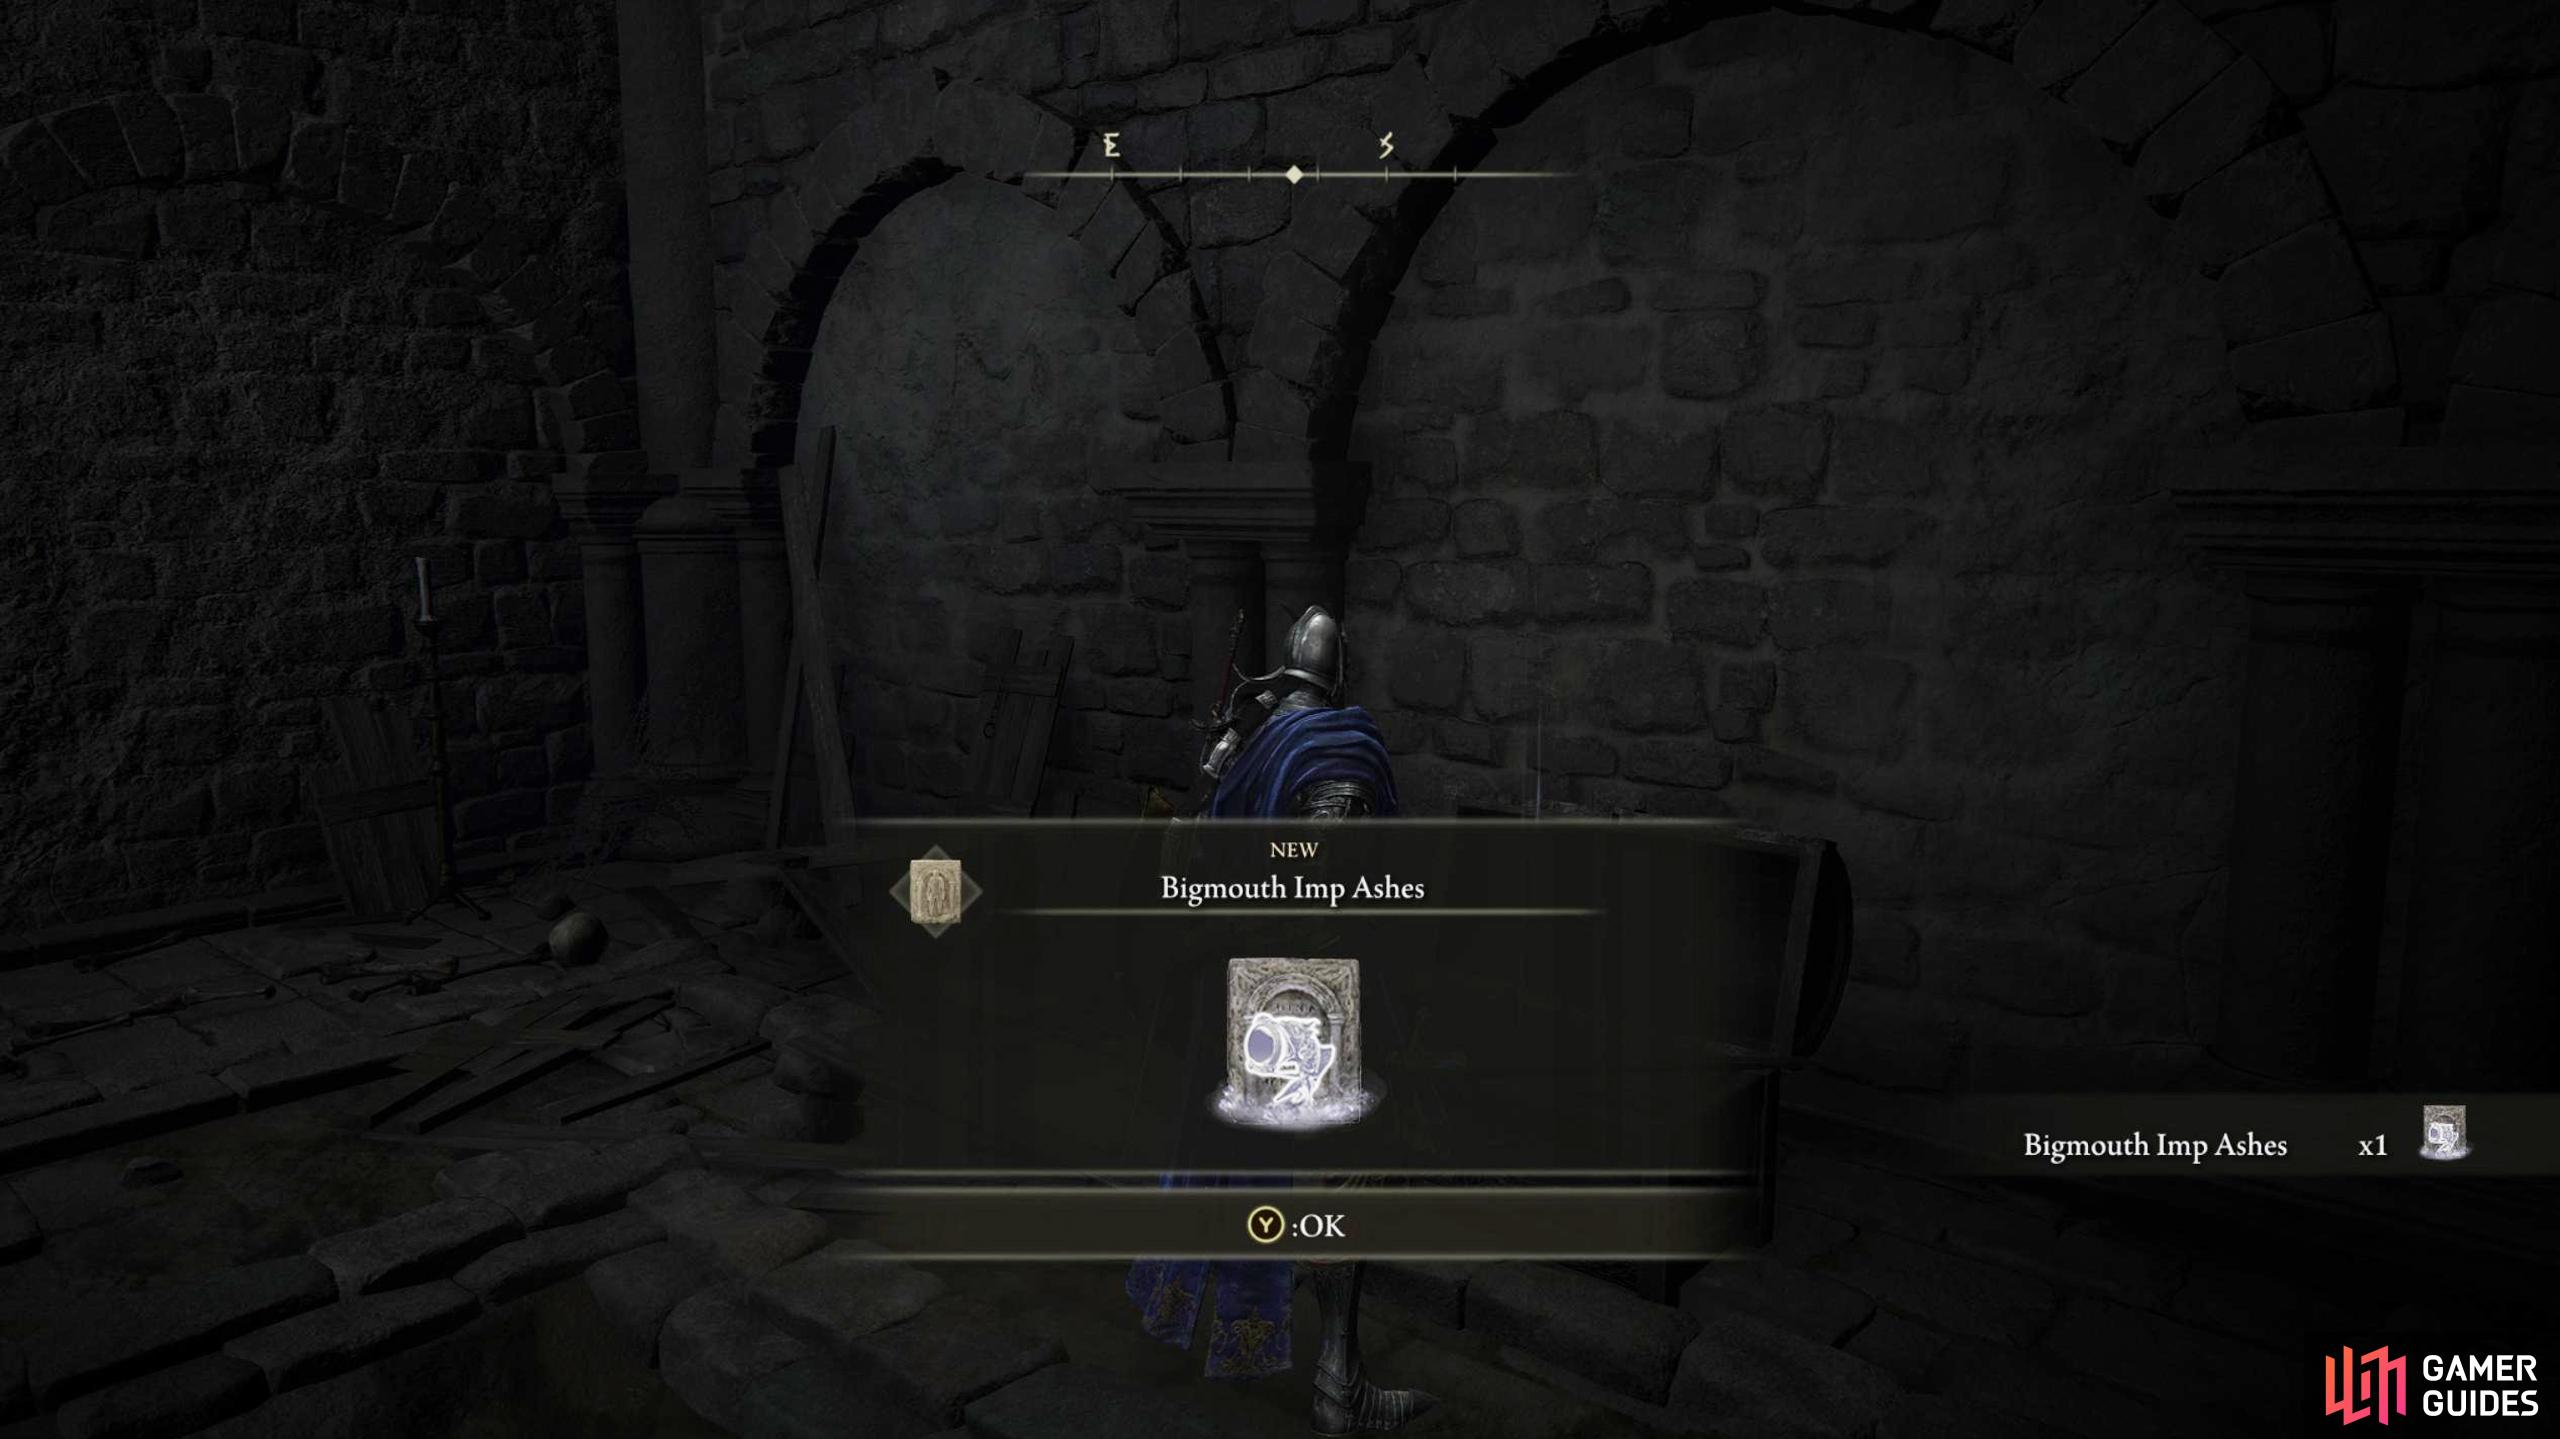
Head back into the room, defeat the smaller imps first, and then defeat the Bigmouth Imp to acquire the Great Ghost Glovewort. Drop off the pedestal to the floor to your south and go through the doorway to the south. At the back of the room, you’ll find a chest containing the Big Mouth Ashes. In the same room, you’ll find a ladder leading up near the doorway. Go up, and take the path east to the end before dropping to the stairs below. This will take you to the room where you dropped to get the Death Knight set. Before heading down the stairs, loot the corpse to the north for a Ghost Glovewort [4]. Go down the stairs and take the elevator down. Follow the path south to eventually get back outside. You may remember us mentioning a boss. Well, here it is.


Jori, Elder Inquisitor
You’ll fight Jori in the Forsaken Graveyard. Jori predominantly attacks at range with holy magic, while also summoning numerous monsters throughout the battle. These can be damaged and killed, albeit briefly until he summons some more. When you close the distance to Jori, he can and will attack you with holy-imbued melee attacks before teleporting away. The easiest way to take out Jori is to rush his back and backstab him while rolling through his melee attacks.

(1 of 2) Follow the stairs and take the elevator down to head outside.
Follow the stairs and take the elevator down to head outside. (left), Here, you’ll find the boss Jori, Elder Inquisitor. The Abyssal Woods are the location after you defeat him. (right)
For the summons, try to use your strongest (but quickest) area of effect attacks as these like to group up near each other. When they’re down, rush Jori, and watch out for his magic attacks. Obviously, holy and magic resistance/equipment is good against Jori as he is an inquisitor and the majority of his attacks will be one or the other. Once you’ve defeated Jori, immediately touch the Forsaken Graveyard site of Grace. Heading through the doorway to the south will take you to the Abyssal Woods…enjoy.

 Sign up
No Comments