
Novigrad is caught in a vice between the Redanians to the north and the Nilfgaardians to the south. While the threat posed to Novigradian society by the Nilfgaardians is clear enough, King Radovid of Redania is a more subtle serpent. Posing as the defender of the north. Radovid’s mistreatment of mages and his dealings with ![]() Whoreson Junior and Menge belie his true intentions - to weaken Novigrad one immolated mage and one assassinated criminal at a time. Once Novigrad has been hollowed out, it’ll be occupied, subsumed into Radovid’s growing northern empire. After helping Albert Vegelbud escape the pyre, Triss finds herself with enough money to finally make her move and evacuate Novigrad of its mages before Radovid’s Witch Hunters can finish them off… and the help of an old friend wouldn’t hurt their chances. This page will provide a walkthrough for the secondary quest
Whoreson Junior and Menge belie his true intentions - to weaken Novigrad one immolated mage and one assassinated criminal at a time. Once Novigrad has been hollowed out, it’ll be occupied, subsumed into Radovid’s growing northern empire. After helping Albert Vegelbud escape the pyre, Triss finds herself with enough money to finally make her move and evacuate Novigrad of its mages before Radovid’s Witch Hunters can finish them off… and the help of an old friend wouldn’t hurt their chances. This page will provide a walkthrough for the secondary quest ![]() Now or Never in The Witcher 3.
Now or Never in The Witcher 3.
Quest Objectives
Starting Now or Never
This quest begins immediately after you complete A Matter of Life and Death, where you should end up outside the Vegelbud Estate. This is important because the start of this quest marks a dire change in Novigrad, which you’ll become aware of as soon as you return to the city… assuming you enter via one of the gates instead of fast traveling to the interior. At the gates you’ll be stopped by guards who demand you present a pass proving that you’re not a mage - Sigi Reuven will bail you out, but it’s doubtful any such aid awaits others.
With Radovid turning up the intensity, Triss will need to make her move soon, but other events have been set in motion by this harsher crackdown that you may want to resolve before meeting up with Triss. Namely, there are two new quests you can find around the city, including Novigrad, Closed City and Novigrad, Closed City II. While not terribly rewarding or important, both of these quests can be easily missed if you’re just running about the city, and if you want to ensure you complete them cleanly you might want to do so now. Don’t worry, Triss’s quest isn’t going anywhere unless you start the main quest [Isle of Mists].
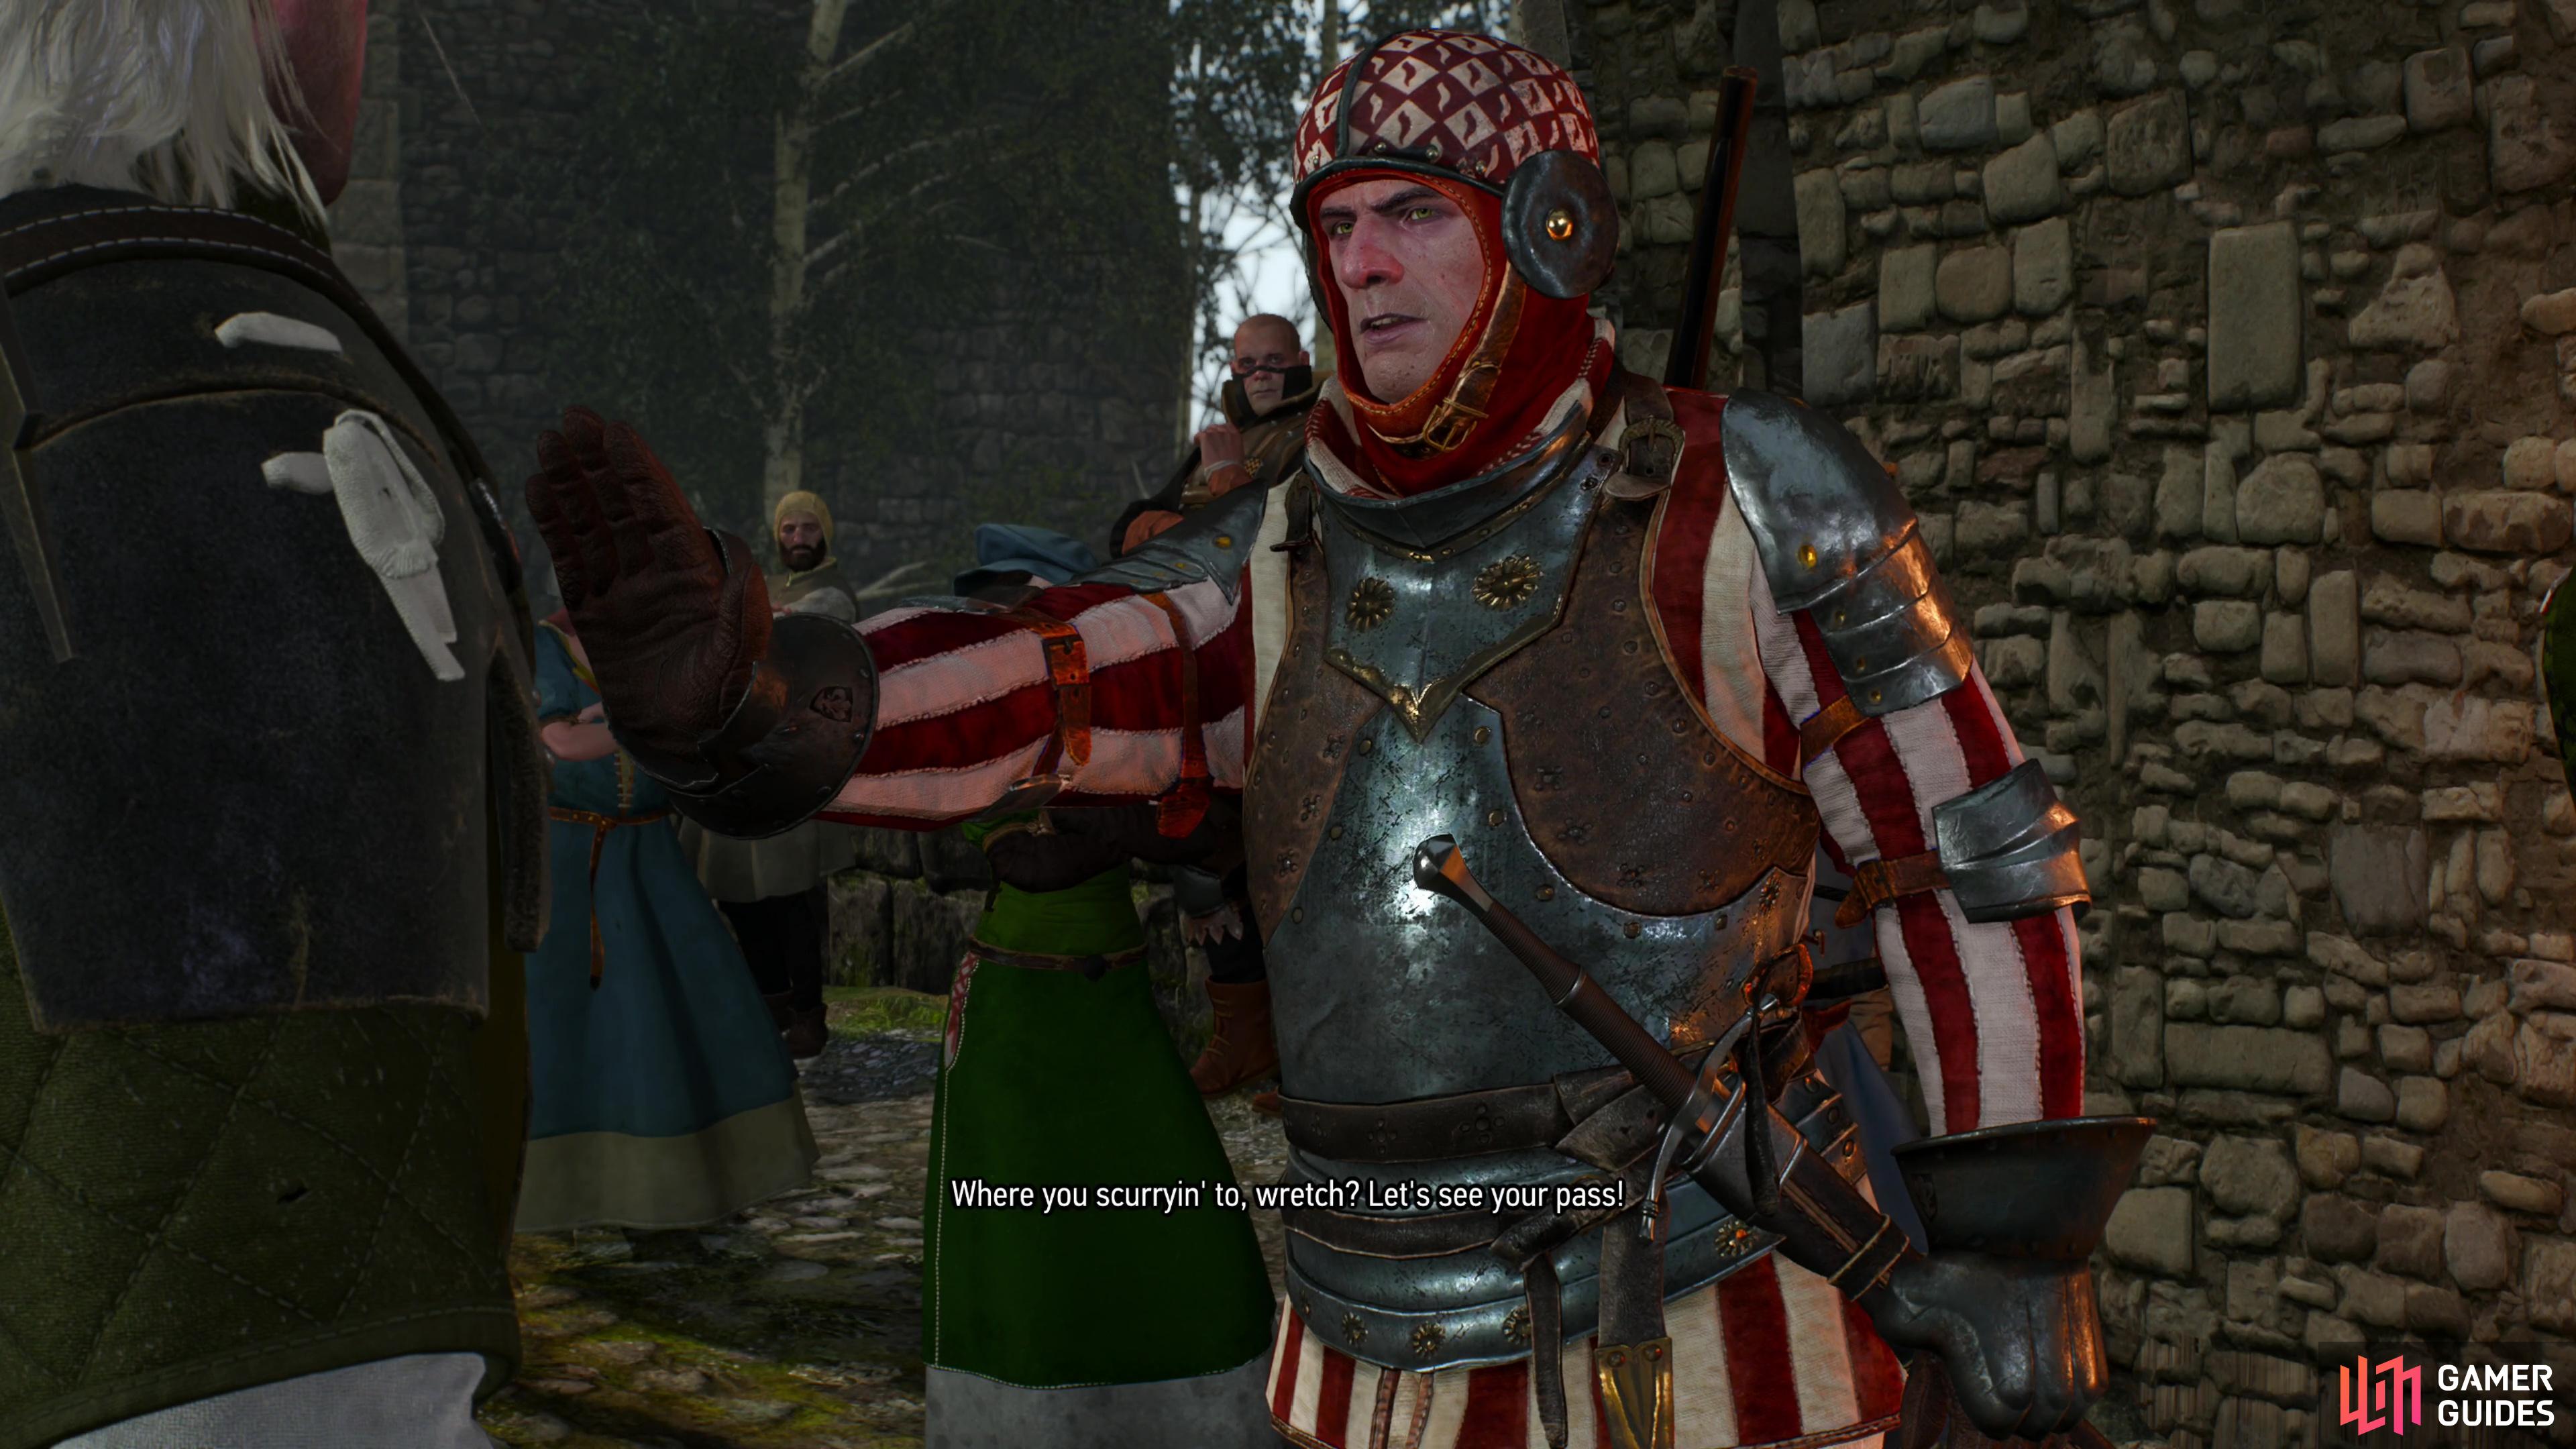
(1 of 2) Enter Novigrad via any gate and you’ll see that the Witch Hunters are cracking down on their anti-mage activities.
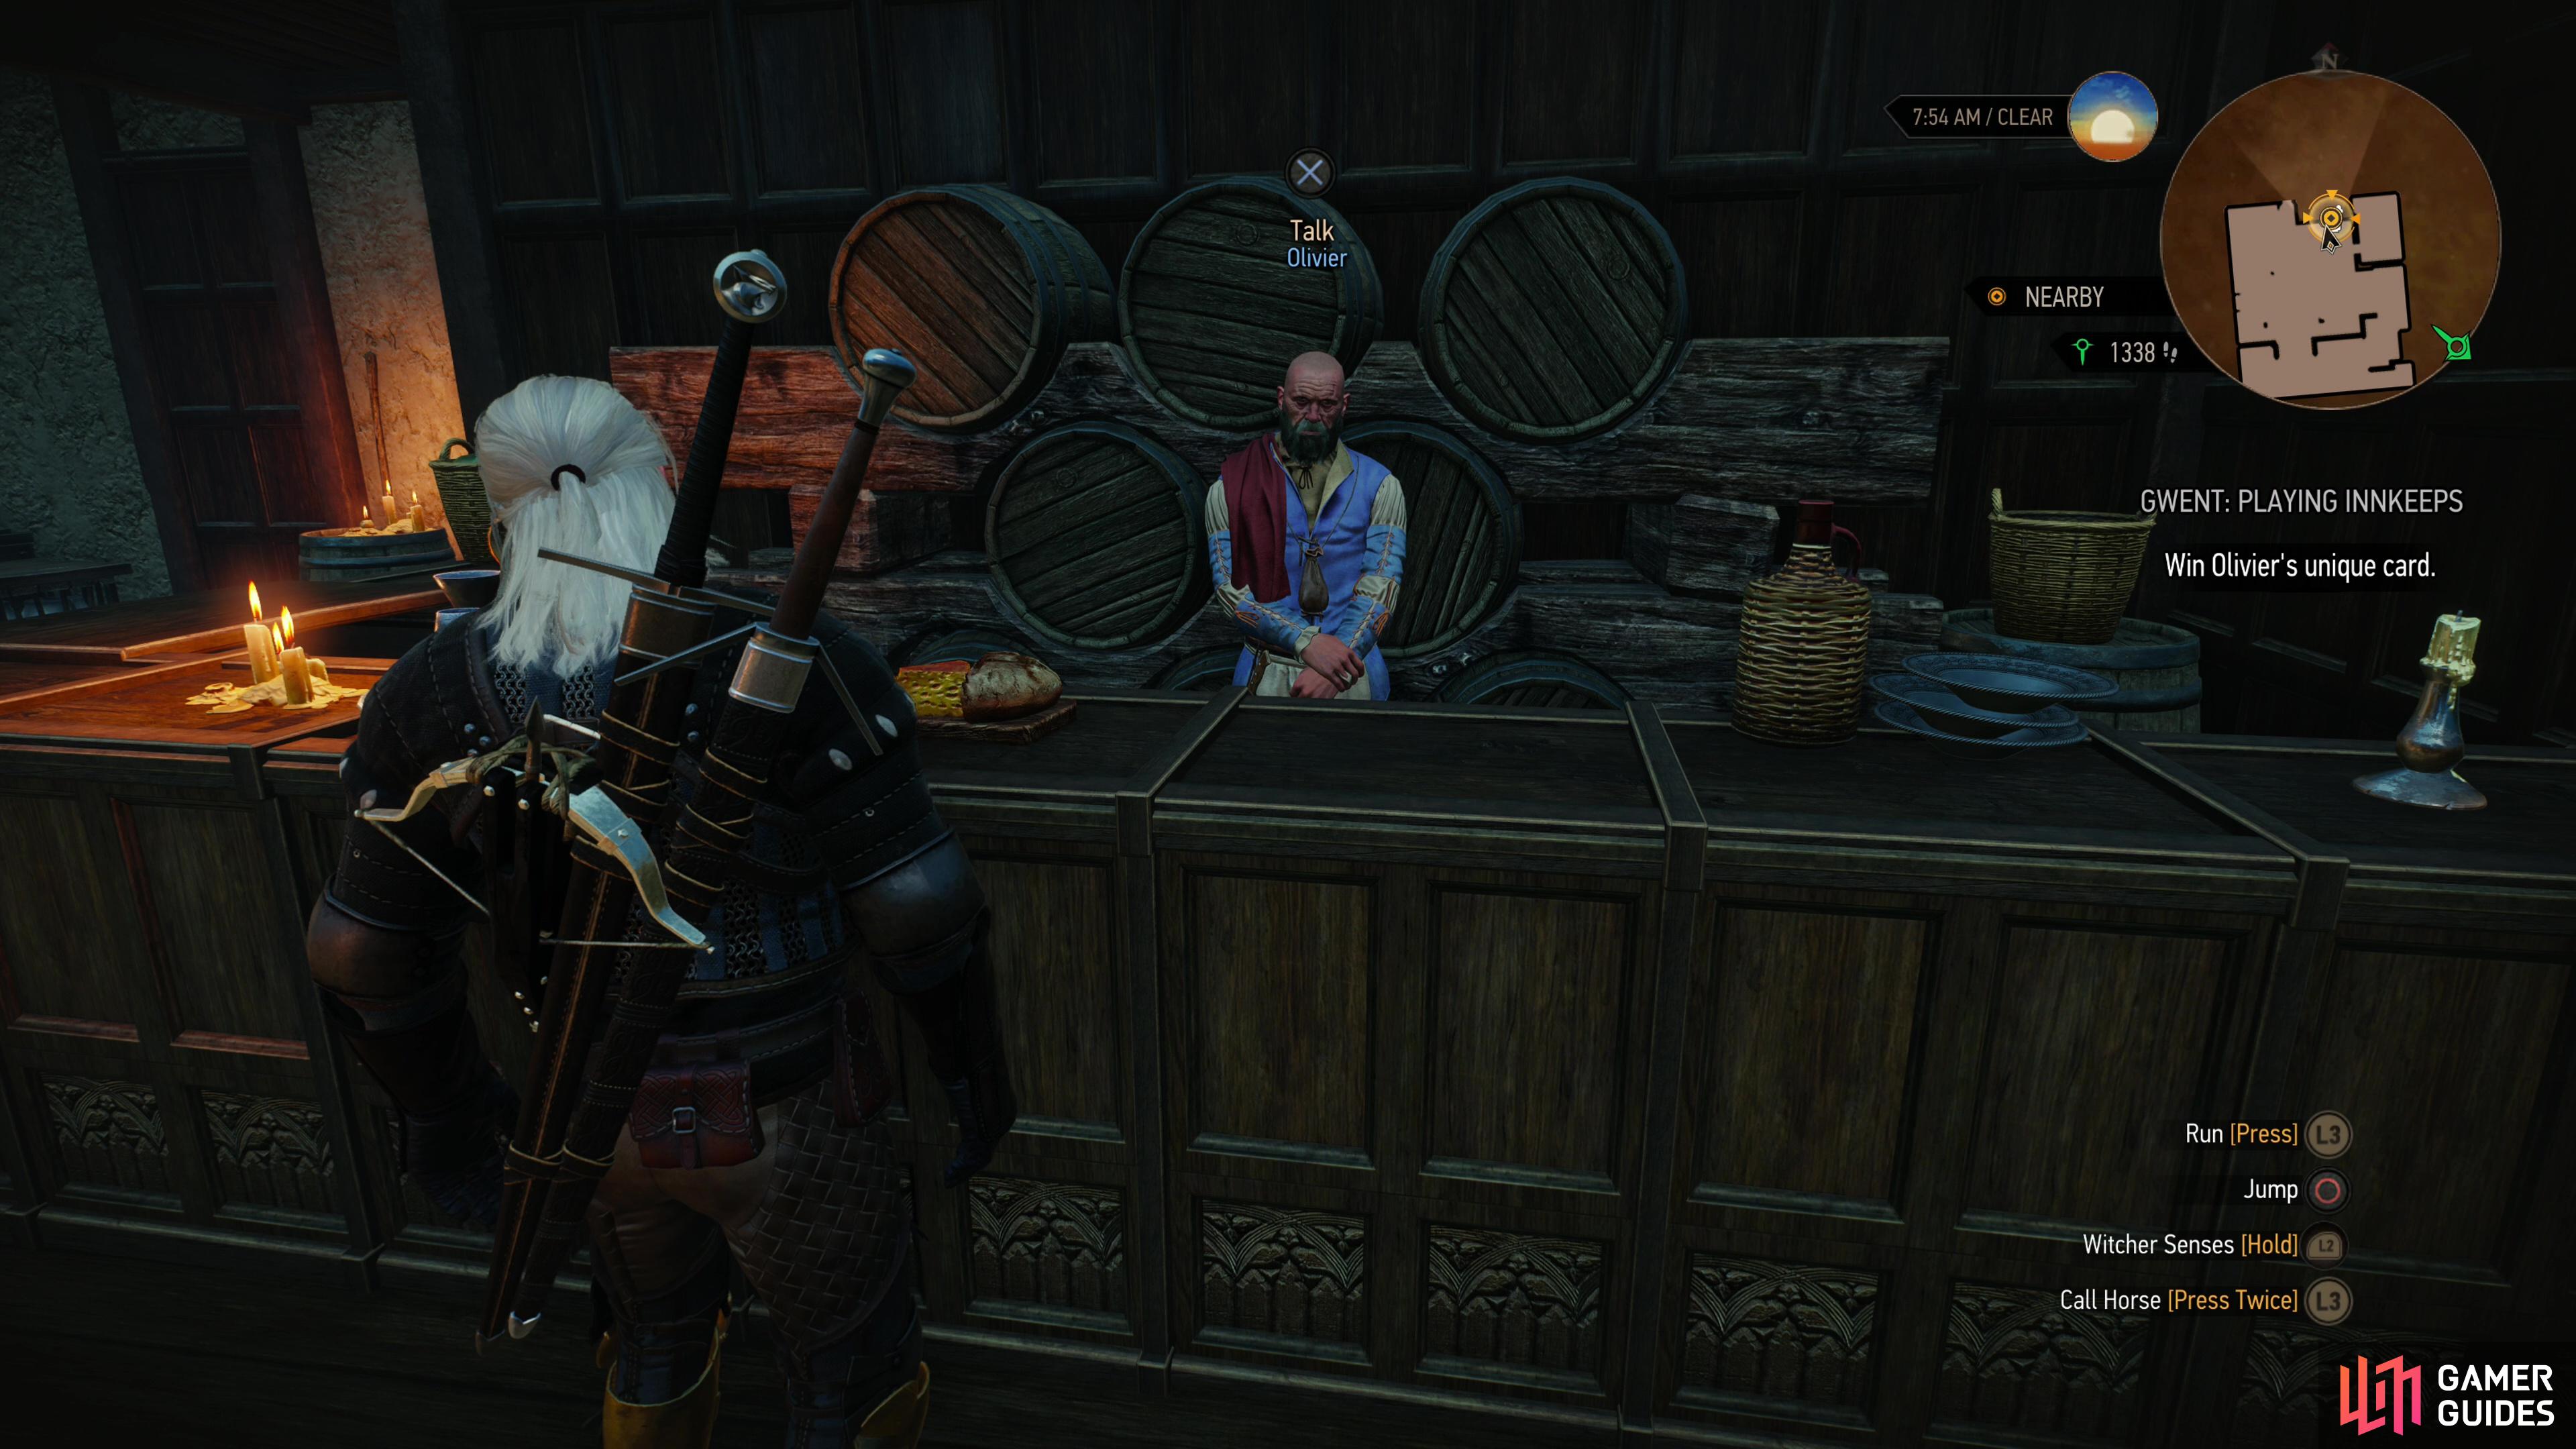
Enter Novigrad via any gate and you’ll see that the Witch Hunters are cracking down on their anti-mage activities. (left), If you want to play Gwent with Olivier, you’d be wise to do so before starting this quest (right)
Meet with Triss
Head to Triss’s hideout northeast of ![]() Hierarch Square and note the Temple Guards and the Witch Hunter outside. Probably not a good sign. Enter the leaning house and head upstairs to find Triss and her landlords arguing. The temperature in the city is rising and as the stakes have increased, so has the greed of Triss’s landlords. Head upstairs and you’ll get a timed dialog decision to either intervene (“Hands off, or I’ll cut ’em off.”) or stay out of it ([Don’t react.]). If you don’t react the landlords will take Triss necklace, but she’ll scold you if you do intervene. Either way, it doesn’t matter all that much.
Hierarch Square and note the Temple Guards and the Witch Hunter outside. Probably not a good sign. Enter the leaning house and head upstairs to find Triss and her landlords arguing. The temperature in the city is rising and as the stakes have increased, so has the greed of Triss’s landlords. Head upstairs and you’ll get a timed dialog decision to either intervene (“Hands off, or I’ll cut ’em off.”) or stay out of it ([Don’t react.]). If you don’t react the landlords will take Triss necklace, but she’ll scold you if you do intervene. Either way, it doesn’t matter all that much.

(1 of 2) Meet Triss at her hideout and scare off her landlords or let them extort Triss.
Meet Triss at her hideout and scare off her landlords or let them extort Triss. (left), Afterwards you’ll need to decide whether you want to rescue Berthold and Anisse - two tardy mages. (right)
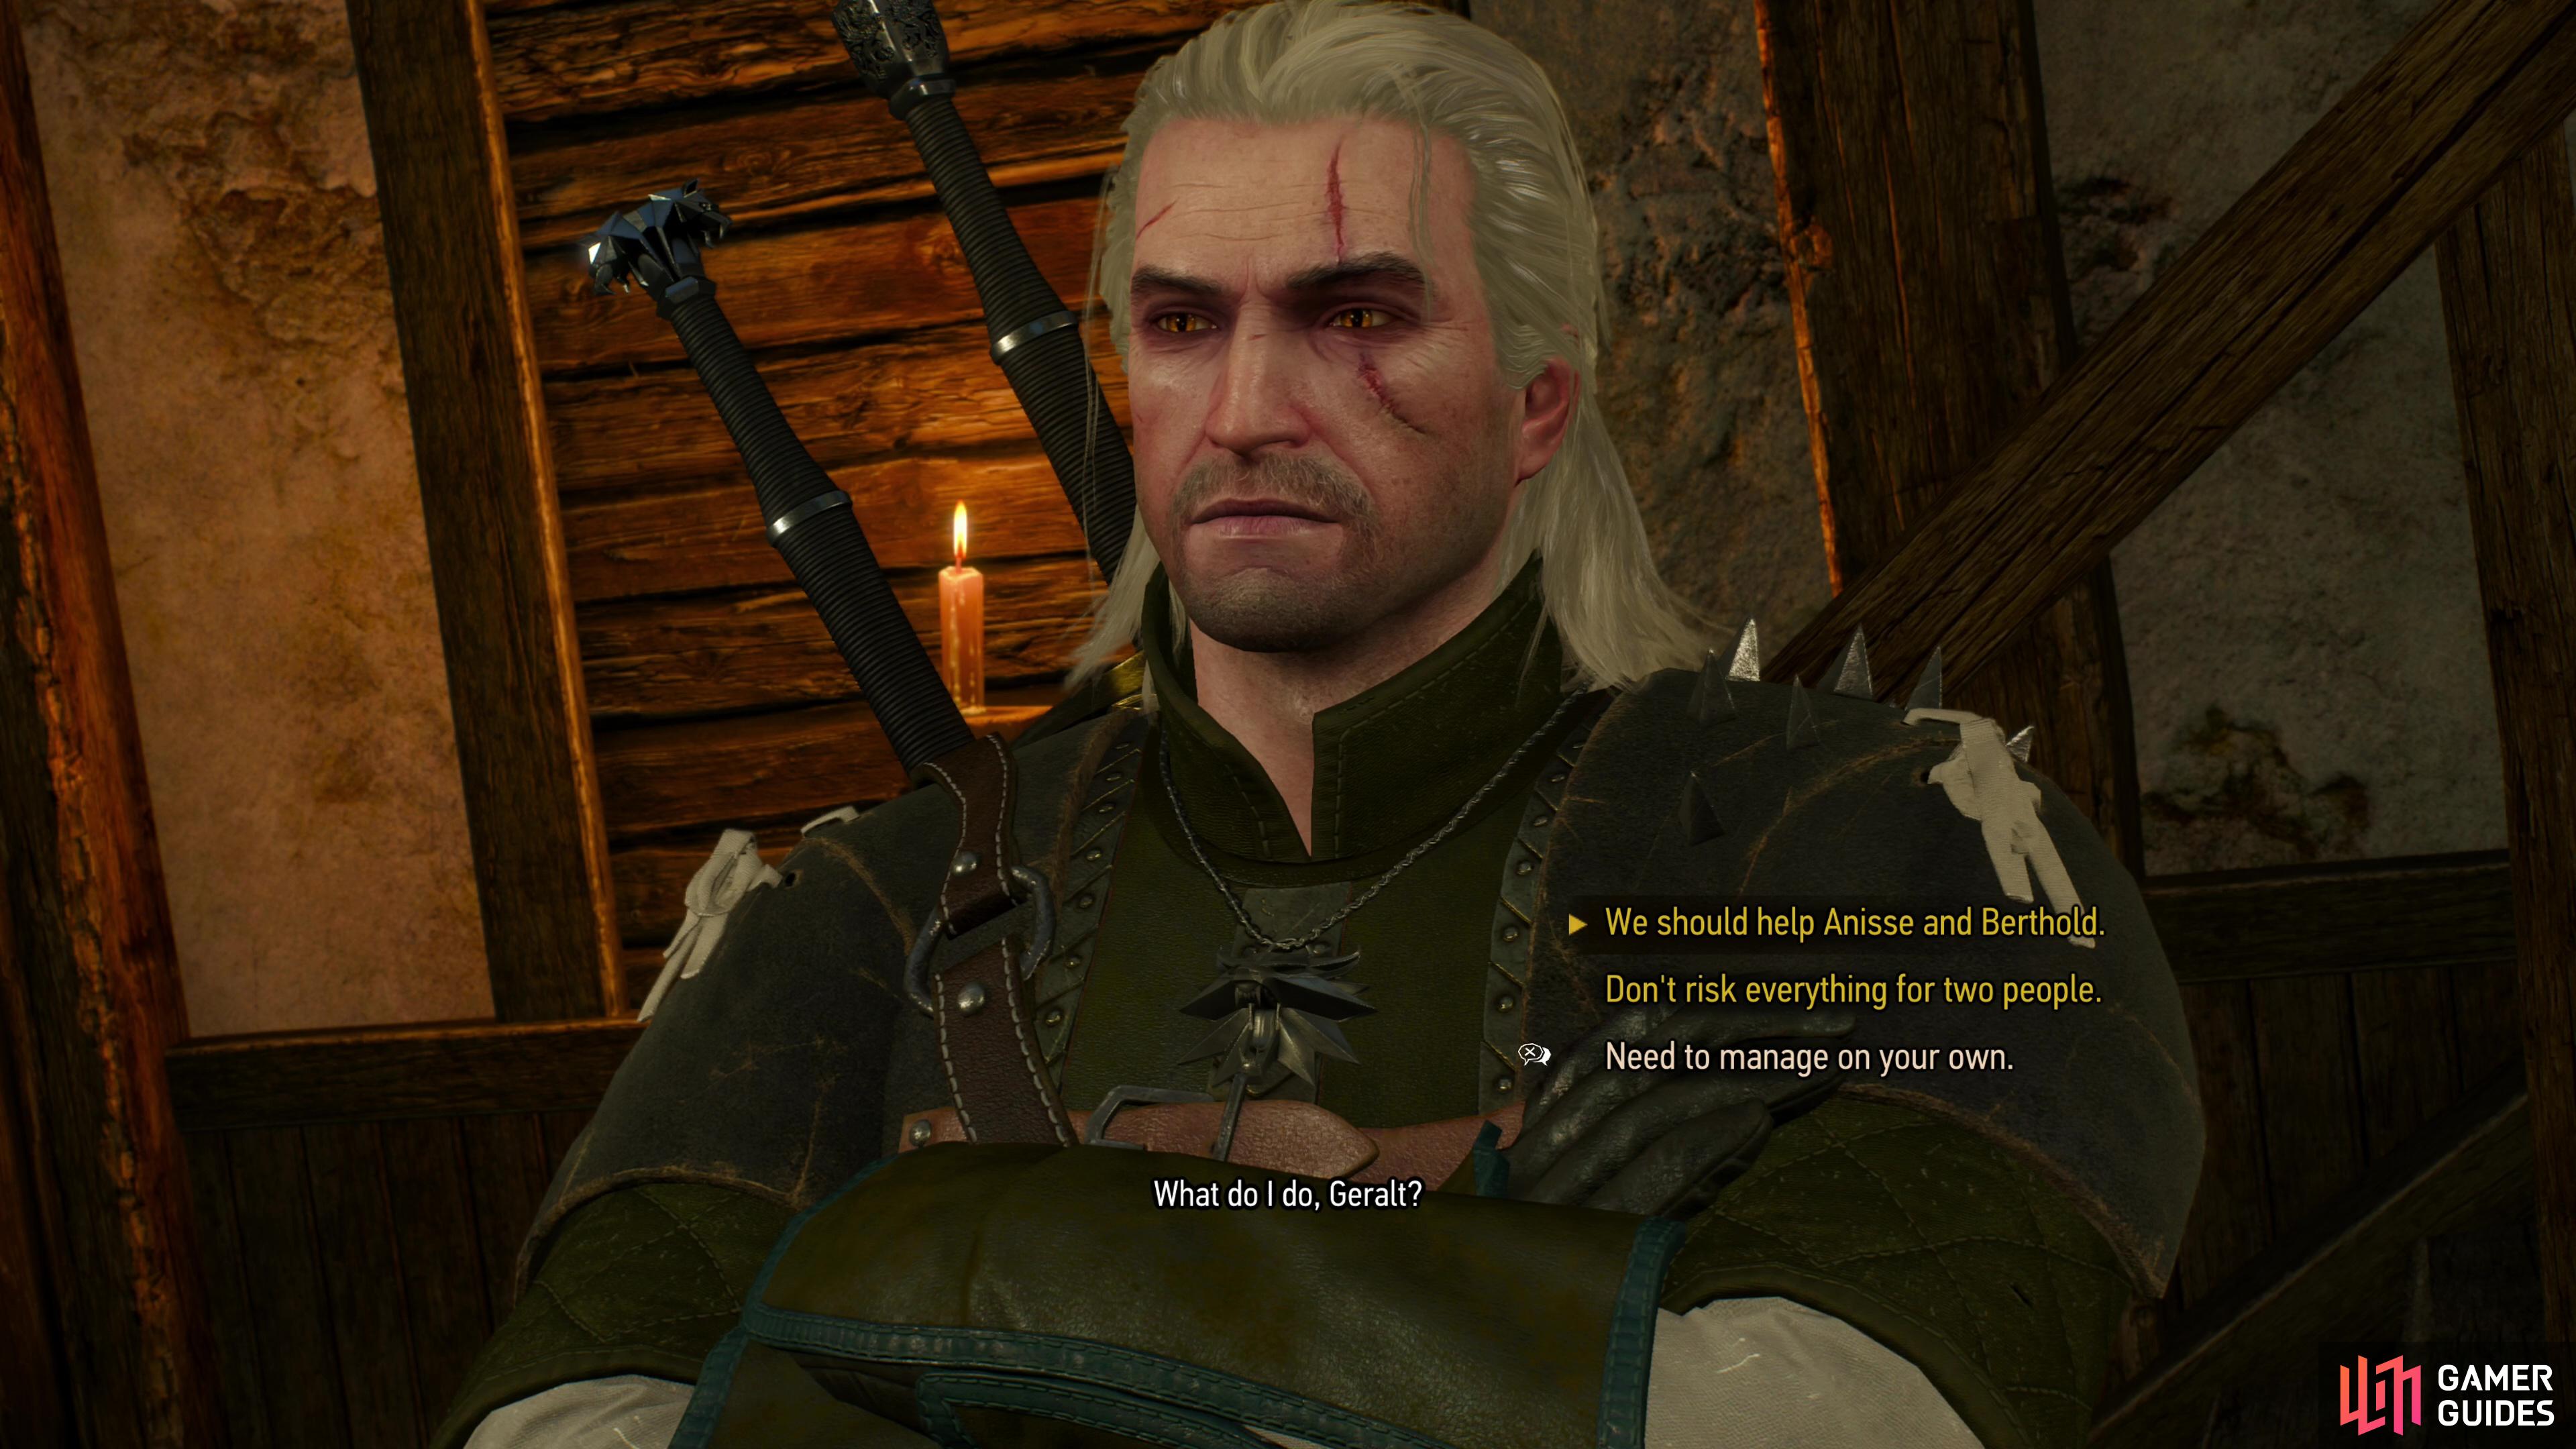
Choice: Rescue Berthold and Anisse
Work through Triss’s dialog and as long as you don’t outright refuse to help her you’ll be fine. Eventually she’ll bring up two tardy mages, Berthold and Anisse, and you’ll get two choices: abandon Berthold and Anisse by picking the option “Don’t risk everything for two people.” or put in the extra work to save them by selecting “We should help Anisse and Berthold.”. The quest will resolve just fine either way, but time is of the essence and there are no free rides - saving Berthold and Anisse will have consequences - check out the spoiler box below for details.
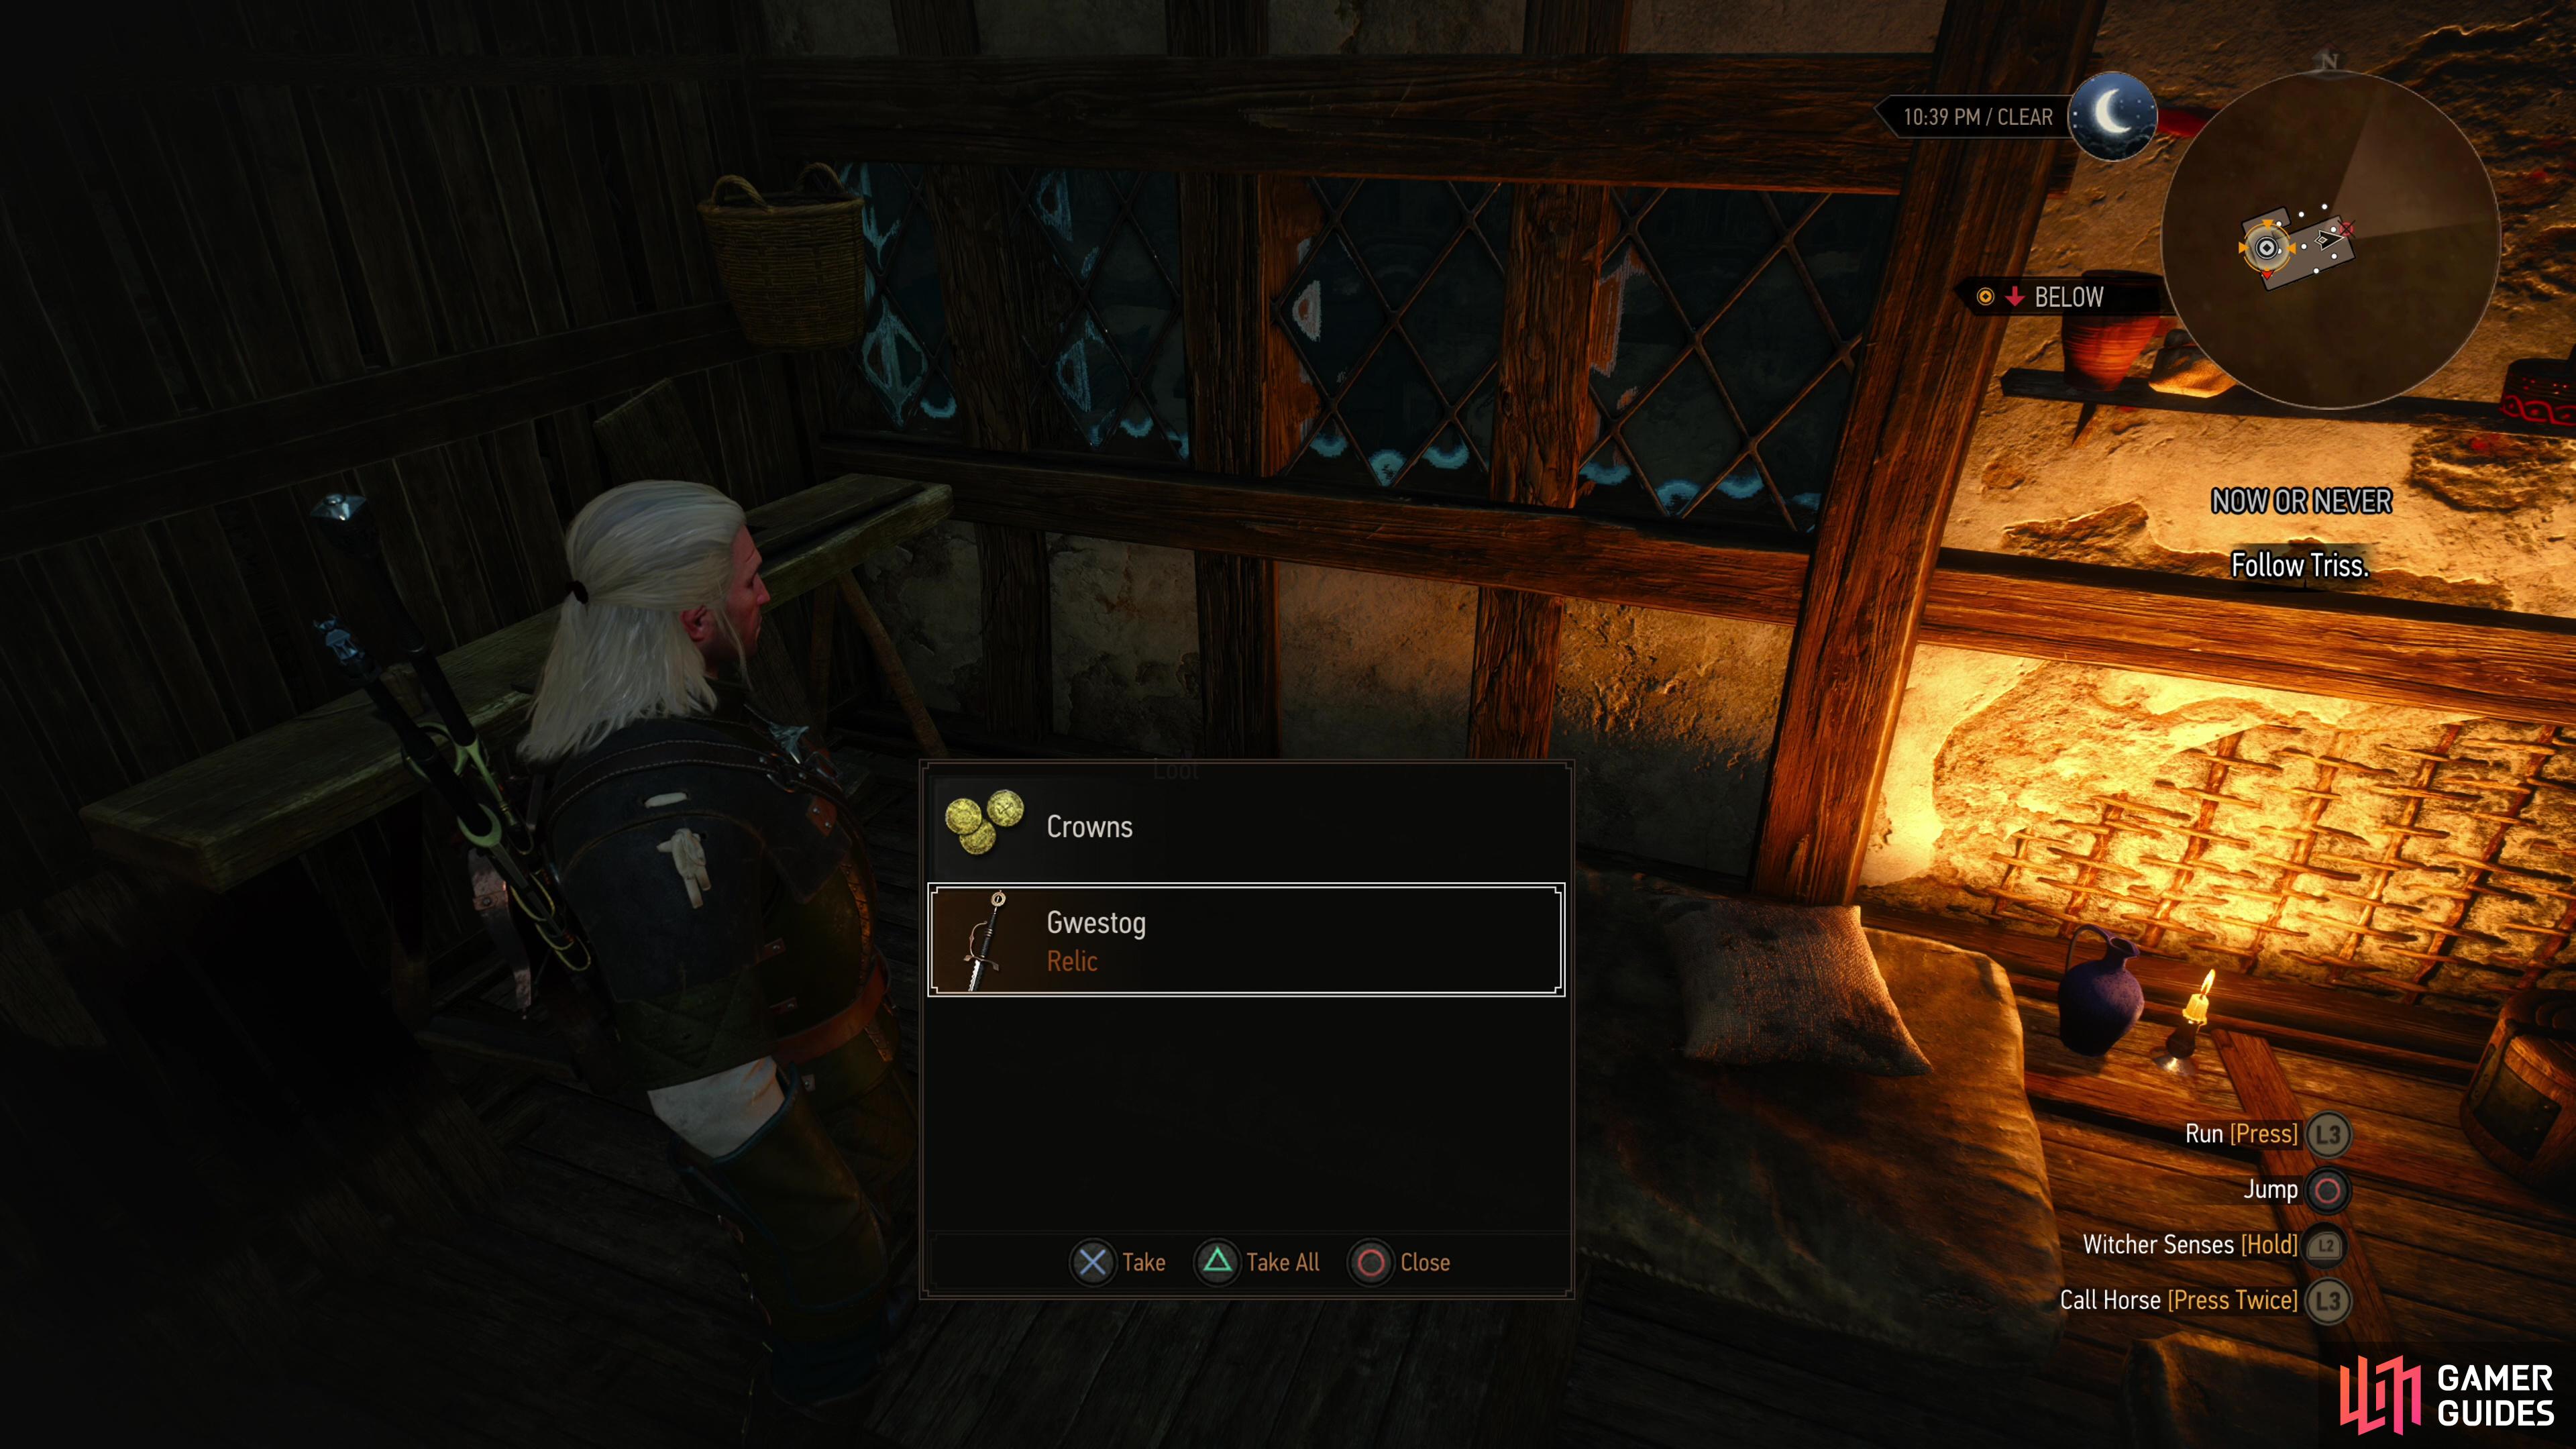
If you choose to rescue Berthold and Anisse, whether you’re successful or not, Olivier will die later on in the quest when you head to The Kingfisher. If you already won his unique Gwent card during Gwent: Playing Innkeepes, then Olivier is expendable as far as NPCs go - he serves no real gameplay purpose going forward. Even if you haven’t you can still get his unique card by searching the storage room to the east of the bar. Of course, Berthold and Anisse are two individuals, so you’ll be net saving an extra person from the Witch Hunters by rescuing them, and you’ll obtain the ![]() Gwestog steel sword, as well. All in all the downsides for rescuing Berthold and Anisse are minor to nonexistent, if you’ve completed Gwent: Playing Innkeepes.
Gwestog steel sword, as well. All in all the downsides for rescuing Berthold and Anisse are minor to nonexistent, if you’ve completed Gwent: Playing Innkeepes.
Whatever you pick, leave Triss’s hideout and once outside you’ll have to dispatch a Witch Hunter (Lv14) and two Temple Guards (Lv14), the latter of which may use crossbows. If you chose to abandon Berthold and Anisse you’ll head straight to The Kingfisher, just avoid a patrol of Witch Hunters along the way and you’ll make it without incident. Skip ahead to the header [Head to the Kingfisher].
::::: note: Witch Hunter Patrols
If you get caught by one of the Witch Hunter patrols you’re meant to hide from you’ll get some dialog that ends in a fight with several Witch Hunters (Lv14). It’s pretty hard to get caught by these patrols, however, as you pretty much have to walk right into them, and there aren’t really any consequences one way or another.
:::::
Rescue Berthold and Anisse
On the other hand if you attempt to rescue Berthold and Anisse you’ll need to avoid a patrol en route to their house. Once at the house head upstairs and you’ll find that some Witch Hunters have cornered the two mages. A fight is inevitable and the two mages are astonishingly fragile - use ![]() Igni immediately to distract the Witch Hunters by inflicting a light case of burning, then quickly cut them down. After the fight, Berthold will have the gall to complain - hit him with
Igni immediately to distract the Witch Hunters by inflicting a light case of burning, then quickly cut them down. After the fight, Berthold will have the gall to complain - hit him with ![]() Axii to get his ass moving, then loot a chest to find Gwestog, a relic-quality steel sword. Leave the house and escort the mages to The Kingfisher, avoiding another patrol as you go.
Axii to get his ass moving, then loot a chest to find Gwestog, a relic-quality steel sword. Leave the house and escort the mages to The Kingfisher, avoiding another patrol as you go.
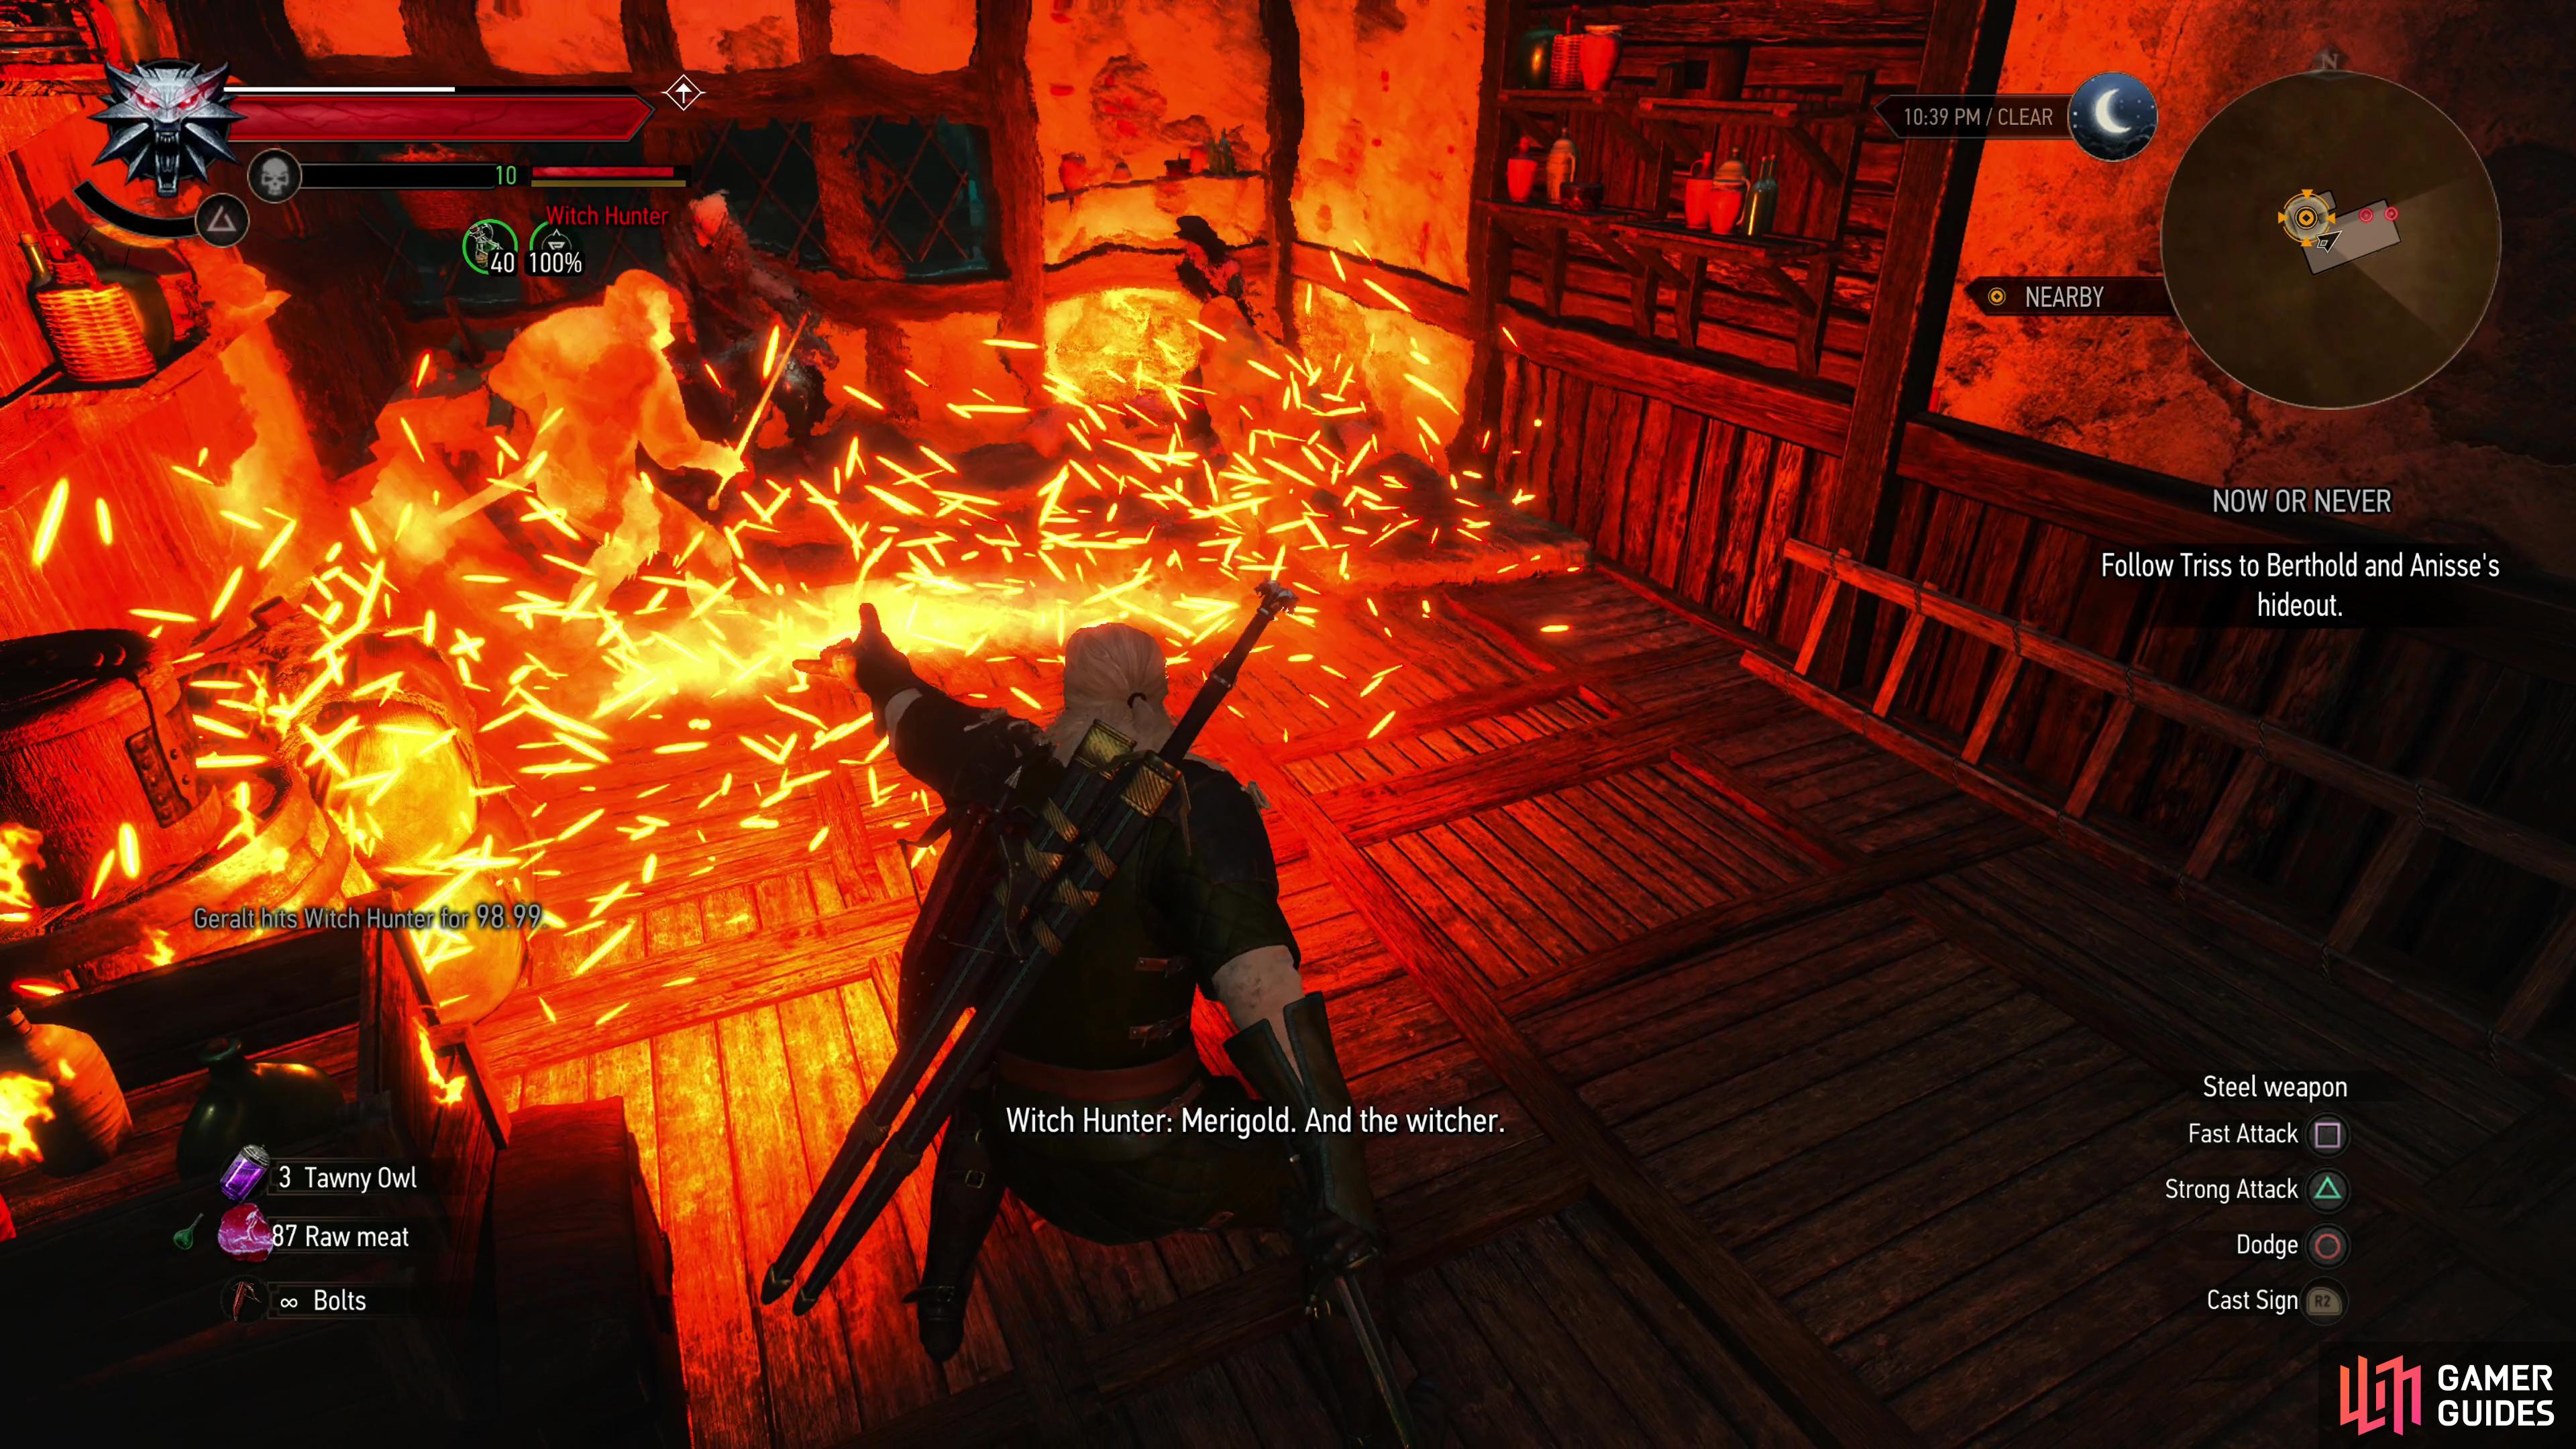
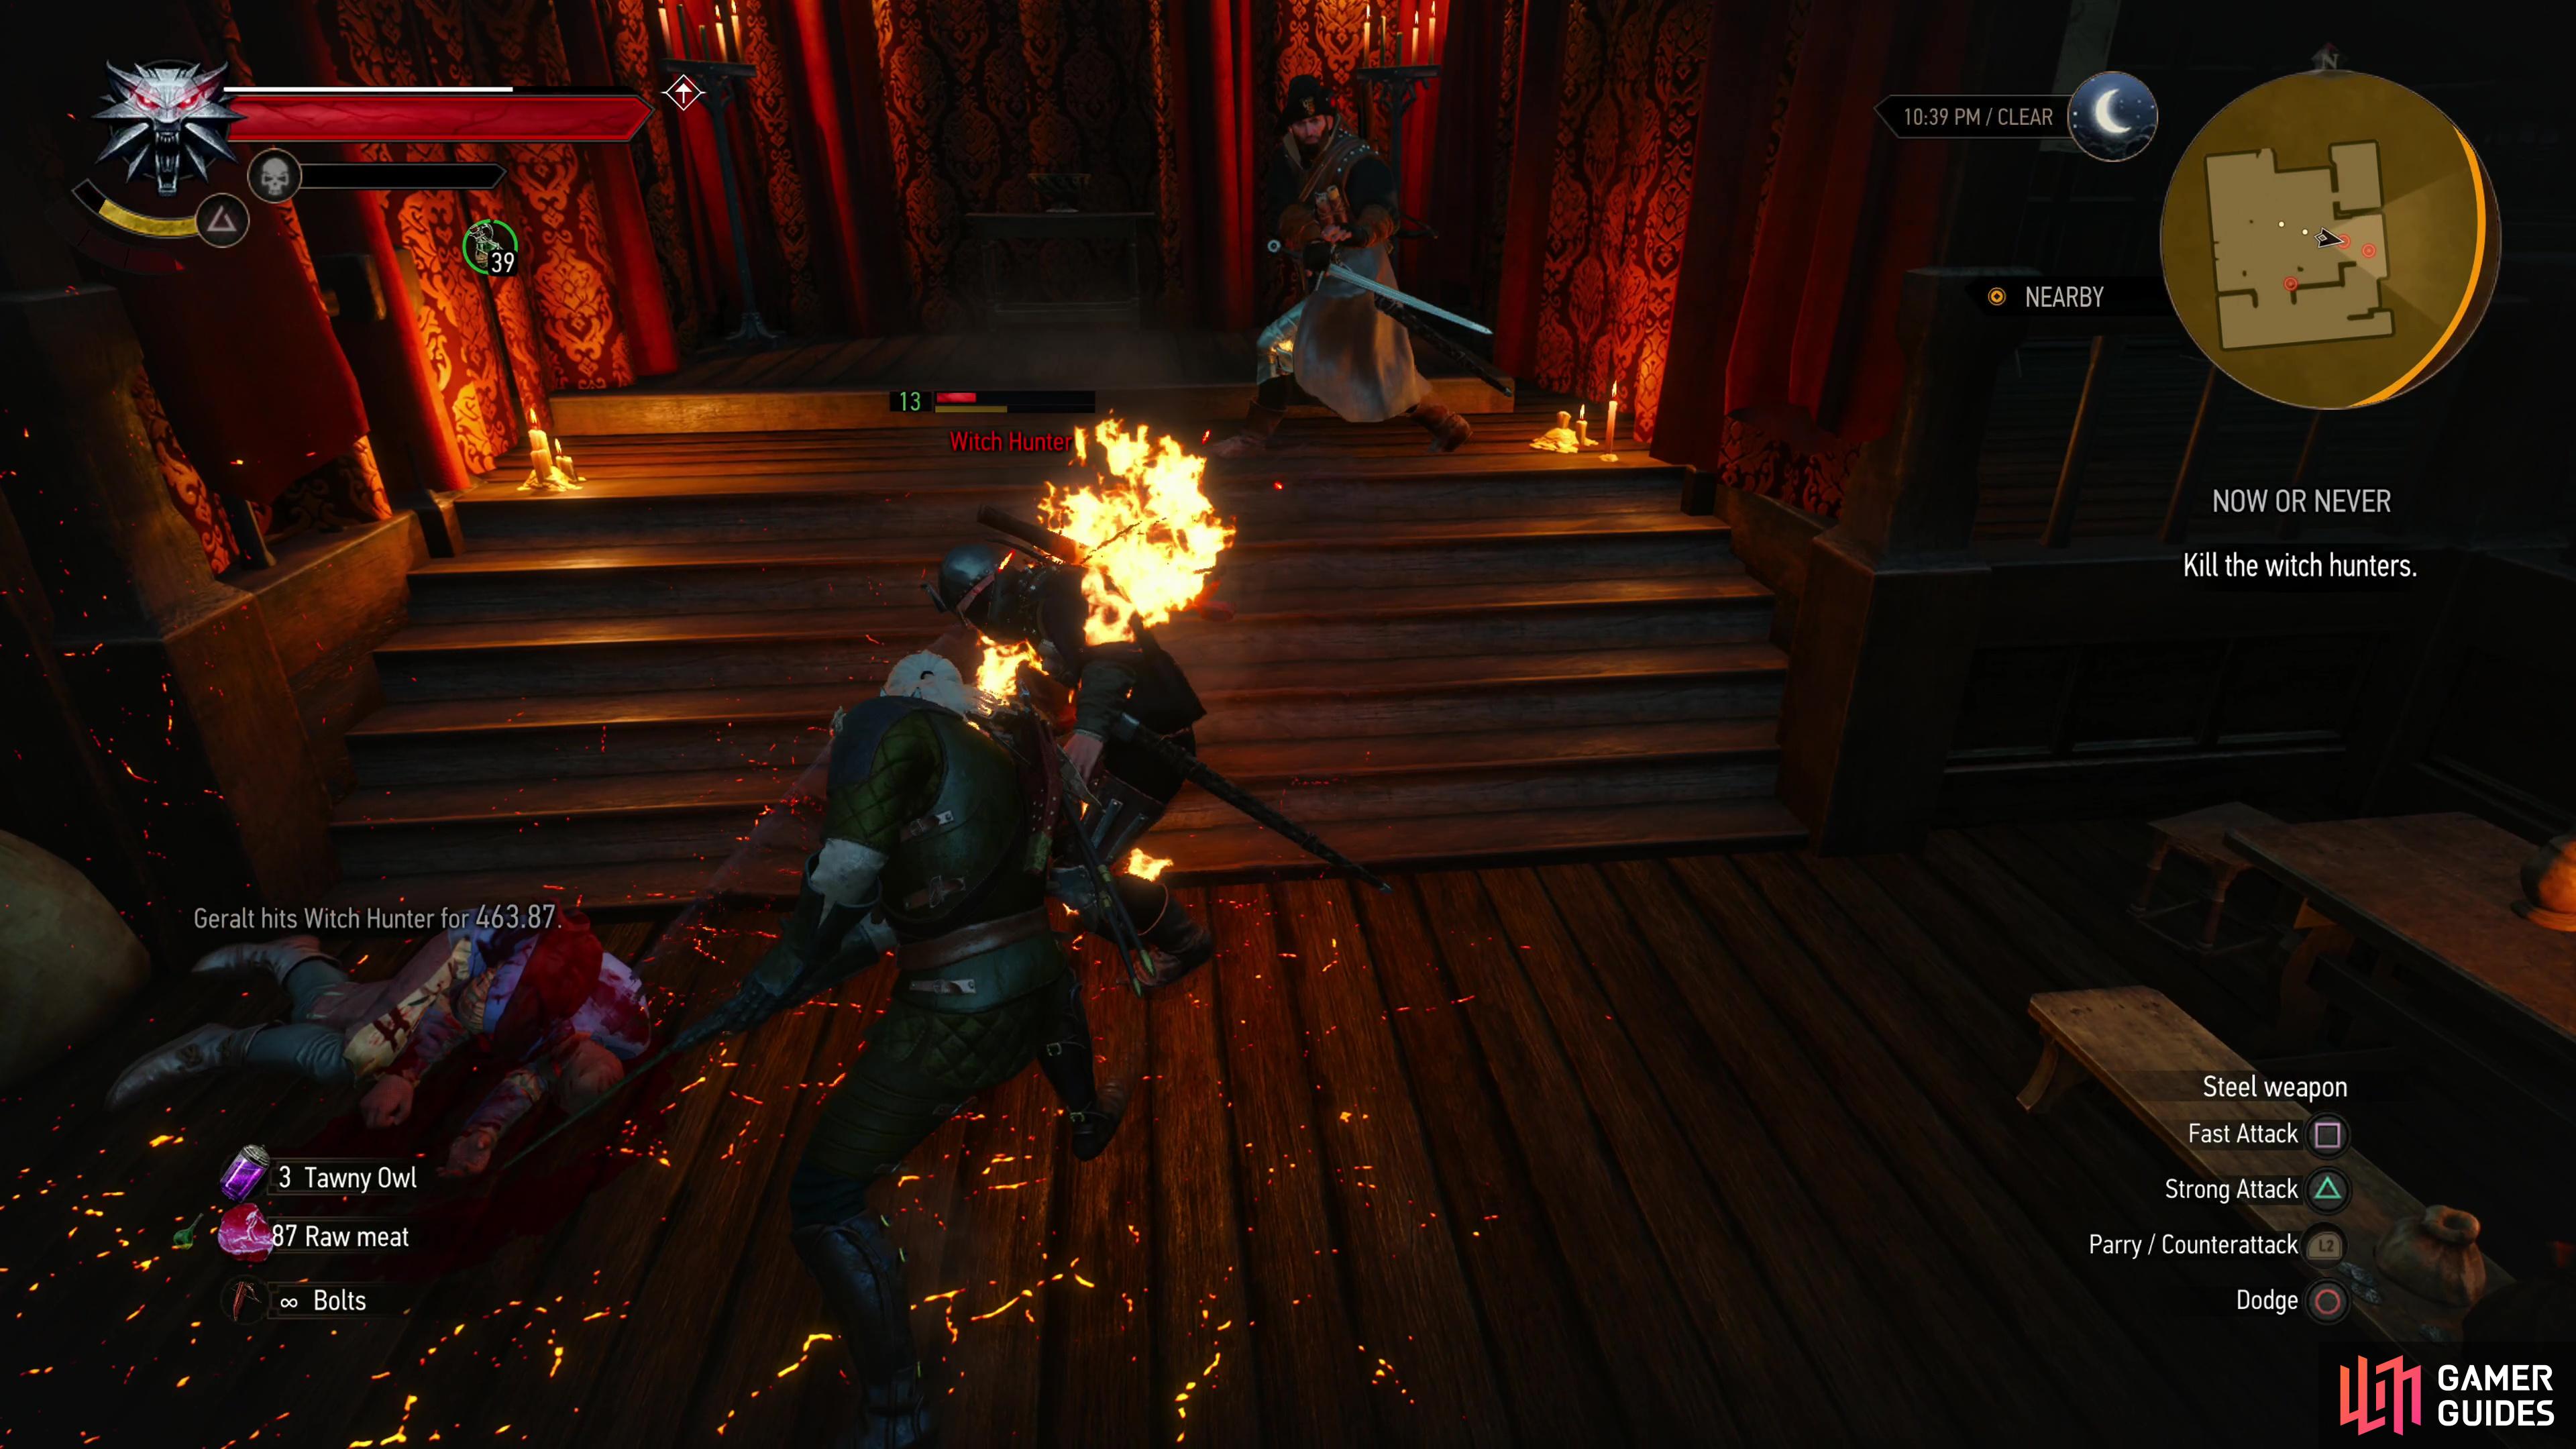
(1 of 3) If you attempt to rescue Berthold and Anisse you’ll need to be quick - Igni should distract the Witch Hunters long enough for you to cut them down.
Head to the Kingfisher
Whether you saved Berthold and Anisse or not you’ll have to avoid a Witch Hunter patrol, and if you ignored Berthold and Anisse you will arrive at the tavern quickly enough to avoid further complications. Follow Olivier into the cellar and after much chatter you’ll resolve to clear the way through the sewers. If you rescued Berthold and Anisse, however, the delay will prove fatal for Olivier and you’ll have to cut down some Witch Hunters (Lv13-14) in The Kingfisher, including some armed with crossbows. In this case Triss will comment on Olivier’s demise before heading down into the cellar, where the quest will proceed normally, with Geralt being charged with clearing the sewers so the mages can escape to the harbor.
Find a Path Through the Sewers
Loot the cellar, then head through a gate door and down some stairs to reach the sewer, where Triss will join you again. There’s a fair bit of sewer-crawling up ahead, but much of it consists of killing ![]() Drowners and looting the various containers you find lying around. Triss will be around to assist with her usual firebolt spells and the odd charm spell, drawing aggro and keeping enemies off balance.
Drowners and looting the various containers you find lying around. Triss will be around to assist with her usual firebolt spells and the odd charm spell, drawing aggro and keeping enemies off balance.
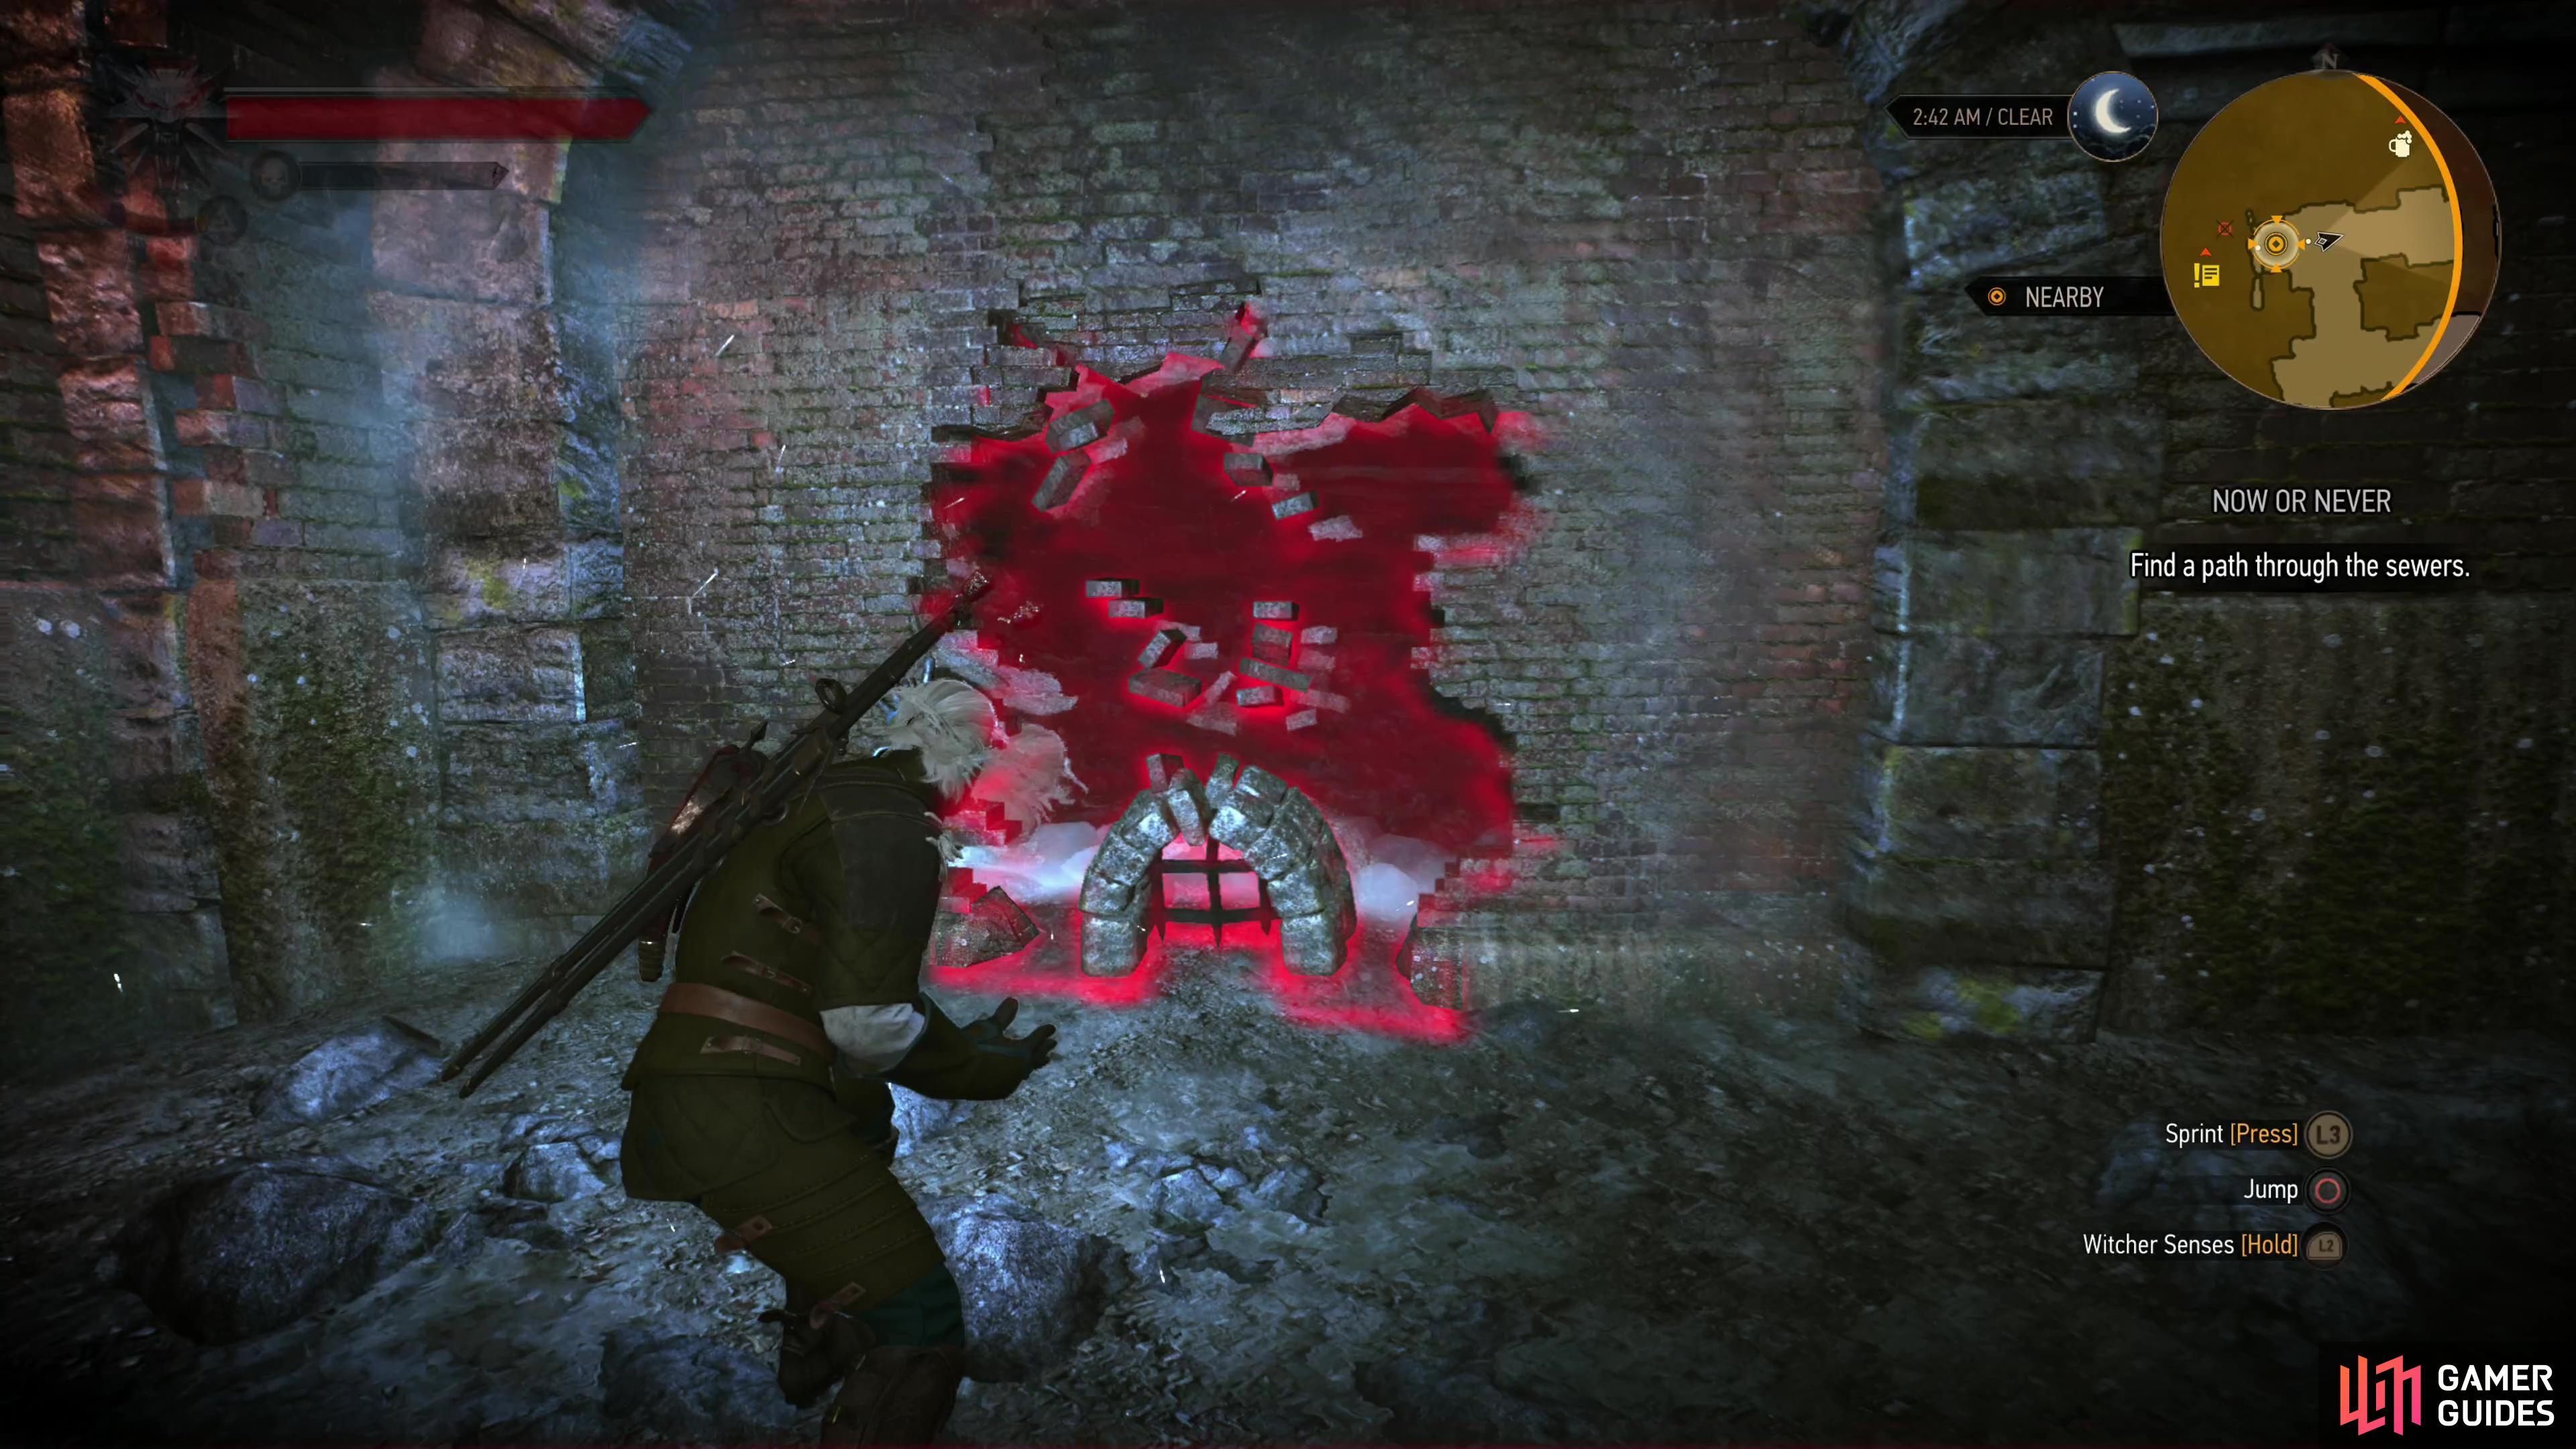
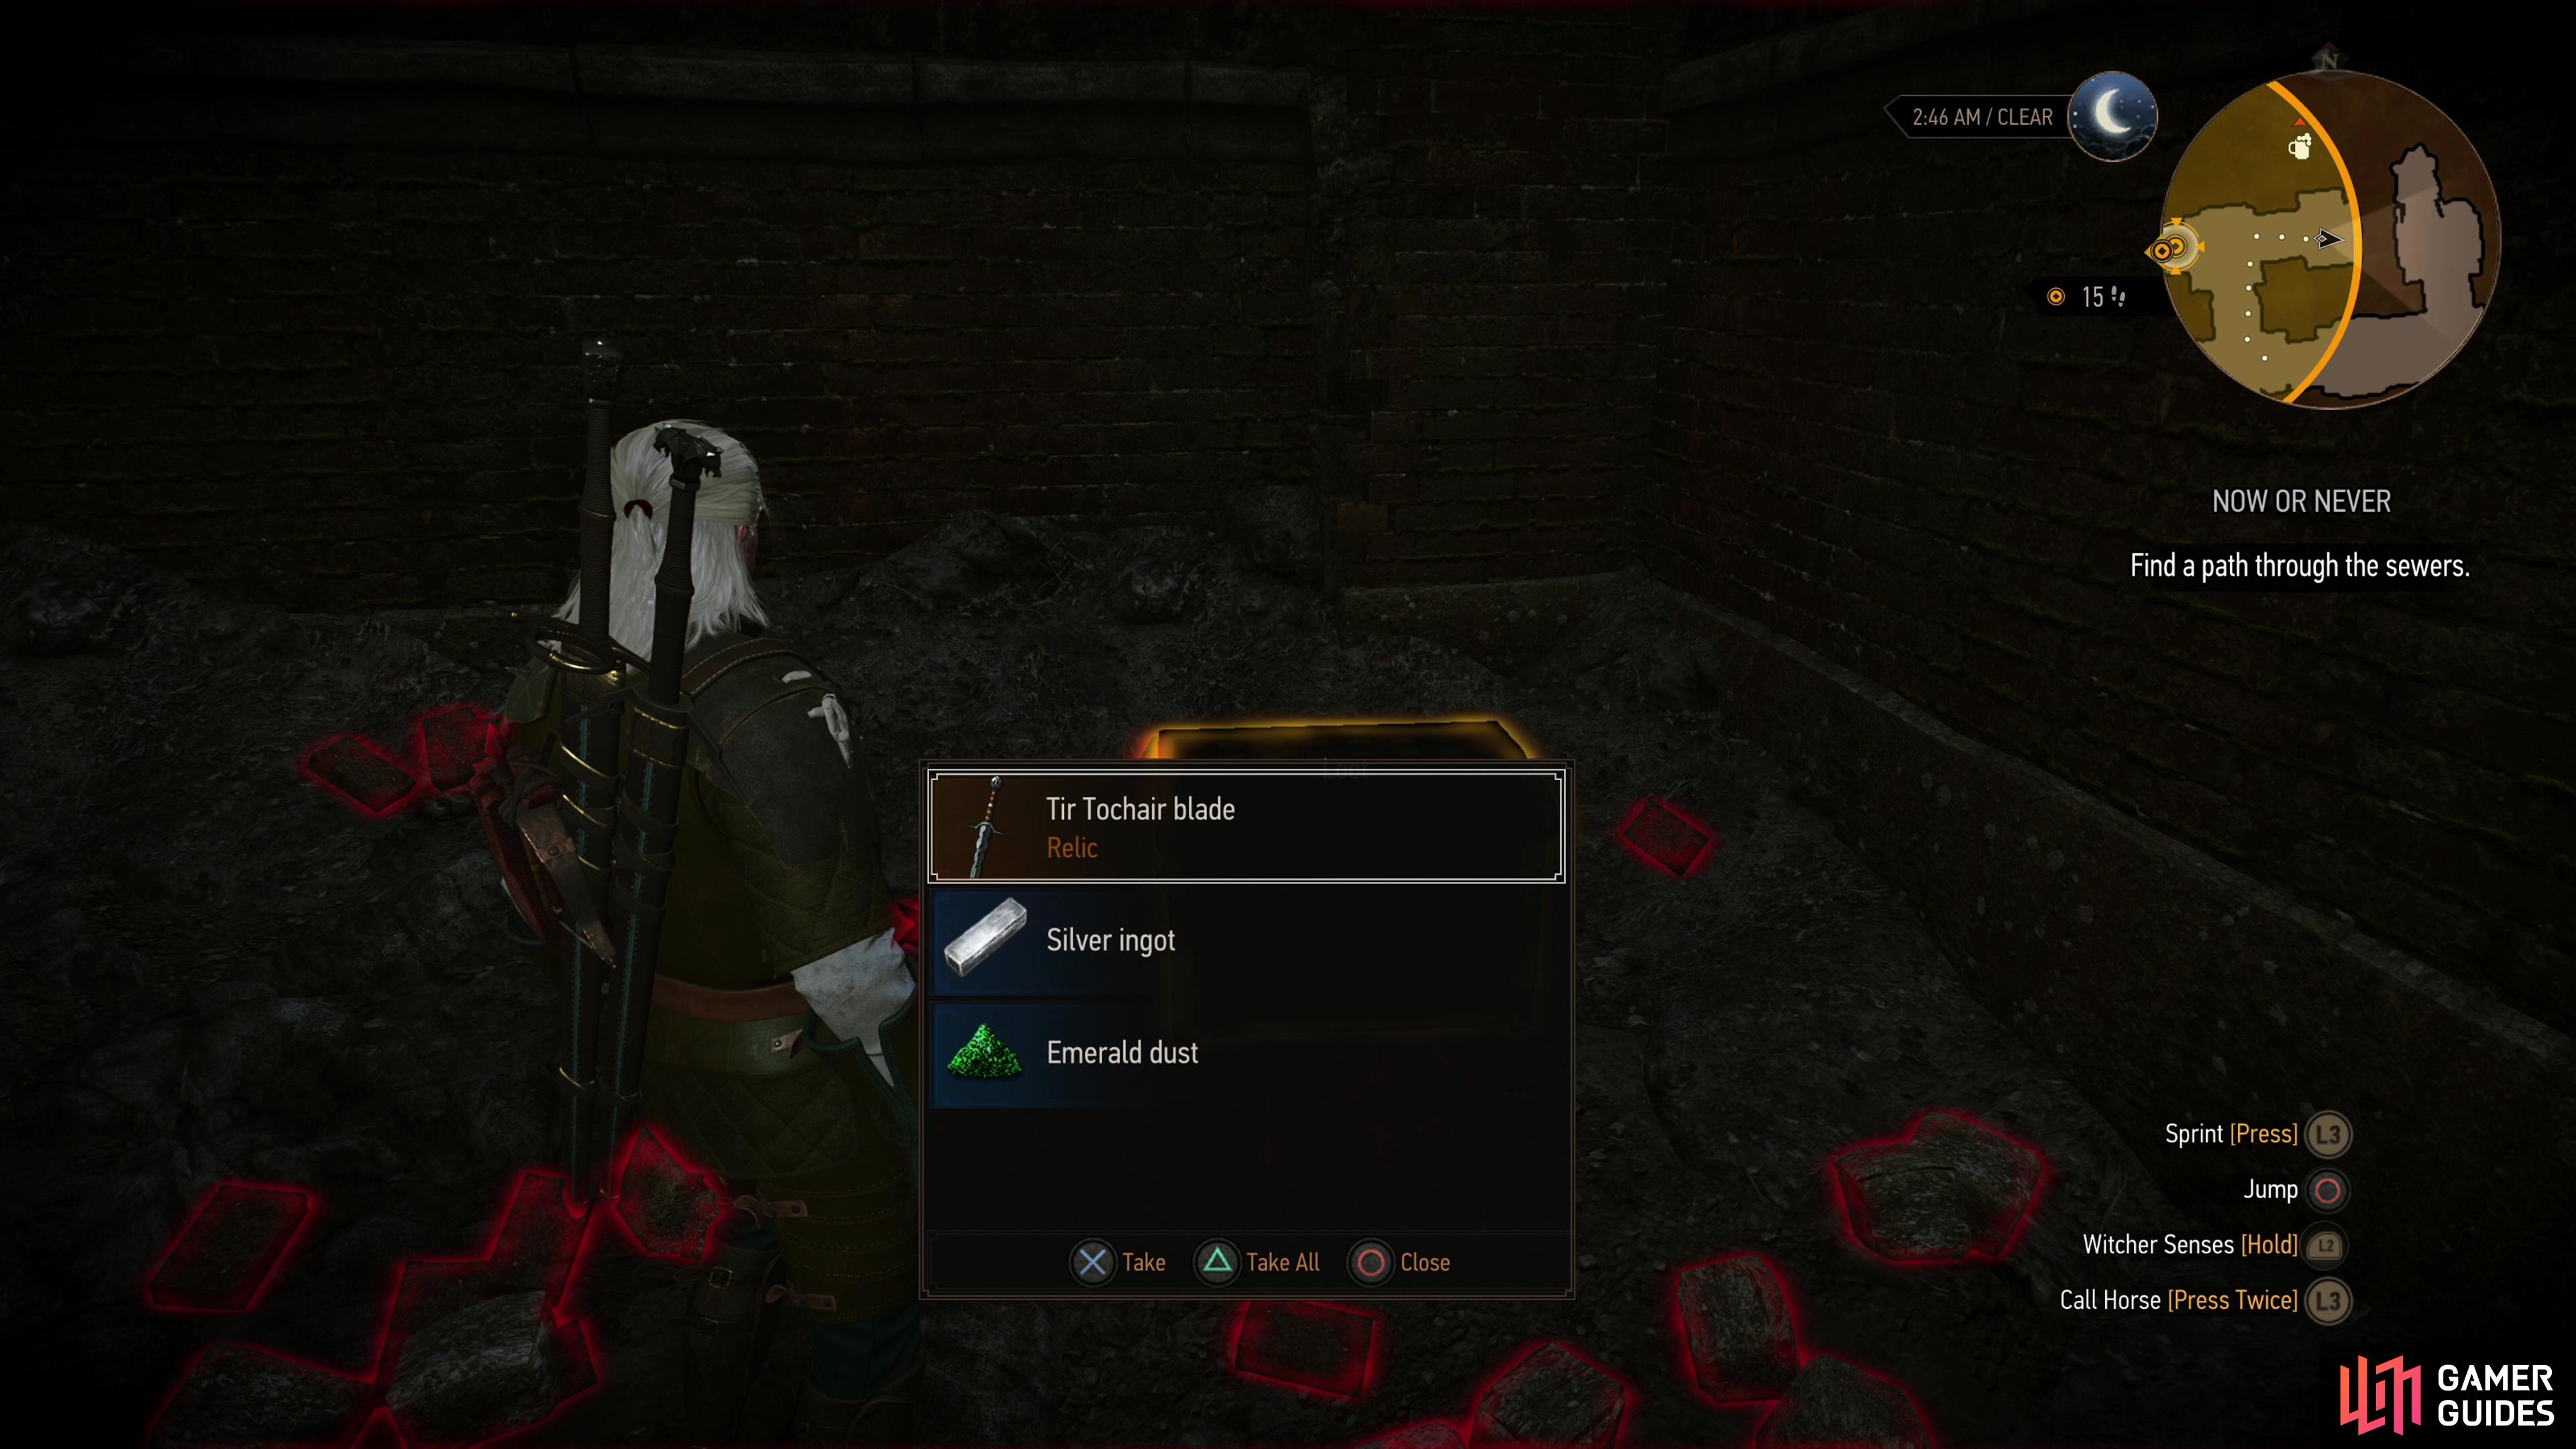
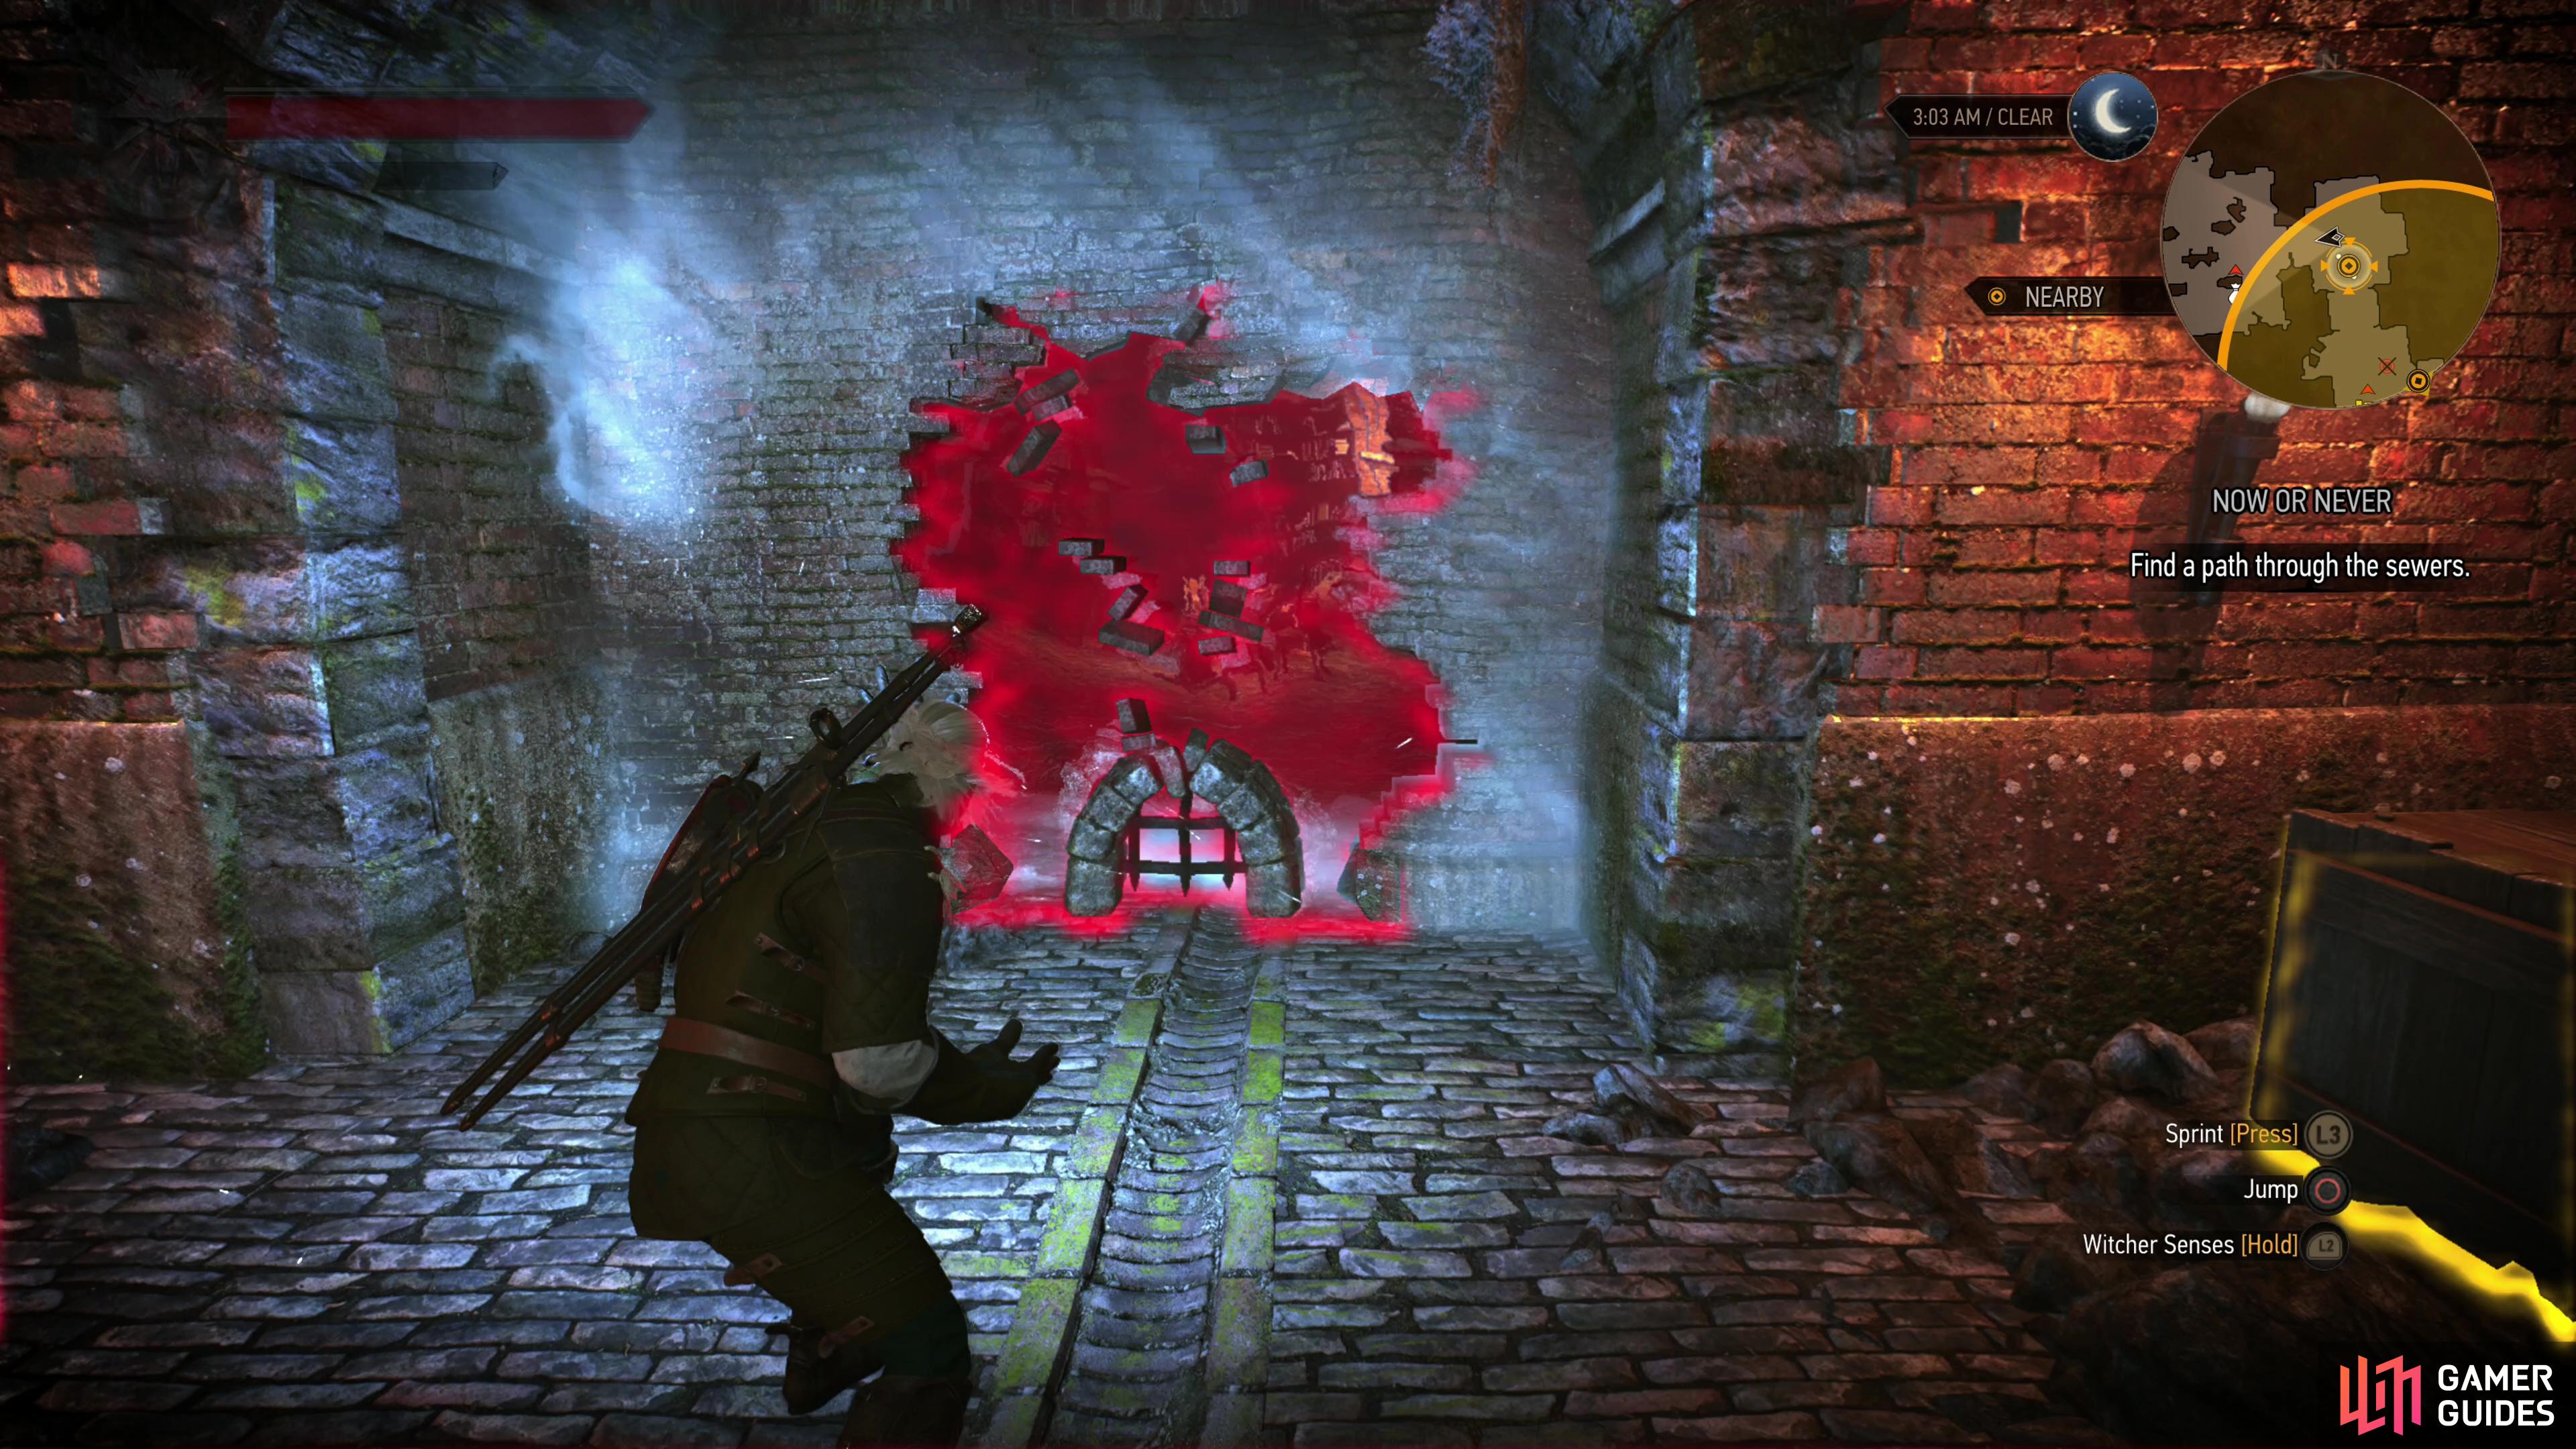
Reach the sewers and follow the linear tunnels ahead until you find your first foes, a pair of Mucknixers (Lv15). Kill them, loot a chest on some scaffolding to the south, then head down some stairs to the north, kill some more Mucknixers (Lv15) through a metal gate to the west, but before you explore off to the west use your Witcher senses to find that the wall to the east is weak. Knock it down with ![]() Aard and search the small room beyond to find a chest. After you’re done search the secret chamber, head into the room past the gate where you killed your second batch of Mucknixers and loot the containers strewn about, then head south to find some crates you can loot at a dead end before backtracking and going north.
Aard and search the small room beyond to find a chest. After you’re done search the secret chamber, head into the room past the gate where you killed your second batch of Mucknixers and loot the containers strewn about, then head south to find some crates you can loot at a dead end before backtracking and going north.
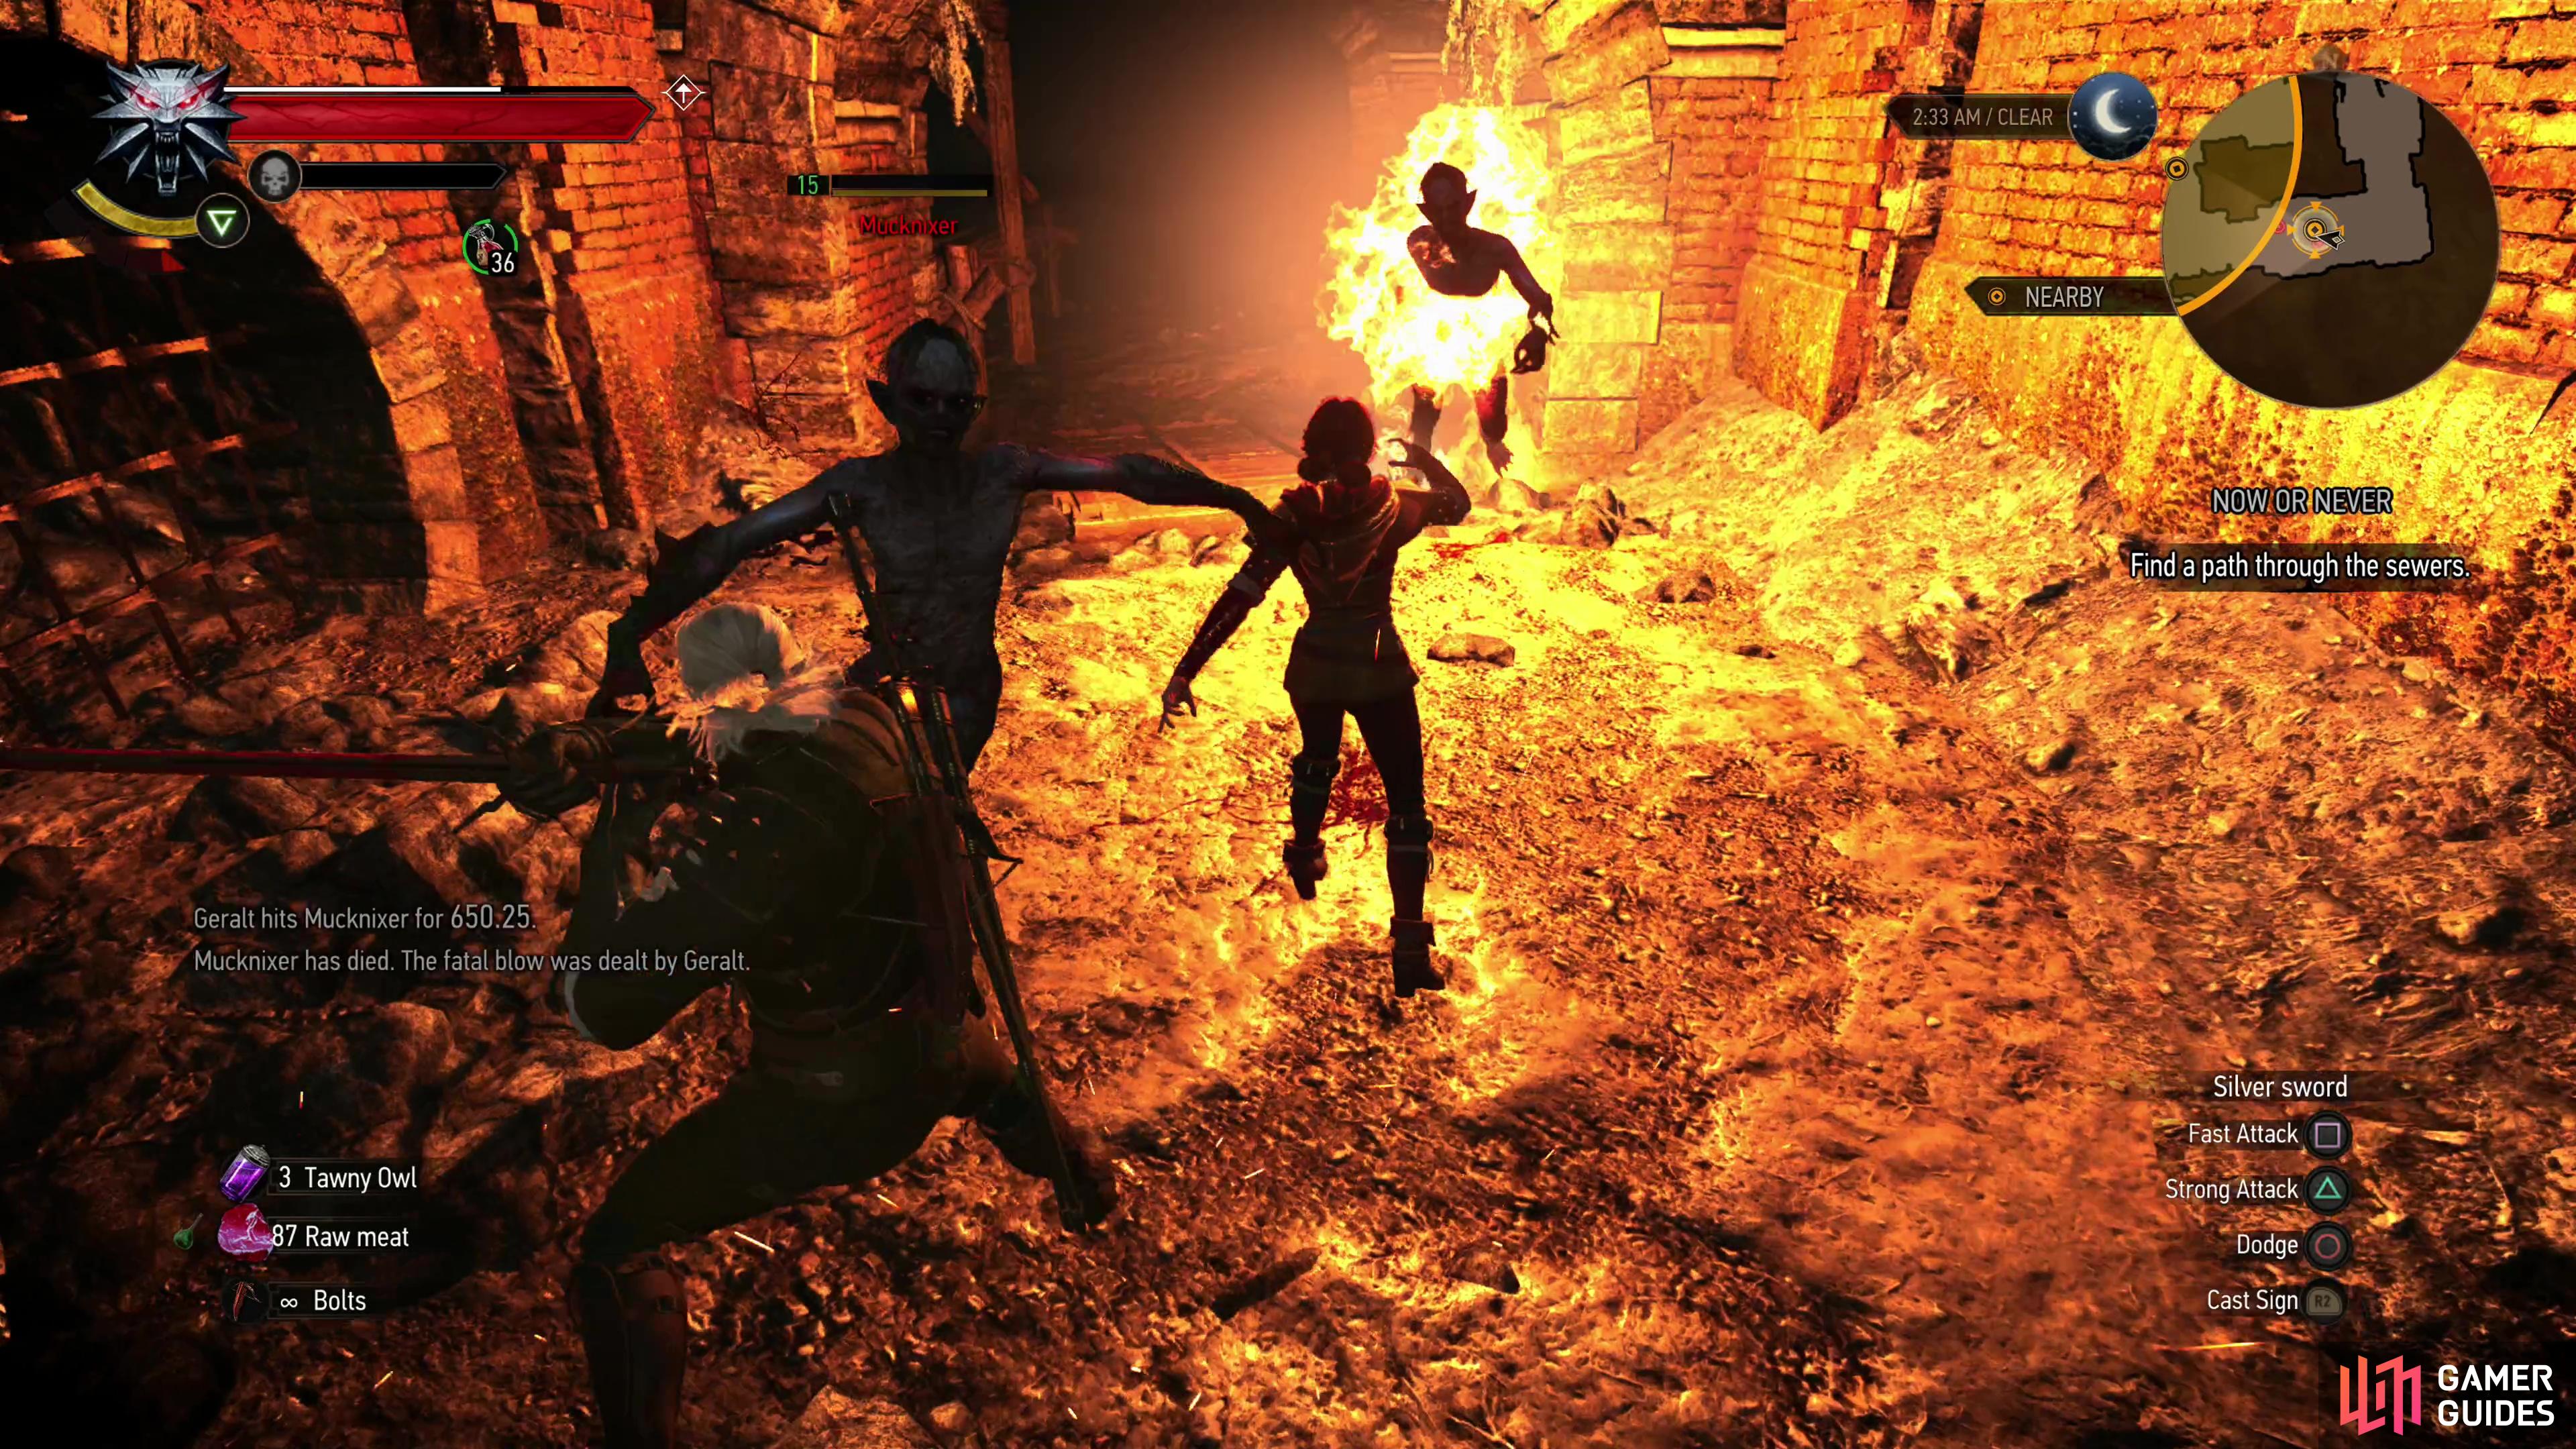
(1 of 3) The sewers are crawling with Mucknixers - an advanced form of Drowner.
Pass Through the Secret Library
Triss will throw a tantrum and start to give into despair before Geralt tells her the score. Use your Witcher senses to note that the brick wall to the west is weak. Aard a hole in the wall and explore the mysteriously well-furnished library beyond. Loot the books if you wish - there’s nothing unique down here, despite what Triss says - then head to the southwestern corner of the library to find another weak wall you can Aard through.
Cross the Rats’ Feeding Ground
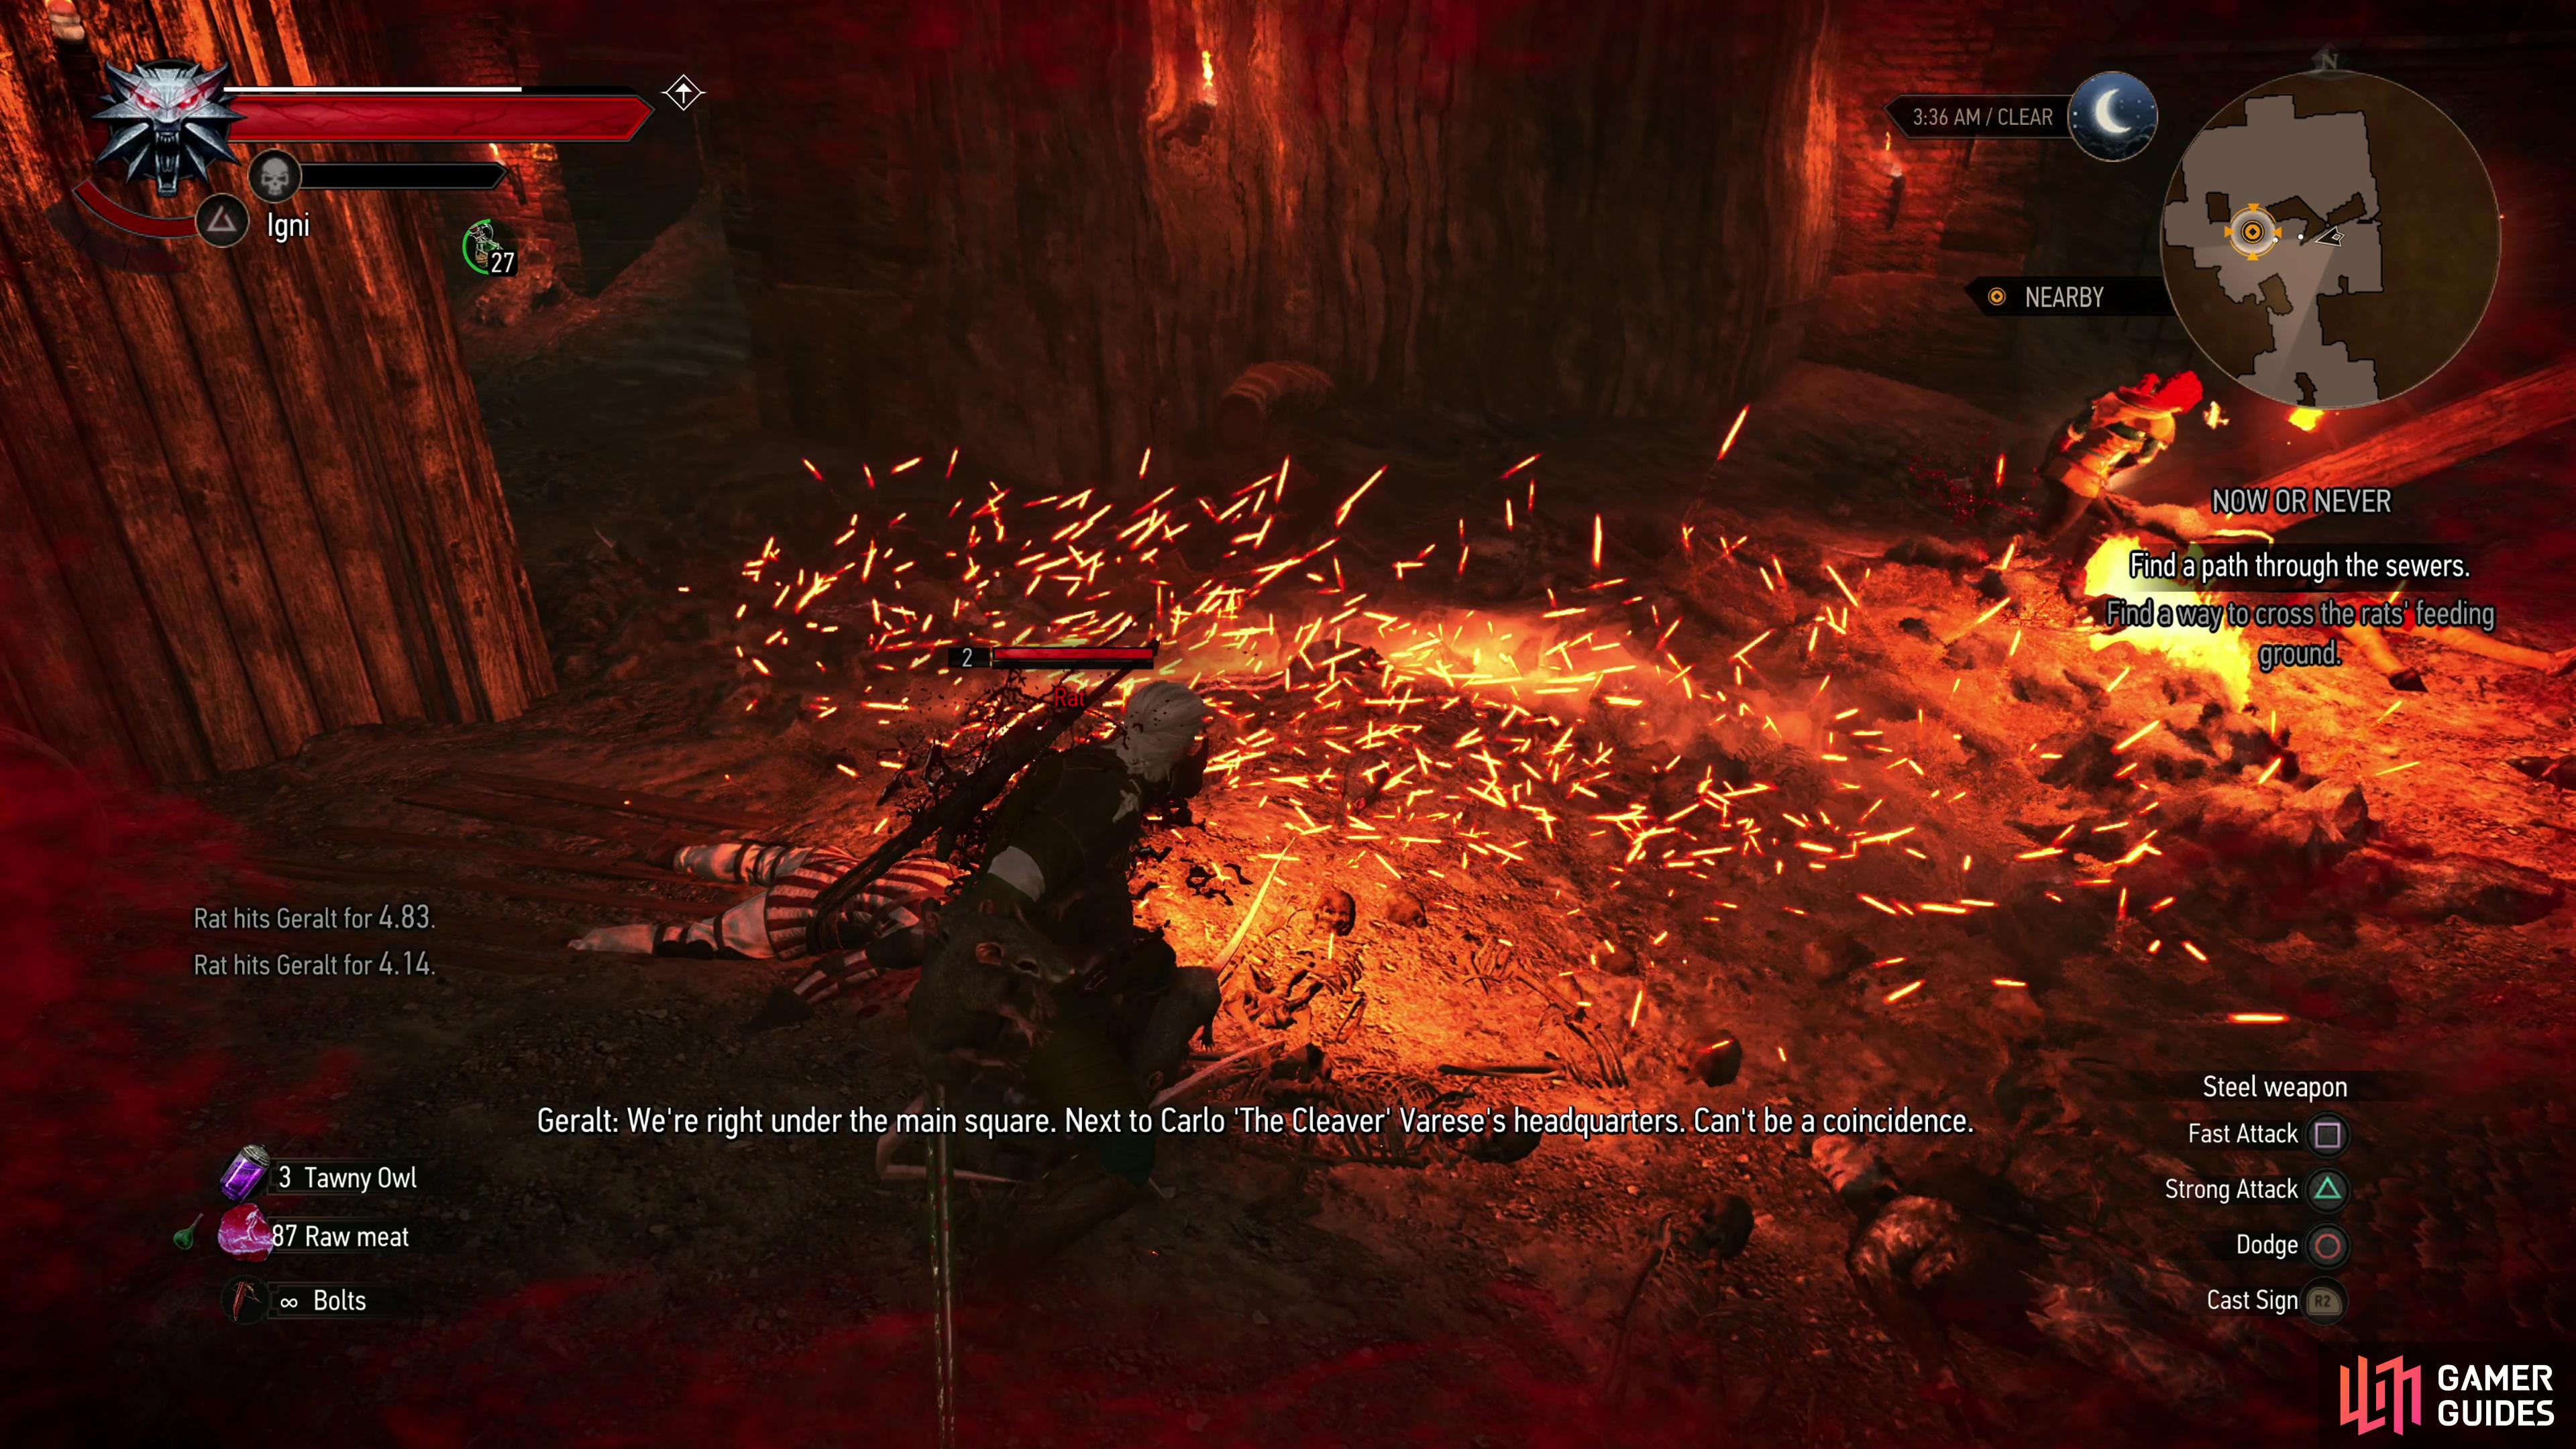
Once through the library, loot a chest to the east then turn west and kill another trio of Mucknixers (Lv15), then go through some metal gates and down some stairs, then through another gate door to reach a large chamber filled with rats. Descend some wooden stairs to reach the bottom of the chamber and dispatch the horde of Rats (Lv2) you find - they’re not much in the way of threats, and a single well-aimed Igni can roast most of them. Loot the skeletons to recover some ![]() Florens, then follow Triss to the south, up another flight of stairs and through a metal door to the east. On the way you can find a Crumpled Letter on a corpse which will confirm Triss and Geralt’s suspicions about the corpses - reminder to never take a loan from
Florens, then follow Triss to the south, up another flight of stairs and through a metal door to the east. On the way you can find a Crumpled Letter on a corpse which will confirm Triss and Geralt’s suspicions about the corpses - reminder to never take a loan from ![]() Cleaver.
Cleaver.
(1 of 2) You’ll have a hidden library behind another Aardable wall,
You’ll have a hidden library behind another Aardable wall, (left), after which you’ll descend into a pit full of hungry rats - Igni will suffice here. (right)
Kill the Katakan
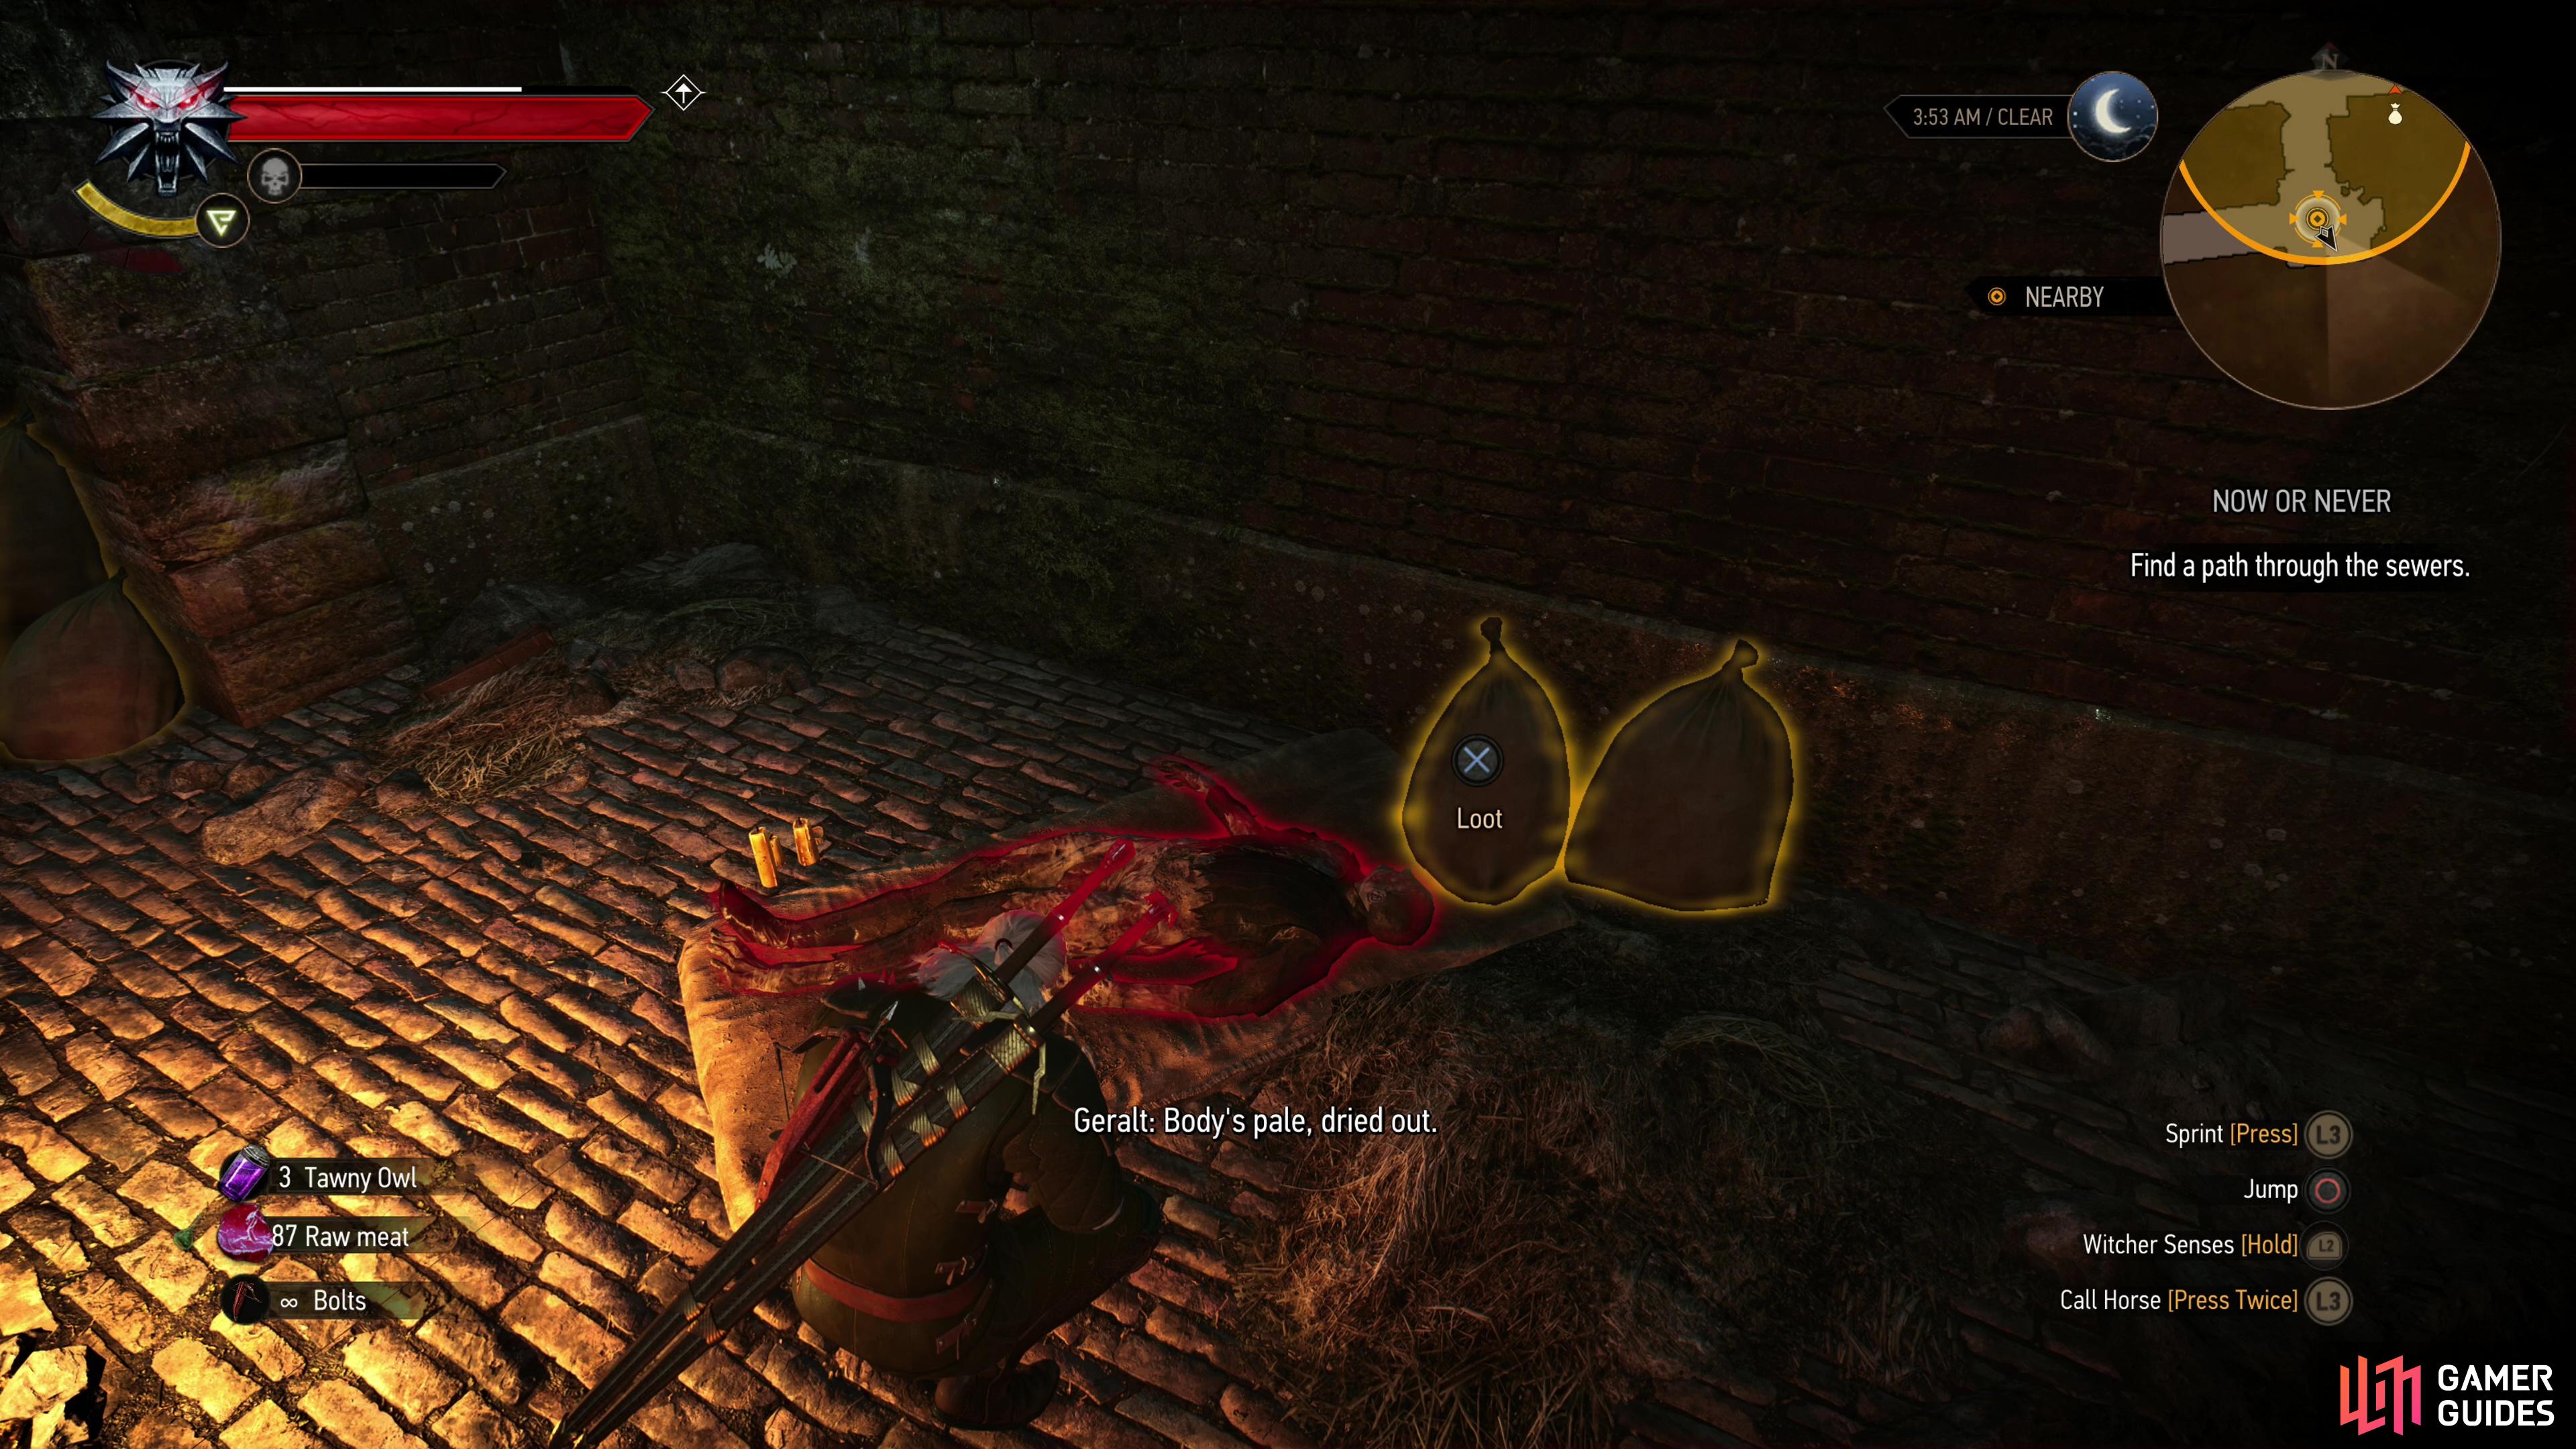
Eventually you’ll reach a fork at a small square chamber. Loot it and if you head upstairs to the east you’ll find a small room occupied by another trio of Mucknixers.(Lv15), this is a dead end, but if you kill them you can loot their chamber. When you’re done, backtrack to the lower room to the west and head south this time to find another chamber full of containers yielding valuable alchemical and crafting components. Loot them and use your Witcher senses to find a corpse on a mattress. A corpse which has been drained of blood.
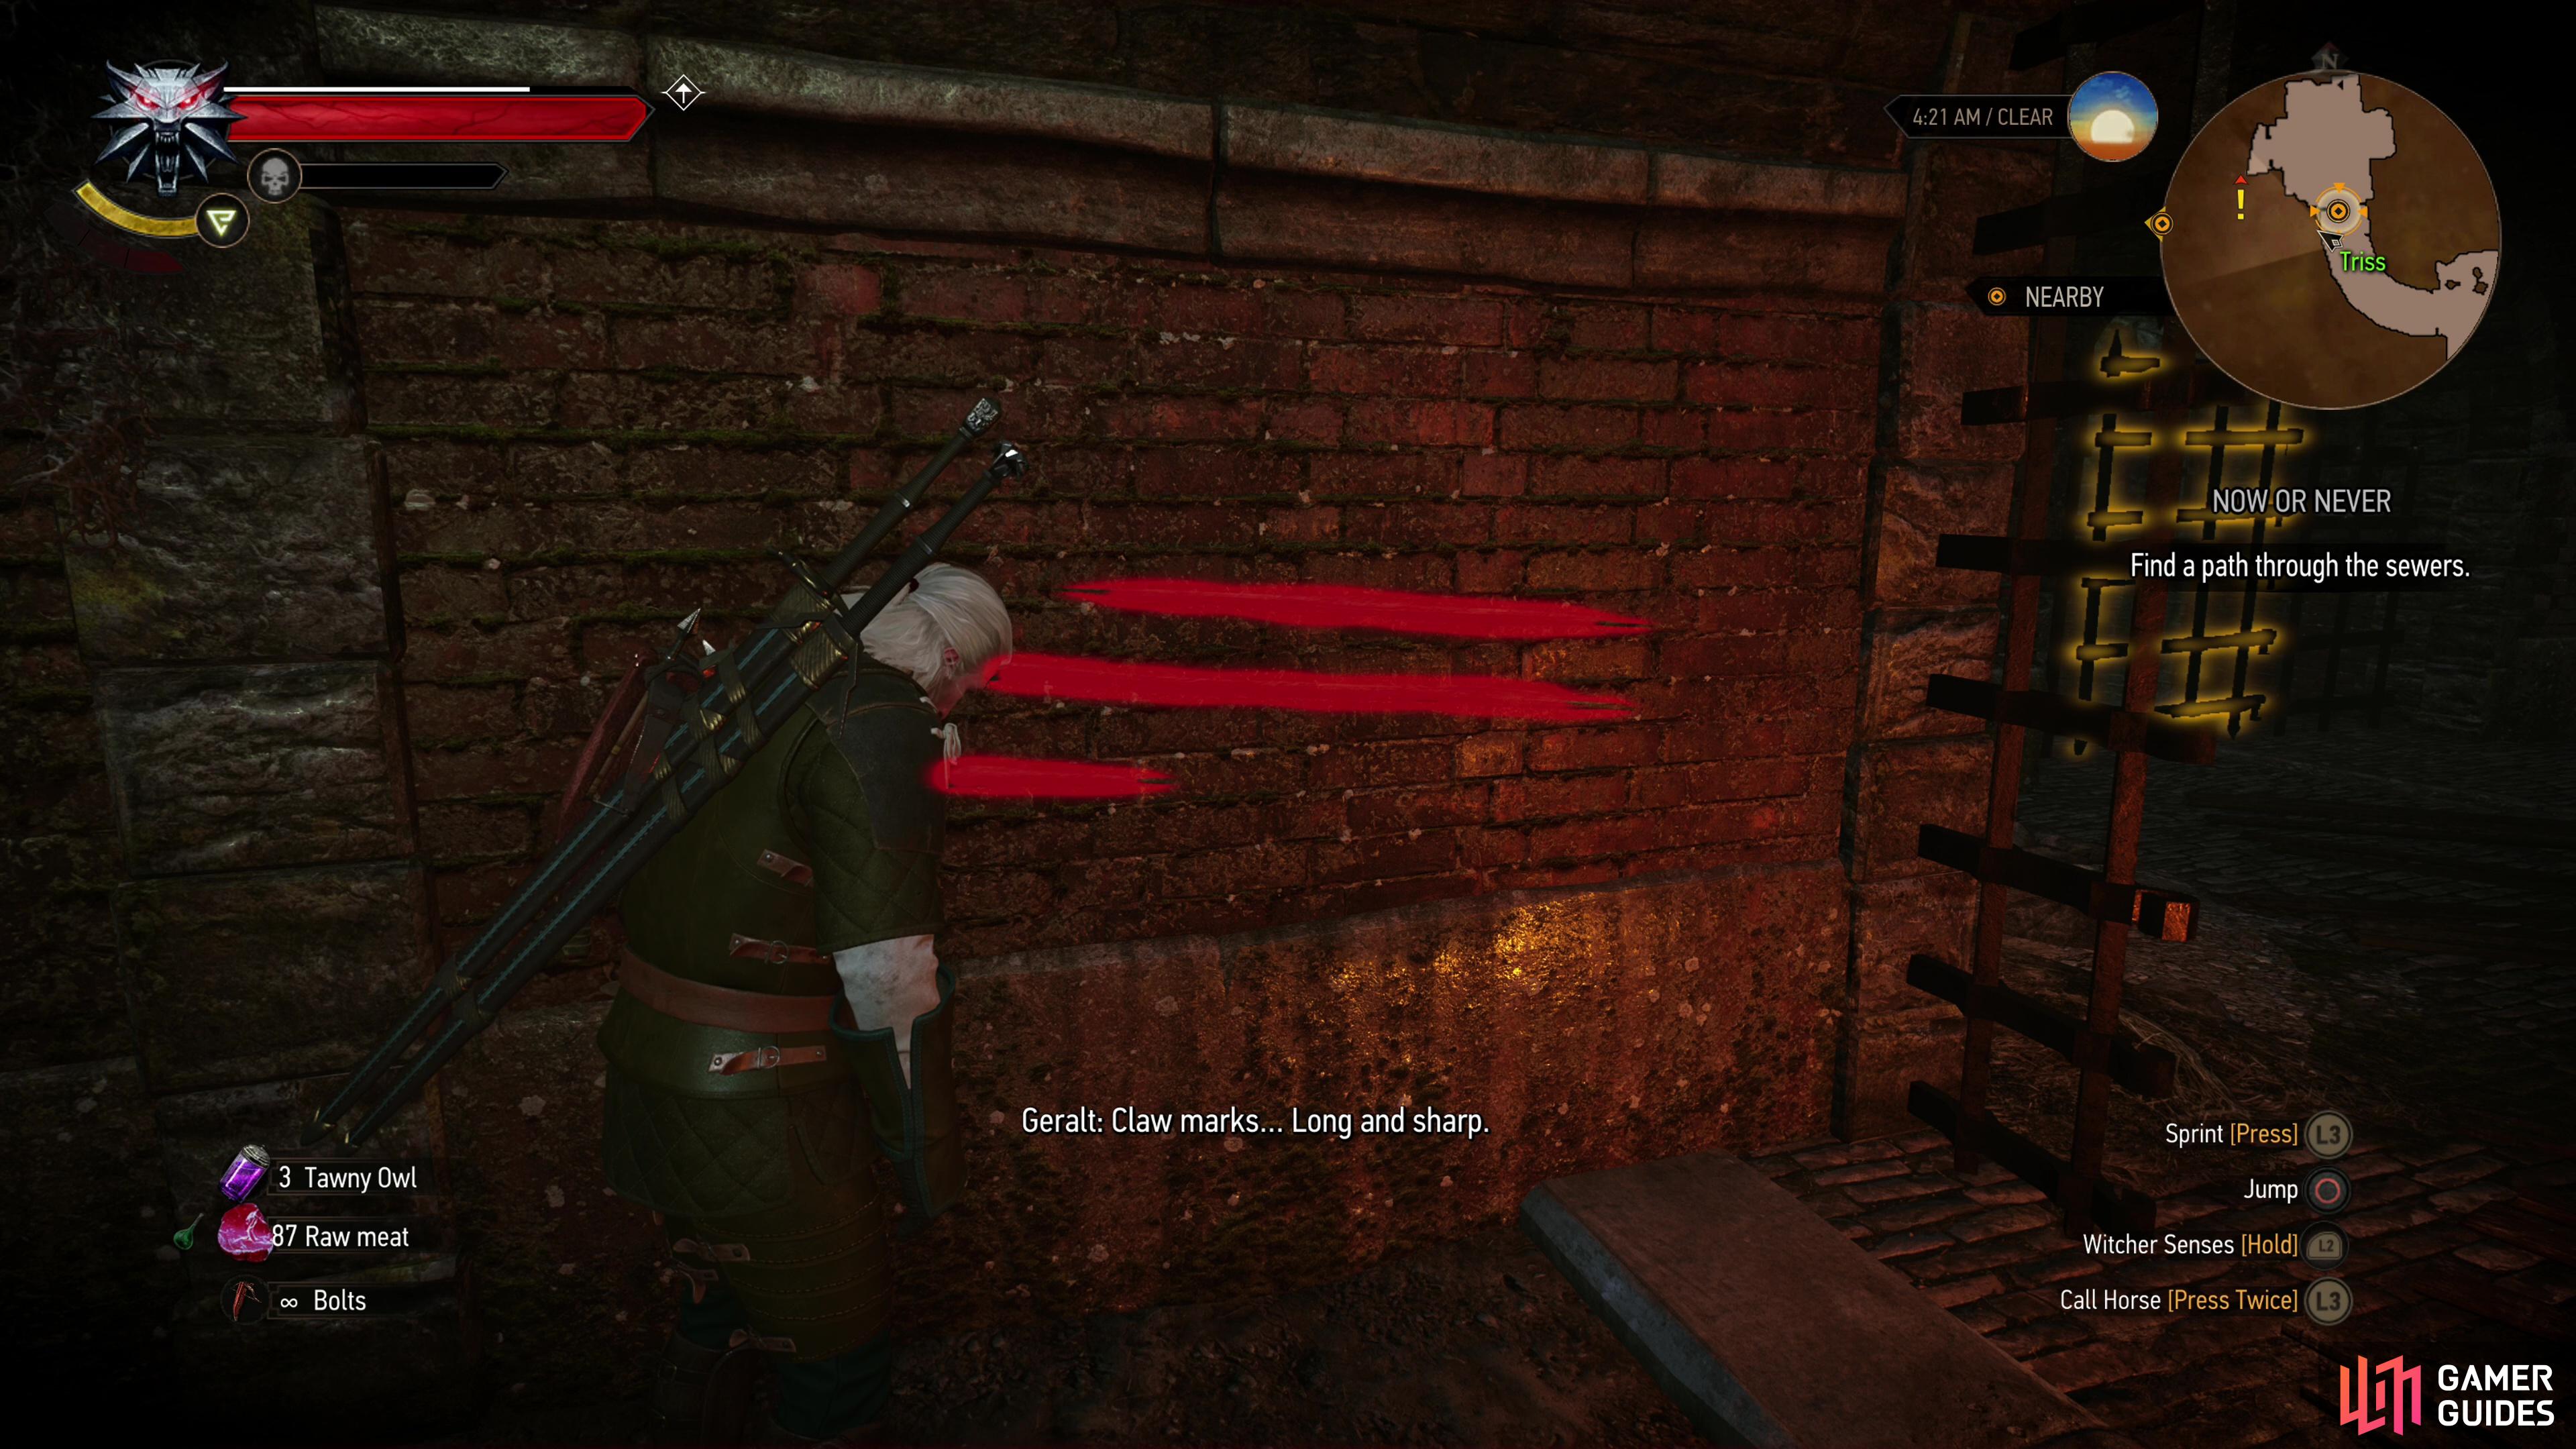
Go down some stairs to the west to find more corpses bearing concerning signs and more containers worth looting. Exit to the west and use your Witcher senses to spot some scratches on the wall, then turn west through yet another gate, stopping to investigate the propped-up corpse of a Witch Hunter to the south to confirm that what dwells in these sewers is a lesser vampire.
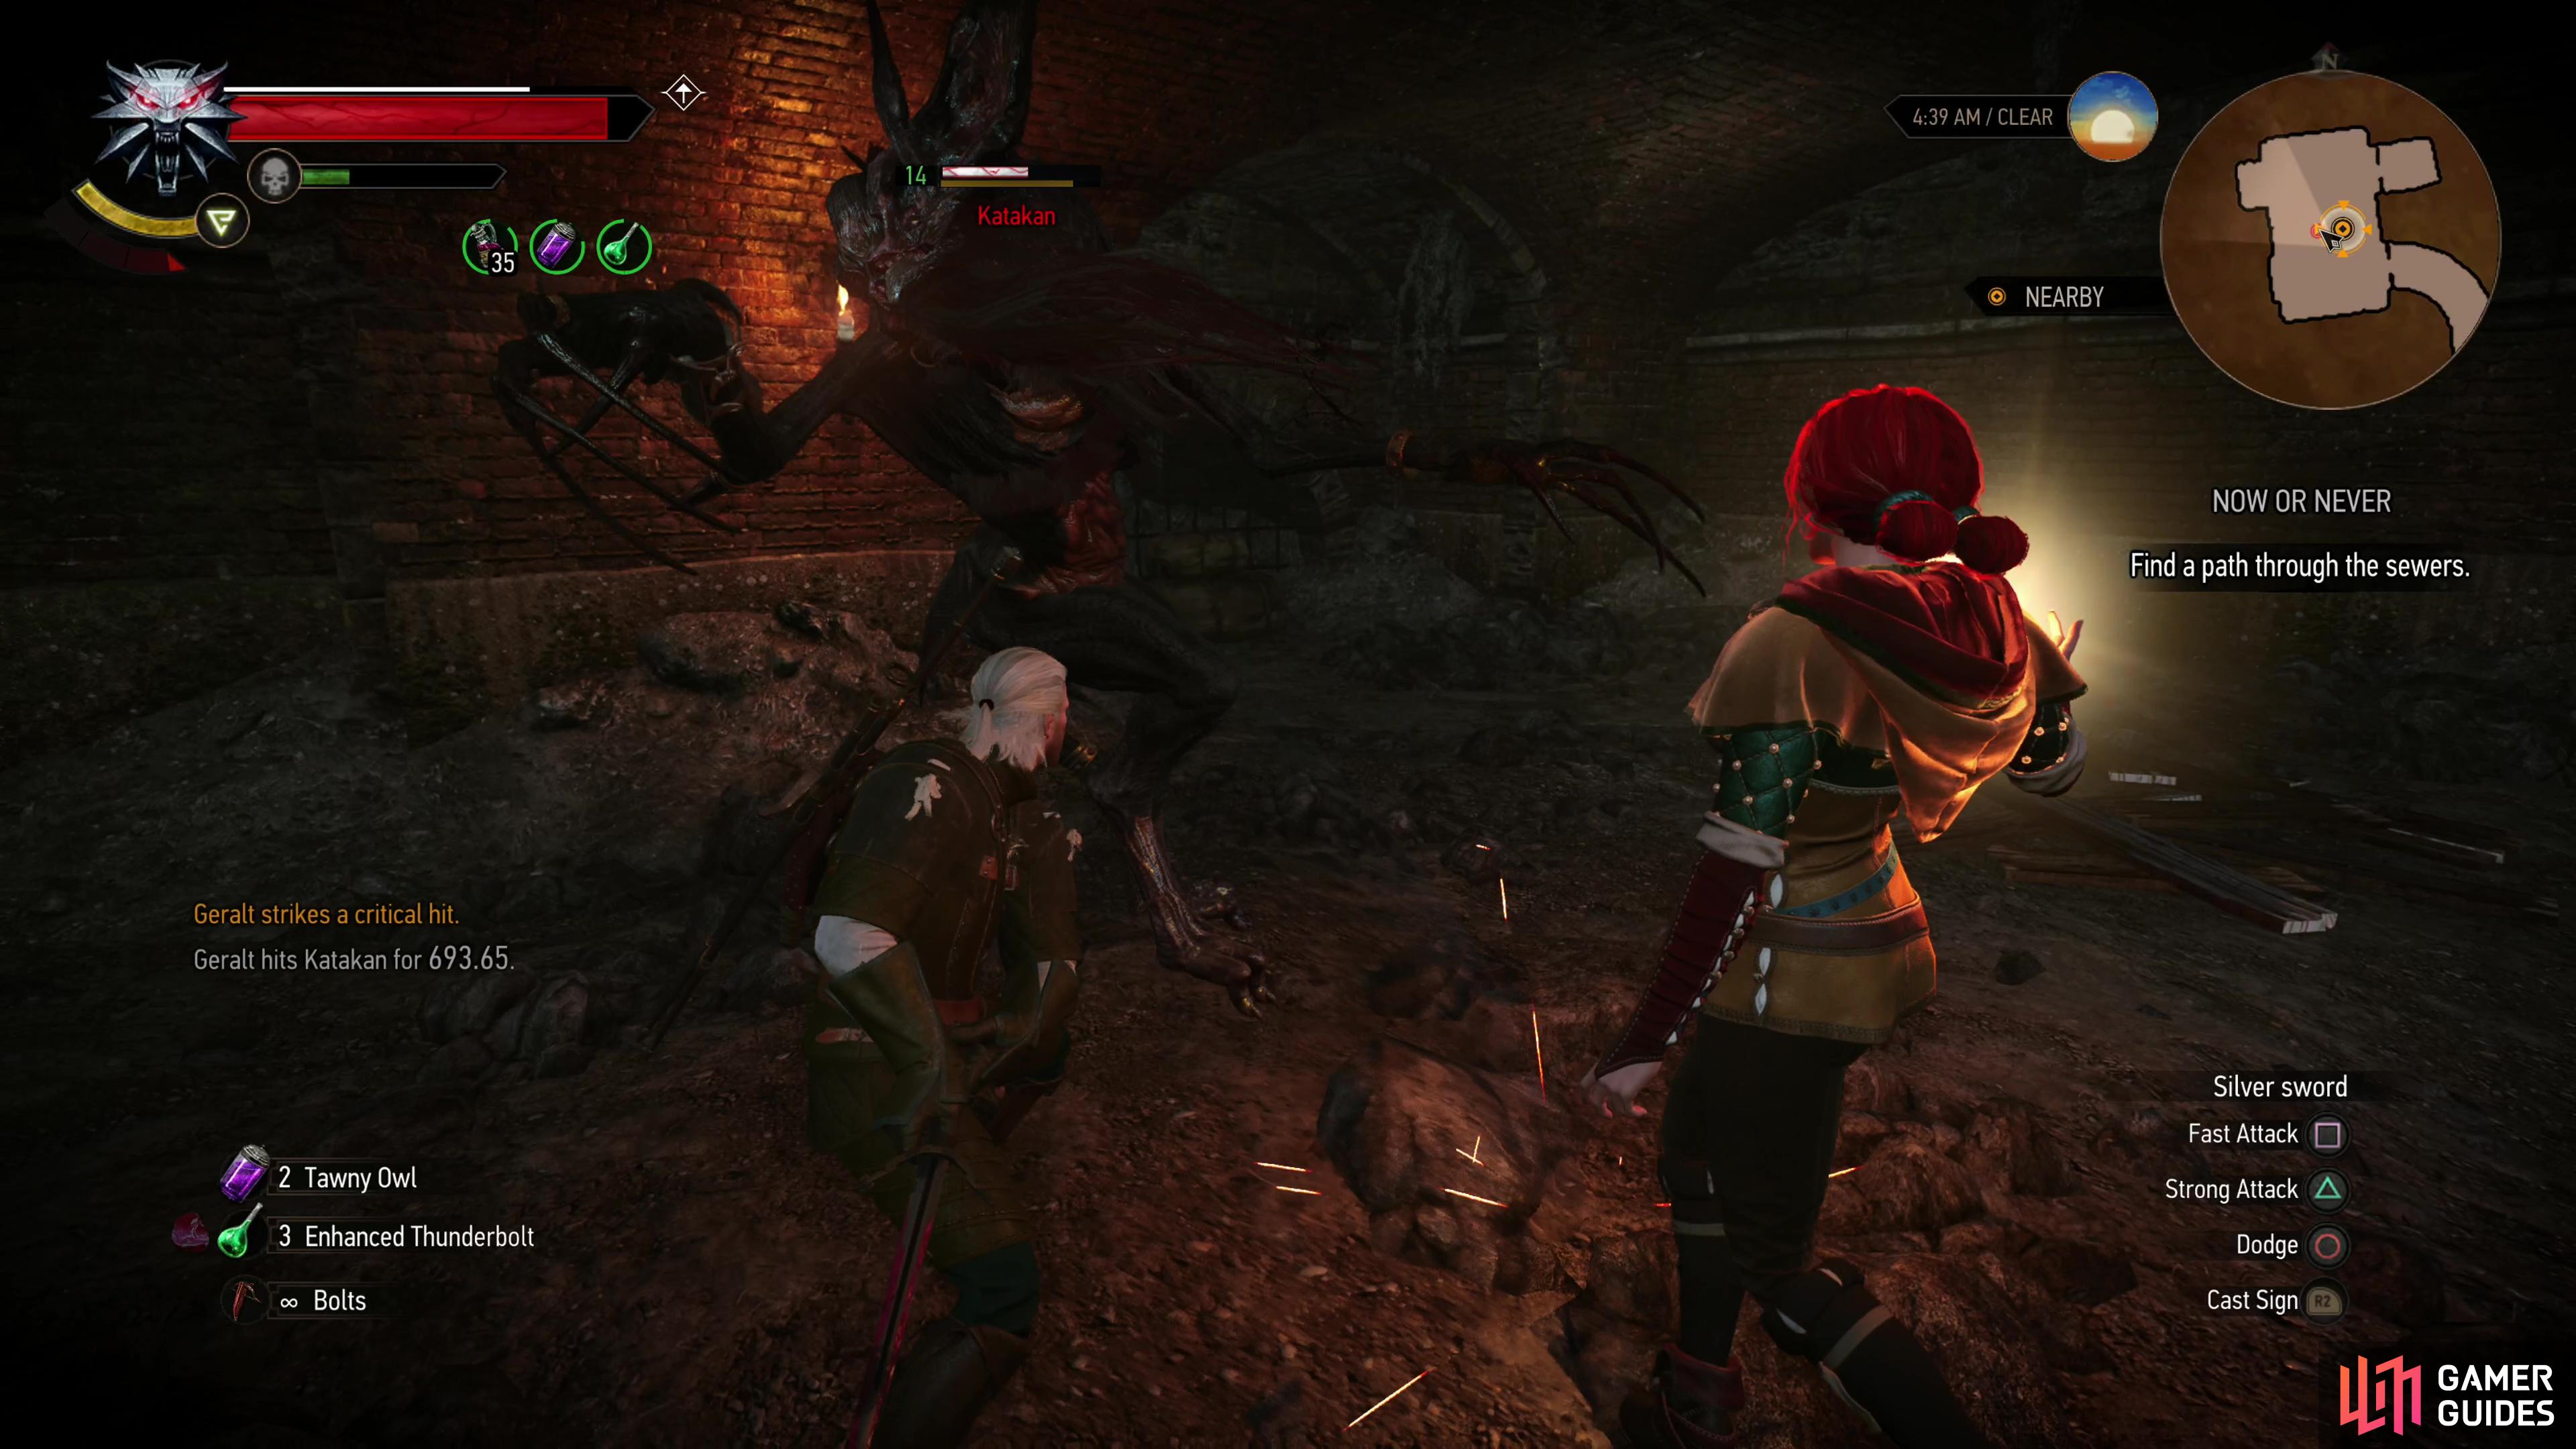
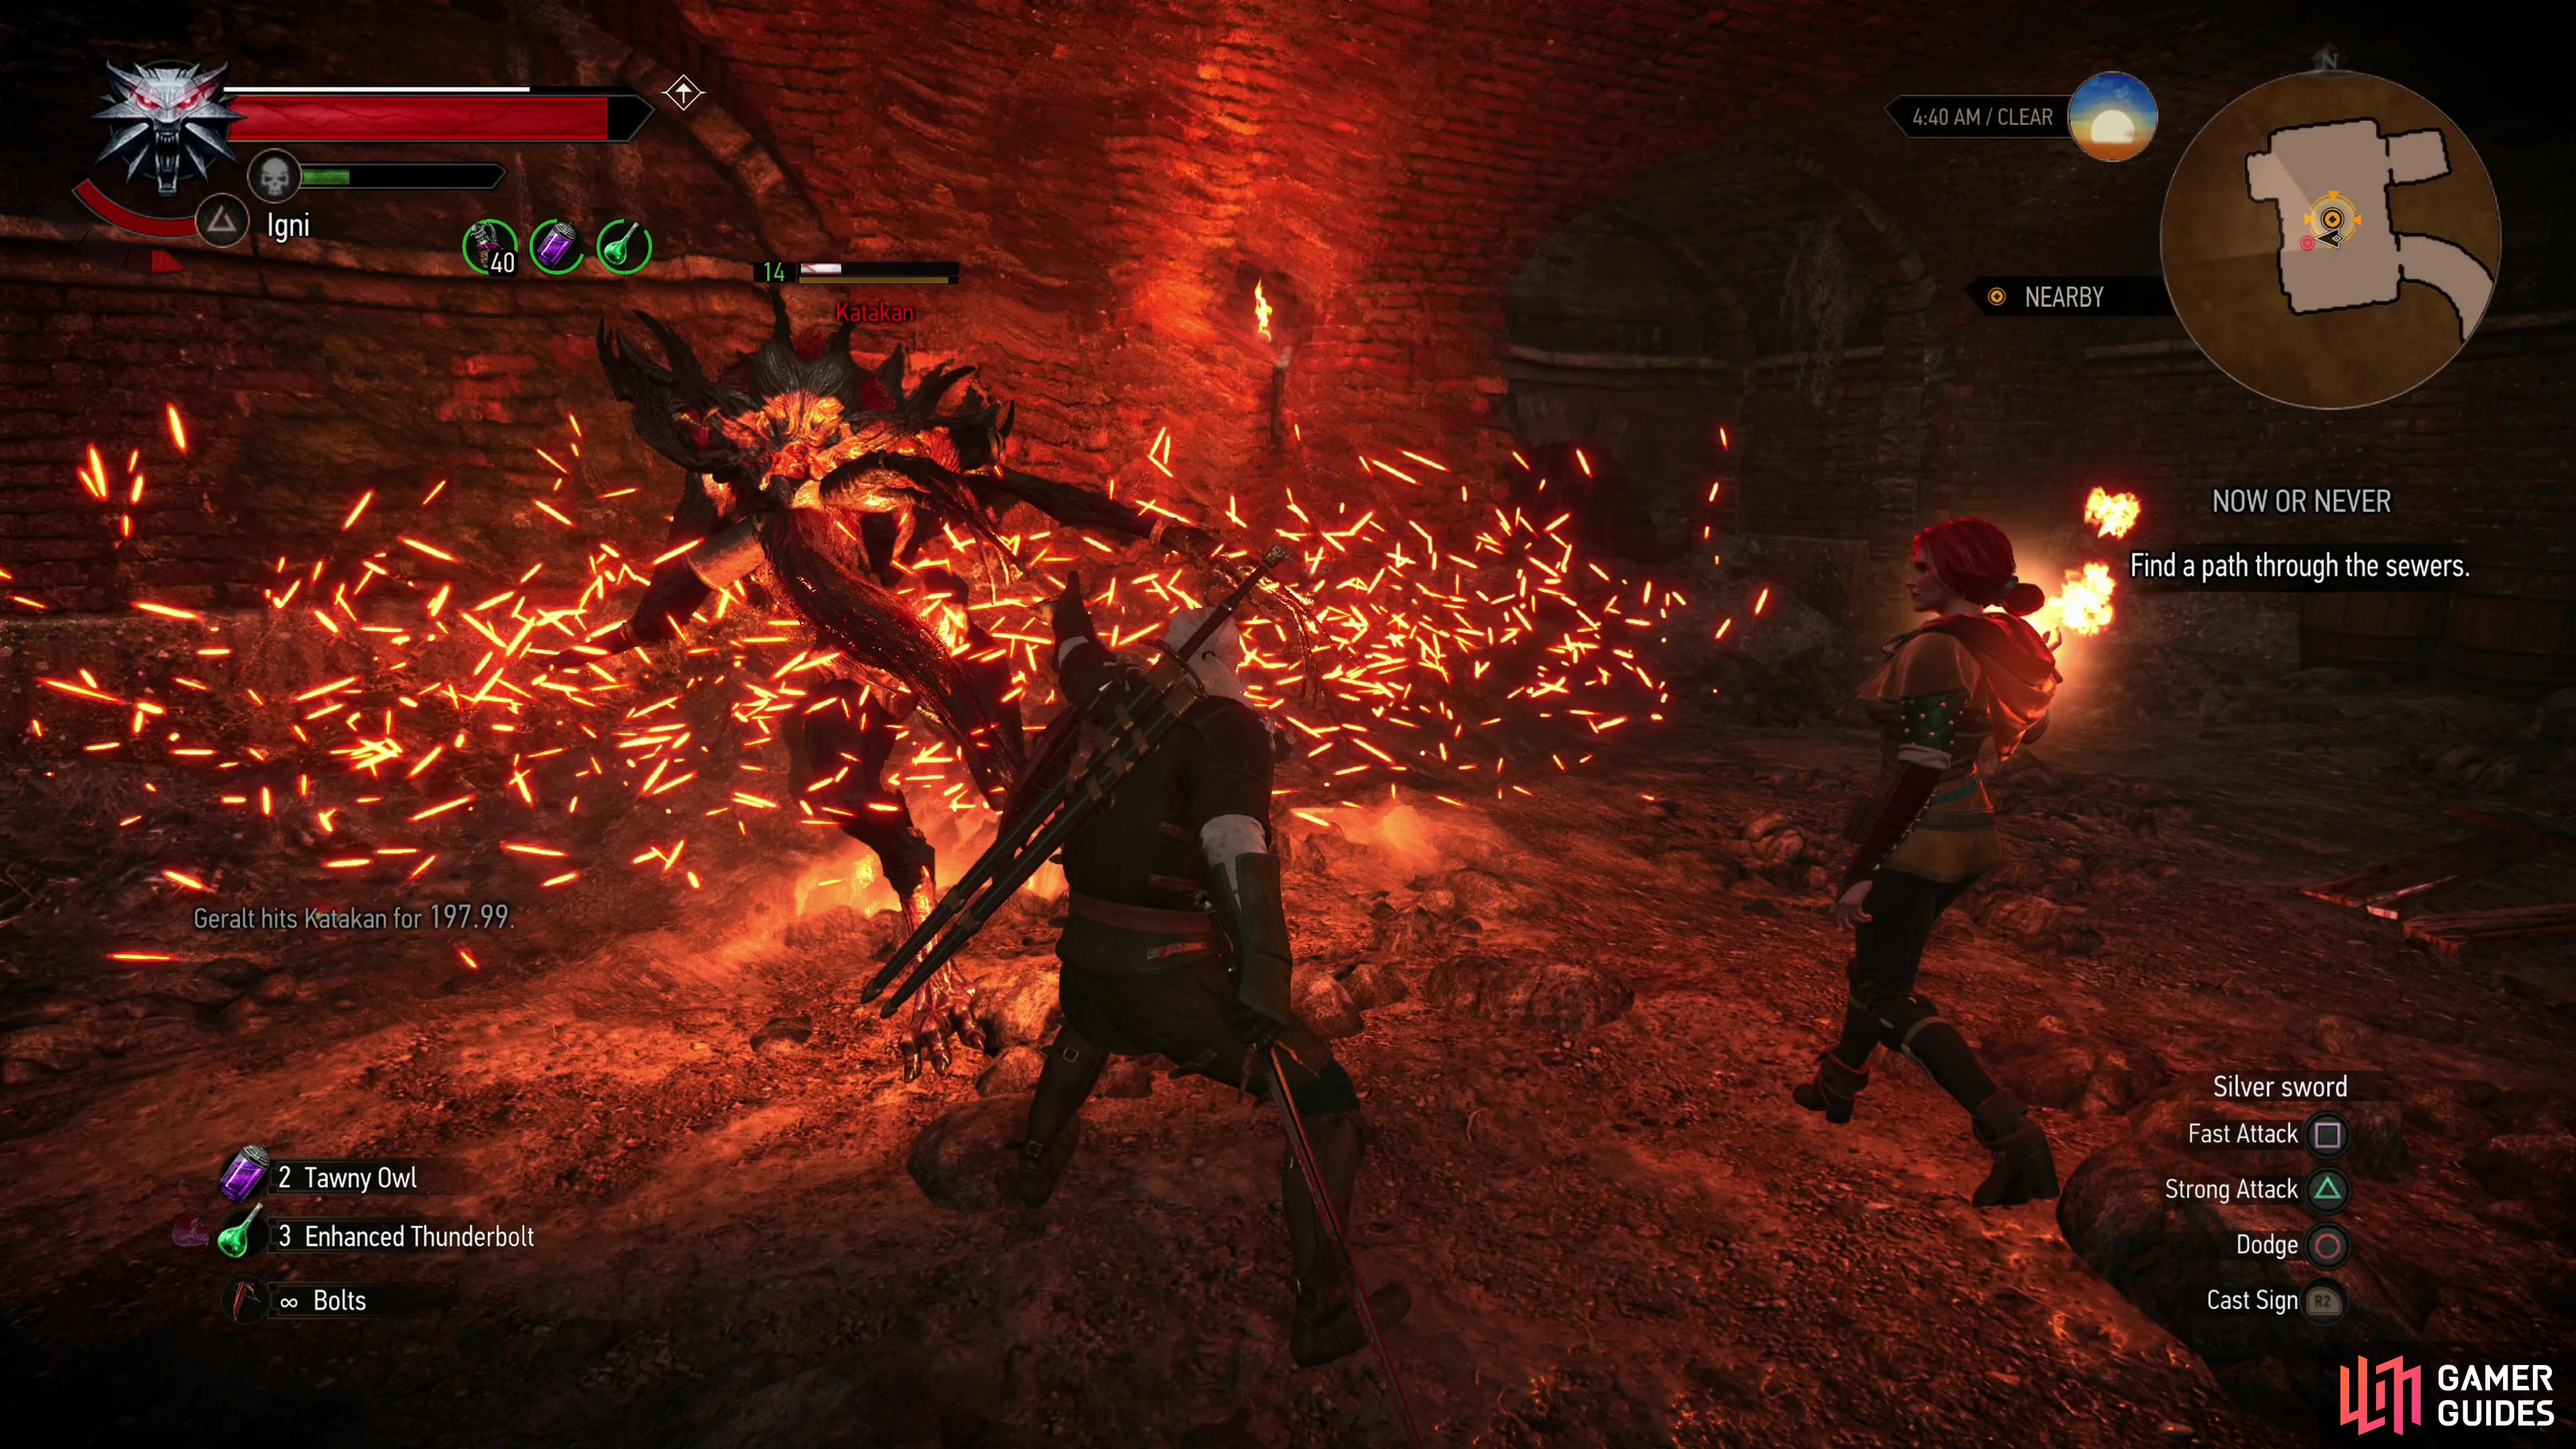
The foe lying ahead is a Katakan (Lv14), and it’s far stronger than anything else you’ve fought during this quest. Similar to the foe at the end of Wild at Heart, much of this difficulty is due to the creature’s ability to quickly regenerate health - the Katakan doesn’t deal a whole lot of damage per hit and Triss’s attacks helps win the damage war, but if you’re lower level this might be a hard fight. You’ll need to fight aggressively, favoring Igni to hopefully inflict burning (although Triss will probably interrupt this before long), chugging potions like ![]() Tawny Owl and
Tawny Owl and ![]() Thunderbolt to help win the damage war. Mostly, however, this will come down to gear. If you’re using a Griffin Silver Sword you’ll deal decent damage, but ideally you’ll want the [Feline Silver Sword] or even the [Griffin Silver Sword - Enhanced], which will make this fight much, much easier. If you don’t have something equivalent to the Griffin Silver Sword, however, it may be very difficult to win the damage battle here.
Thunderbolt to help win the damage war. Mostly, however, this will come down to gear. If you’re using a Griffin Silver Sword you’ll deal decent damage, but ideally you’ll want the [Feline Silver Sword] or even the [Griffin Silver Sword - Enhanced], which will make this fight much, much easier. If you don’t have something equivalent to the Griffin Silver Sword, however, it may be very difficult to win the damage battle here.
Aside from buffing with Tawny Owl and Thunderbolt potions and applying Vampire ![]() Oil, just fight aggressively and use Active
Oil, just fight aggressively and use Active ![]() Quen to absorb incoming attacks when the enemy turns invisible. You can probably tank a few hits from this enemy if you need to, which is something of a novelty in Death March! difficulty. If you didn’t have a hard time putting the creature down, you may want to consider farming it for a Katakan Mutagen, which is not a guaranteed drop - you will only encounter a few of these creatures during the game, and it’d be wise to secure one of these mutagens when you have the chance. You will earn a whopping 500 EXP for defeating the Katakan.
Quen to absorb incoming attacks when the enemy turns invisible. You can probably tank a few hits from this enemy if you need to, which is something of a novelty in Death March! difficulty. If you didn’t have a hard time putting the creature down, you may want to consider farming it for a Katakan Mutagen, which is not a guaranteed drop - you will only encounter a few of these creatures during the game, and it’d be wise to secure one of these mutagens when you have the chance. You will earn a whopping 500 EXP for defeating the Katakan.

Escape the Sewers
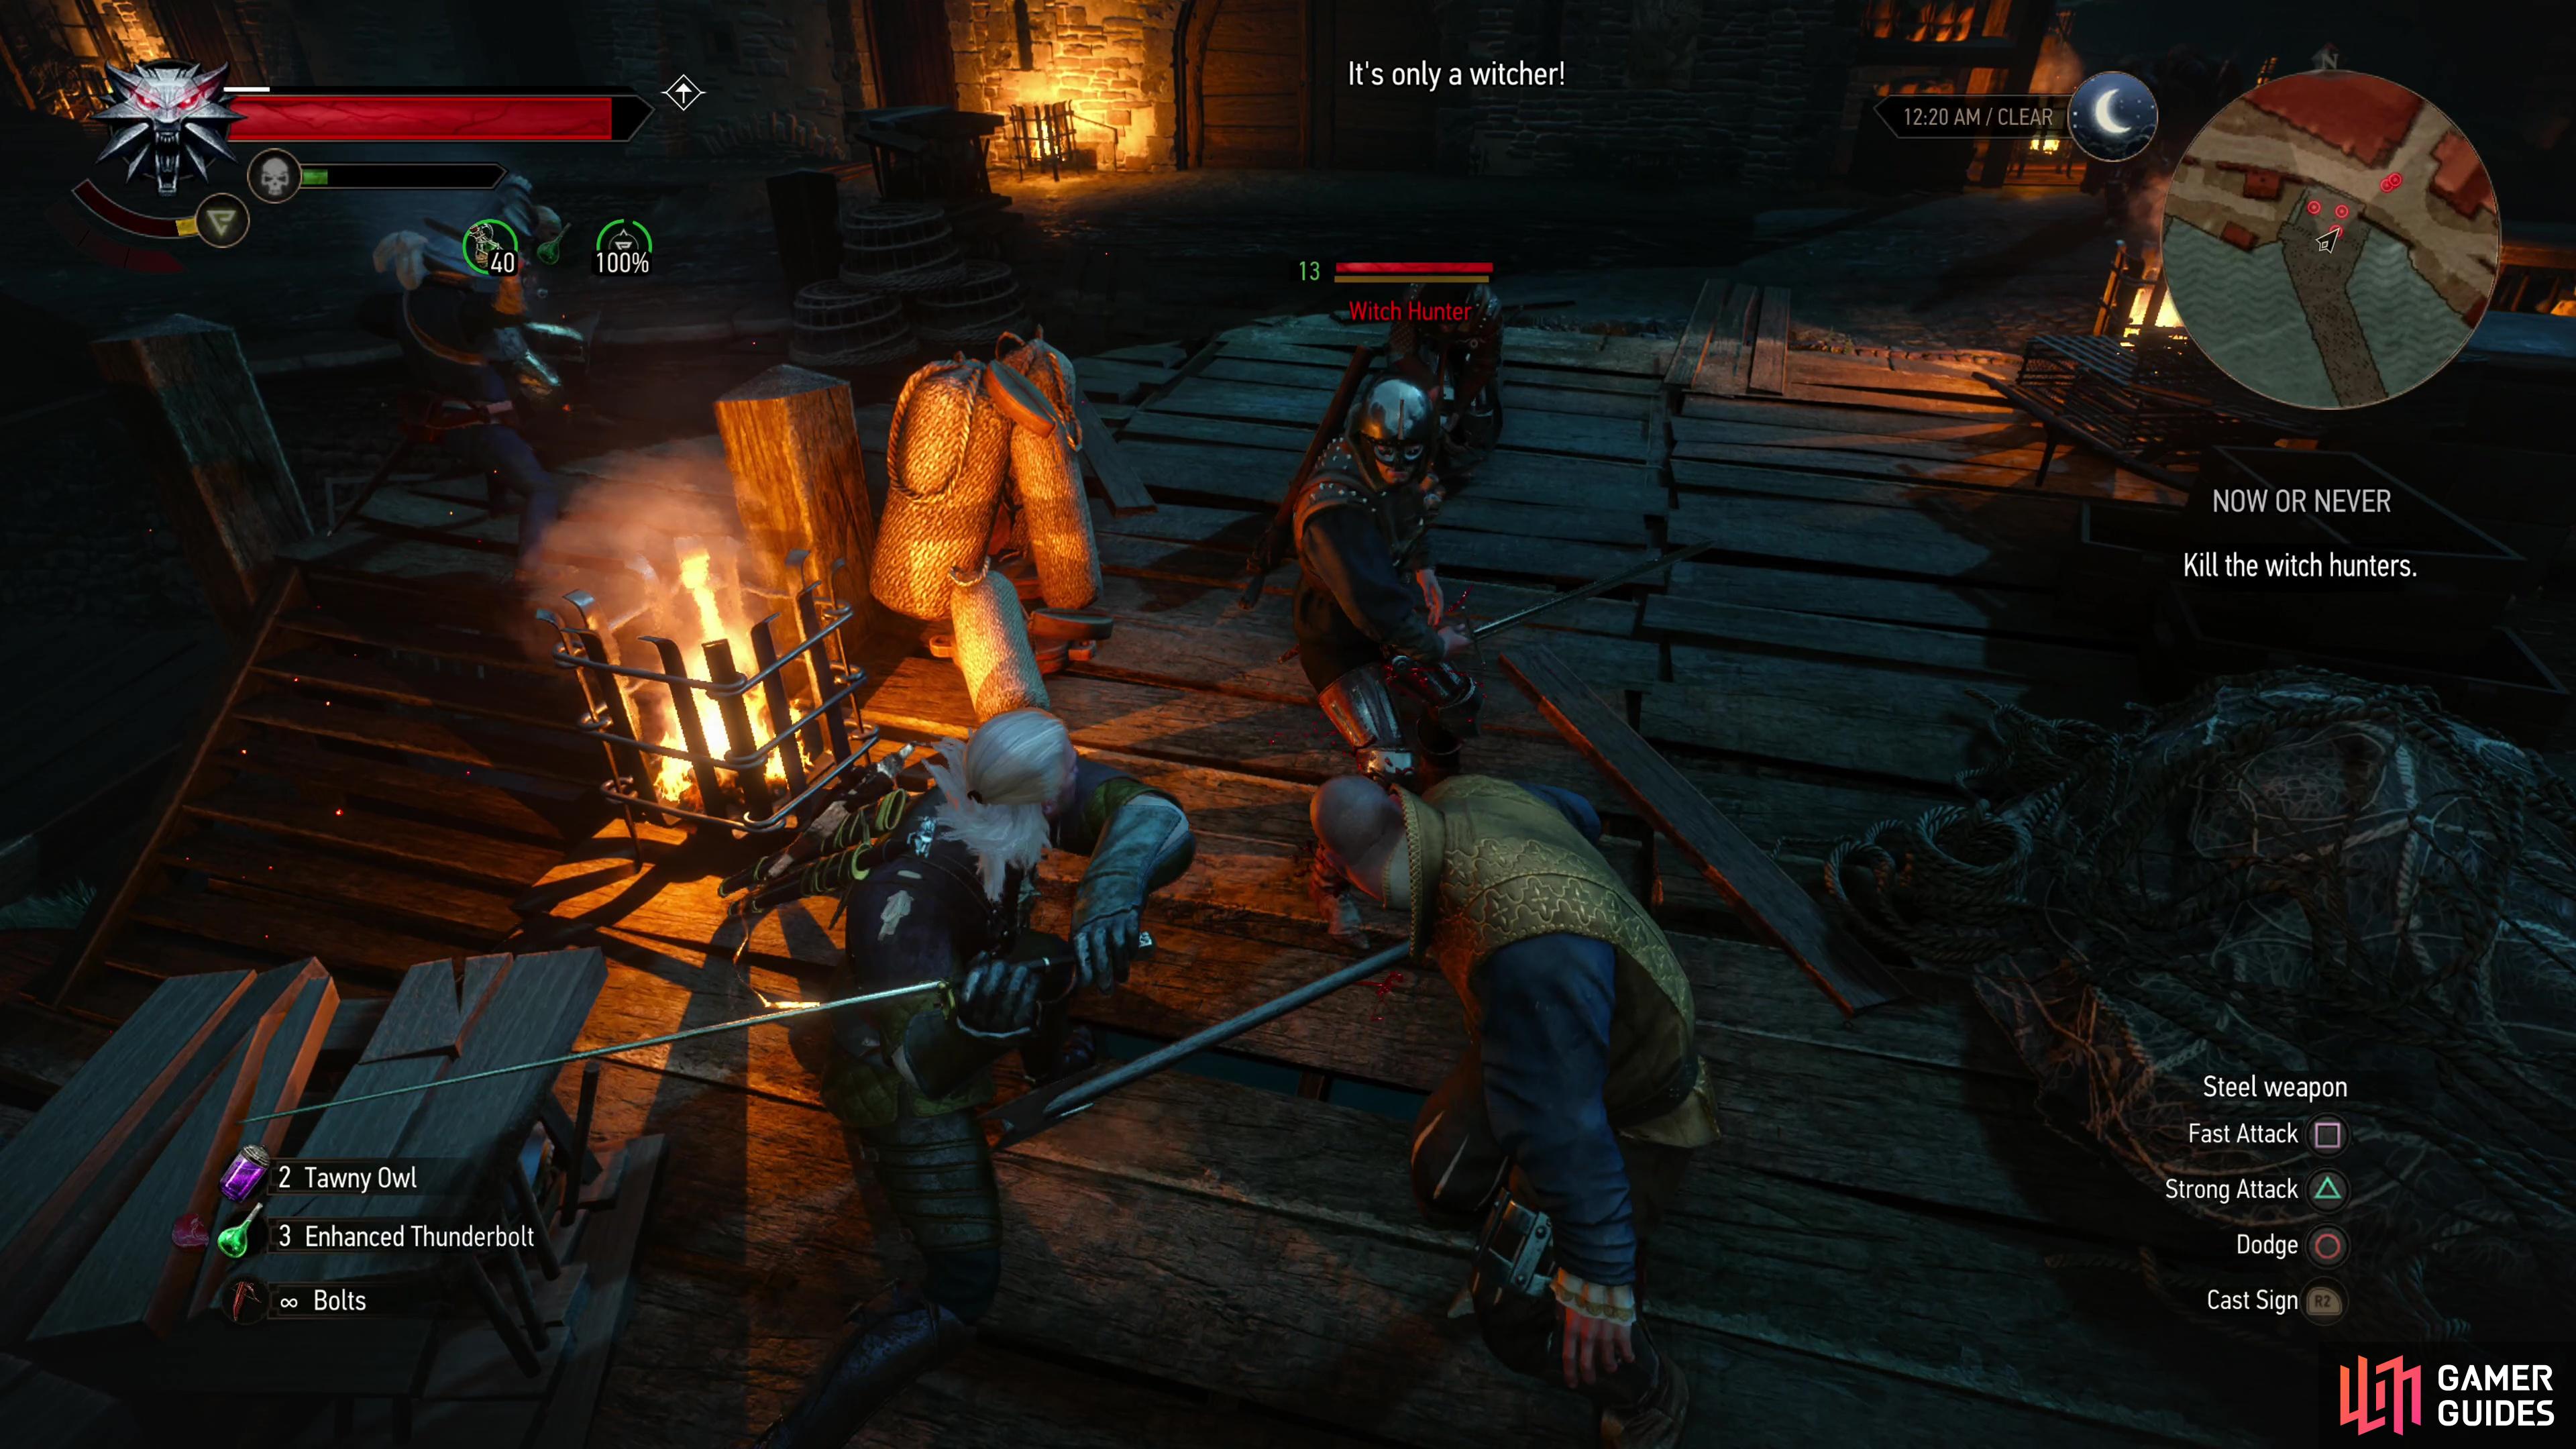
Loot the Katakan’s chamber, then go through a gate door and up some stairs to the northeast. Follow the linear path ahead and you’ll eventually find yourself at the harbor, earning another 200 EXP in the process. Head up to some stairs to trigger a scene and make whatever dialog choices you wish with Triss, after which you’ll have to fend off a mob of Witch Hunters (Lv12-13). This fight shouldn’t be much of a problem considering you have Triss, ![]() Dijkstra, and a squad of Dijkstra’s goons fighting on your side, so just use Quen to absorb the odd wayward swing and cut down your foes to secure another 300 EXP.
Dijkstra, and a squad of Dijkstra’s goons fighting on your side, so just use Quen to absorb the odd wayward swing and cut down your foes to secure another 300 EXP.
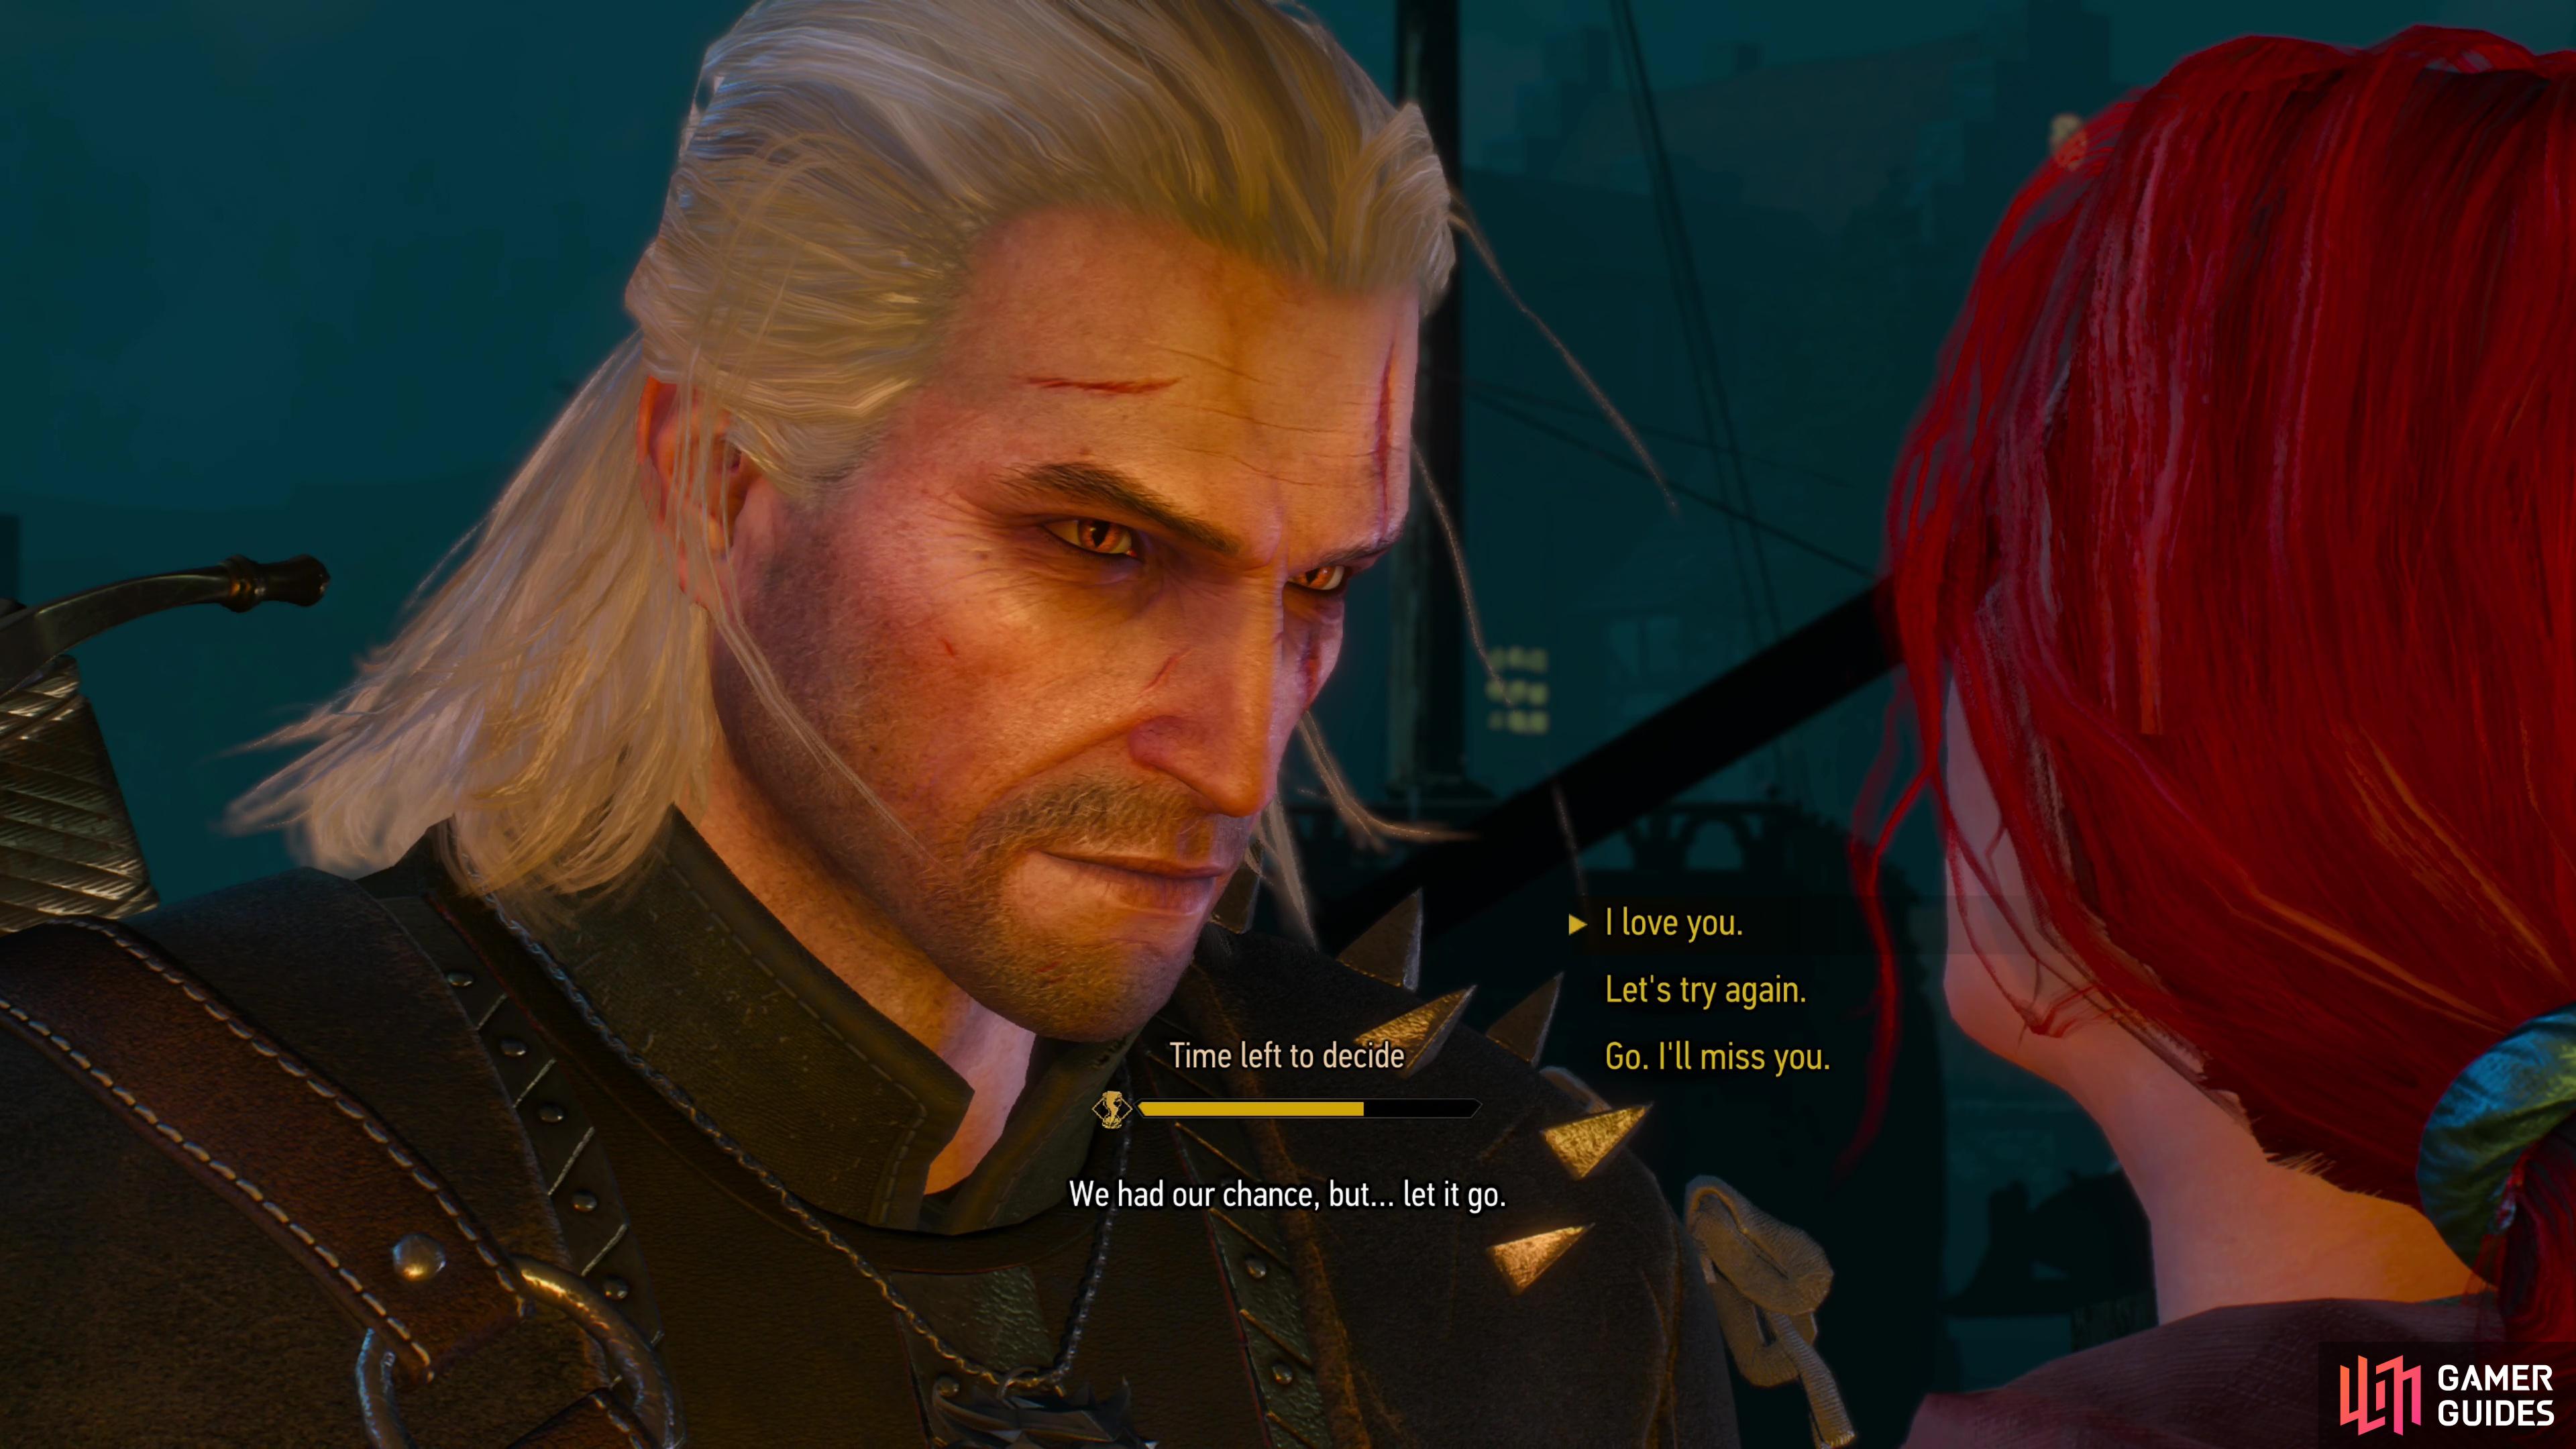
Choice: How to Romance Triss
Scatter the Witch Hunters and you’ll actually get some dialog choices that matter. When Triss talks to you pick the option “Stay with me.” followed by “I love you.” during a timed dialog decision to rekindle your romance with Triss. Any other option will friend-zone Triss for the rest of the game. You must have kissed Triss in the hedge maze during A Matter of Life and Death for the romance to trigger. In either case, after some scenes you may find yourself talking to Dijkstra at the end of the quest. Assuming you resolved both Redania’s Most Wanted and Eye for an Eye Dijkstra will invite you to partake in the sort of high-stakes politics Geralt insists he abhors… yet which he always seems to end up embroiled in. This will start the quest [![]() A Deadly Plot], which coincidentally is also where you can advance the quest [
A Deadly Plot], which coincidentally is also where you can advance the quest [![]() Gwent: Old Pals].
Gwent: Old Pals].
(1 of 3) With the help of Dijkstra and his goons, fight off some Witch Hunters.
In any event, you’ll get another 300 EXP during the ending scenes of this quest and when it ends you’ll appear at the Lighthouse signpost west of Novigrad.
::::: note: Romancing Triss and Yennefer
If you romanced Triss at the end of Now or Never you’re locked into this romance. You can attempt to Romance Yennefer as well later on, but doing so will not have the happy ending you might envisage. While there’s some humor to be had in the attempt, trying to romance one too many sorceresses will result in Geralt ending up single. Dalliances with courtesans and Kiera Metz are fine, just don’t try to romance both Triss and Yennefer.
:::::

 Sign up
No Comments