
Buried deep in a hillock overlooking Crookback Bog, an ancient spirit struggles against its fetters. Recently roused from its impotence slumber by the blood spilled in Velen by the warring armies, this trapped spirit seeks freedom, and with it the chance to seek vengeance upon its captors. This page will provide a walkthrough for the quest ![]() The Whispering Hillock in The Witcher 3, including how your decision here affects the
The Whispering Hillock in The Witcher 3, including how your decision here affects the ![]() Bloody Baron and his wife, the village of
Bloody Baron and his wife, the village of ![]() Downwarren, and the orphans of Crookback Bog.
Downwarren, and the orphans of Crookback Bog.
Quest Objectives
Starting The Whispering Hillock
This is a bit of an odd quest in that there are multiple ways to start it, and it can exist as a standalone quest or as an accessory to the main quest Ladies in the Wood. While The Whispering Hillock is technically a secondary quest, most players will likely encounter it during Ladies in the Wood. You must complete the former in order to advance the latter… so it’s a secondary quest that has to be completed in order to progress the main questline. Making it a main quest. Glad we got that sorted. That said, you can stumble across the Whisper Hillock as soon as you enter Velen just by wandering around, and the entire quest can be completed before you even start Ladies in the Wood. It’s worth noting that the quest is largely identical either way, although the ending outcomes can vary depending on whether ![]() Ladies of the Wood is active or not when you complete this quest. Otherwise, the only difference is some dialog.
Ladies of the Wood is active or not when you complete this quest. Otherwise, the only difference is some dialog.
If you’re playing through the main questline, you’ll start Ladies of the Wood following Wandering in the Dark. Progress the former until you’re tasked with taking the ![]() Crones’ Dagger to the Ealdorman in Downwarren and he’ll tell you to investigate the Whispering Hillock. Follow the road southeast from Downwarren to reach the objective marker near the Ancient Oak signpost - when you get near a disembodied voice will start threatening you, and this quest will begin.
Crones’ Dagger to the Ealdorman in Downwarren and he’ll tell you to investigate the Whispering Hillock. Follow the road southeast from Downwarren to reach the objective marker near the Ancient Oak signpost - when you get near a disembodied voice will start threatening you, and this quest will begin.
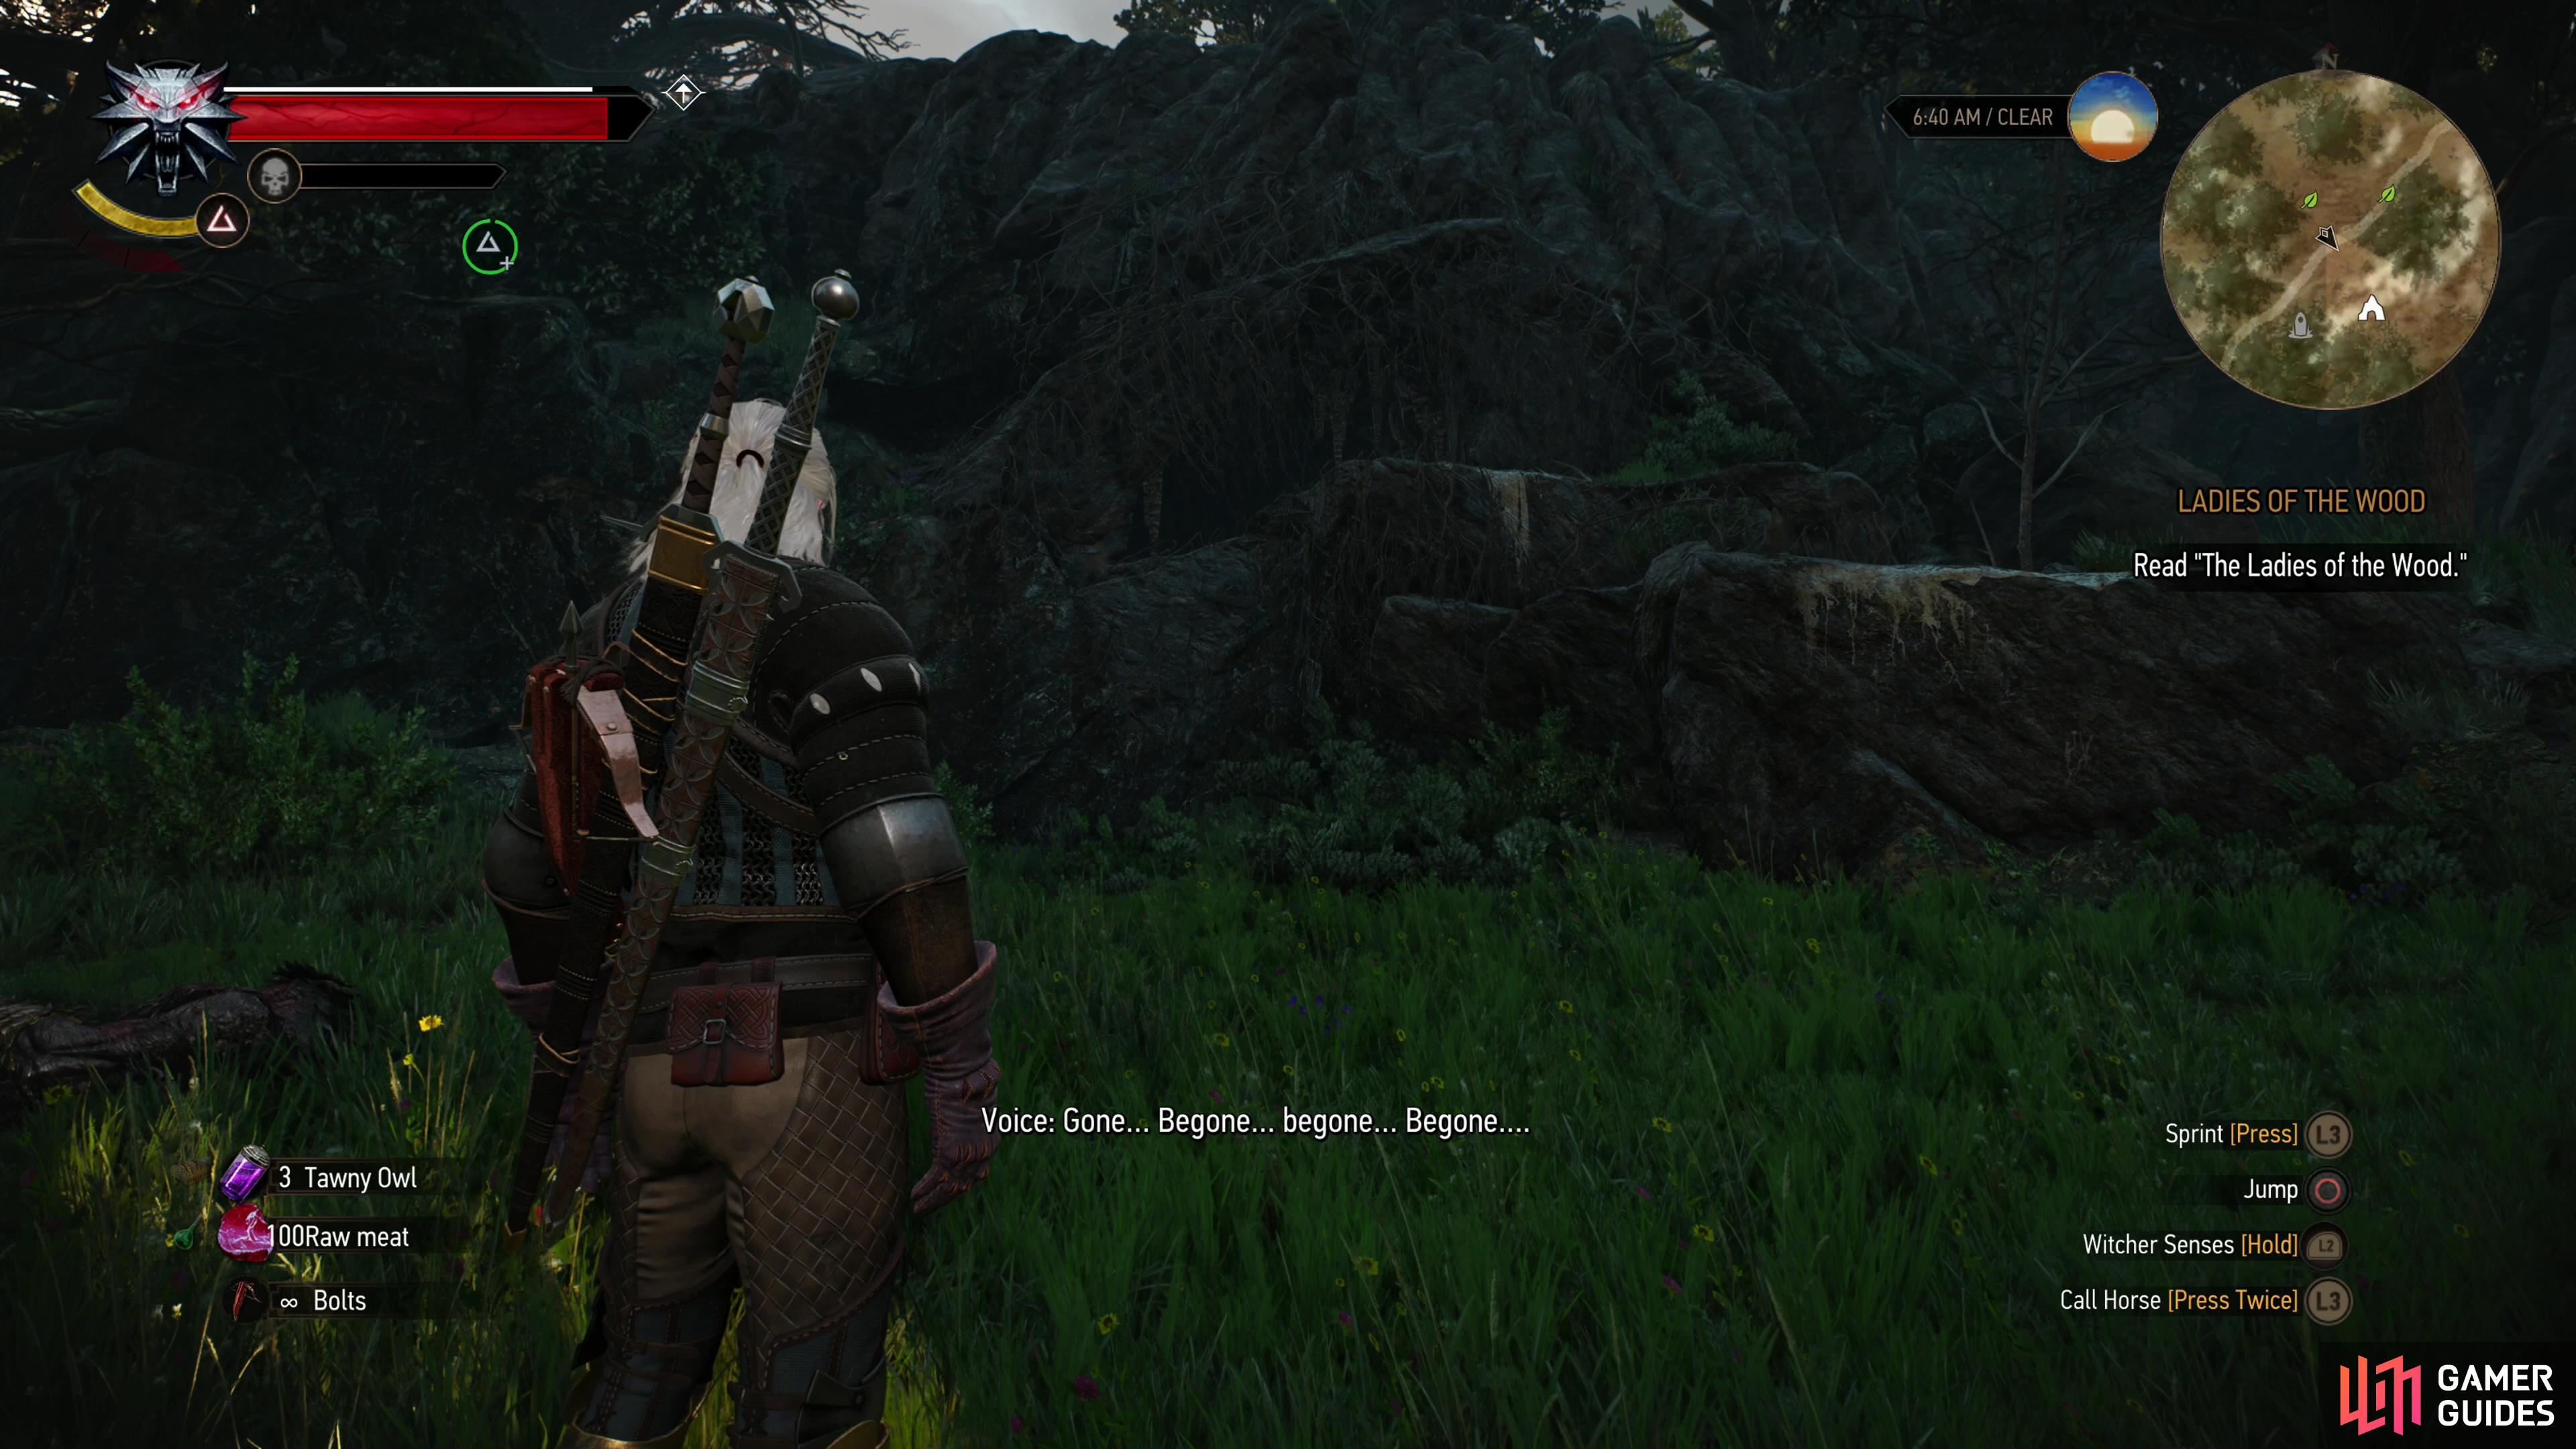
Alternatively, if you head to the Whispering Hillock any time before you talk to the Ealdorman of Downwarren you’ll be warned away by the same voice. The quest won’t start, however, until you explore the cave underneath the hillock and talk to the spirit within.
However you start the quest, all the quest’s steps are largely identical throughout, with one exception - you will complete an objective during Ladies of the Wood, meaning if you advance that quest first, you should have slightly less work to do.


(1 of 2) During the quest “Ladies of the Wood” you’ll be directed to talk to the Ealdorman of Downwarren and help with the village’s problem, leading to “The Whispering Hillock”.
During the quest “Ladies of the Wood” you’ll be directed to talk to the Ealdorman of Downwarren and help with the village’s problem, leading to “The Whispering Hillock”. (left), Alternatively you can just stumble across the Whispering Hillock. Either way, a disembodied voice and its pet Wolves greet you when you arrive. (right)
Explore the Whispering Hillock
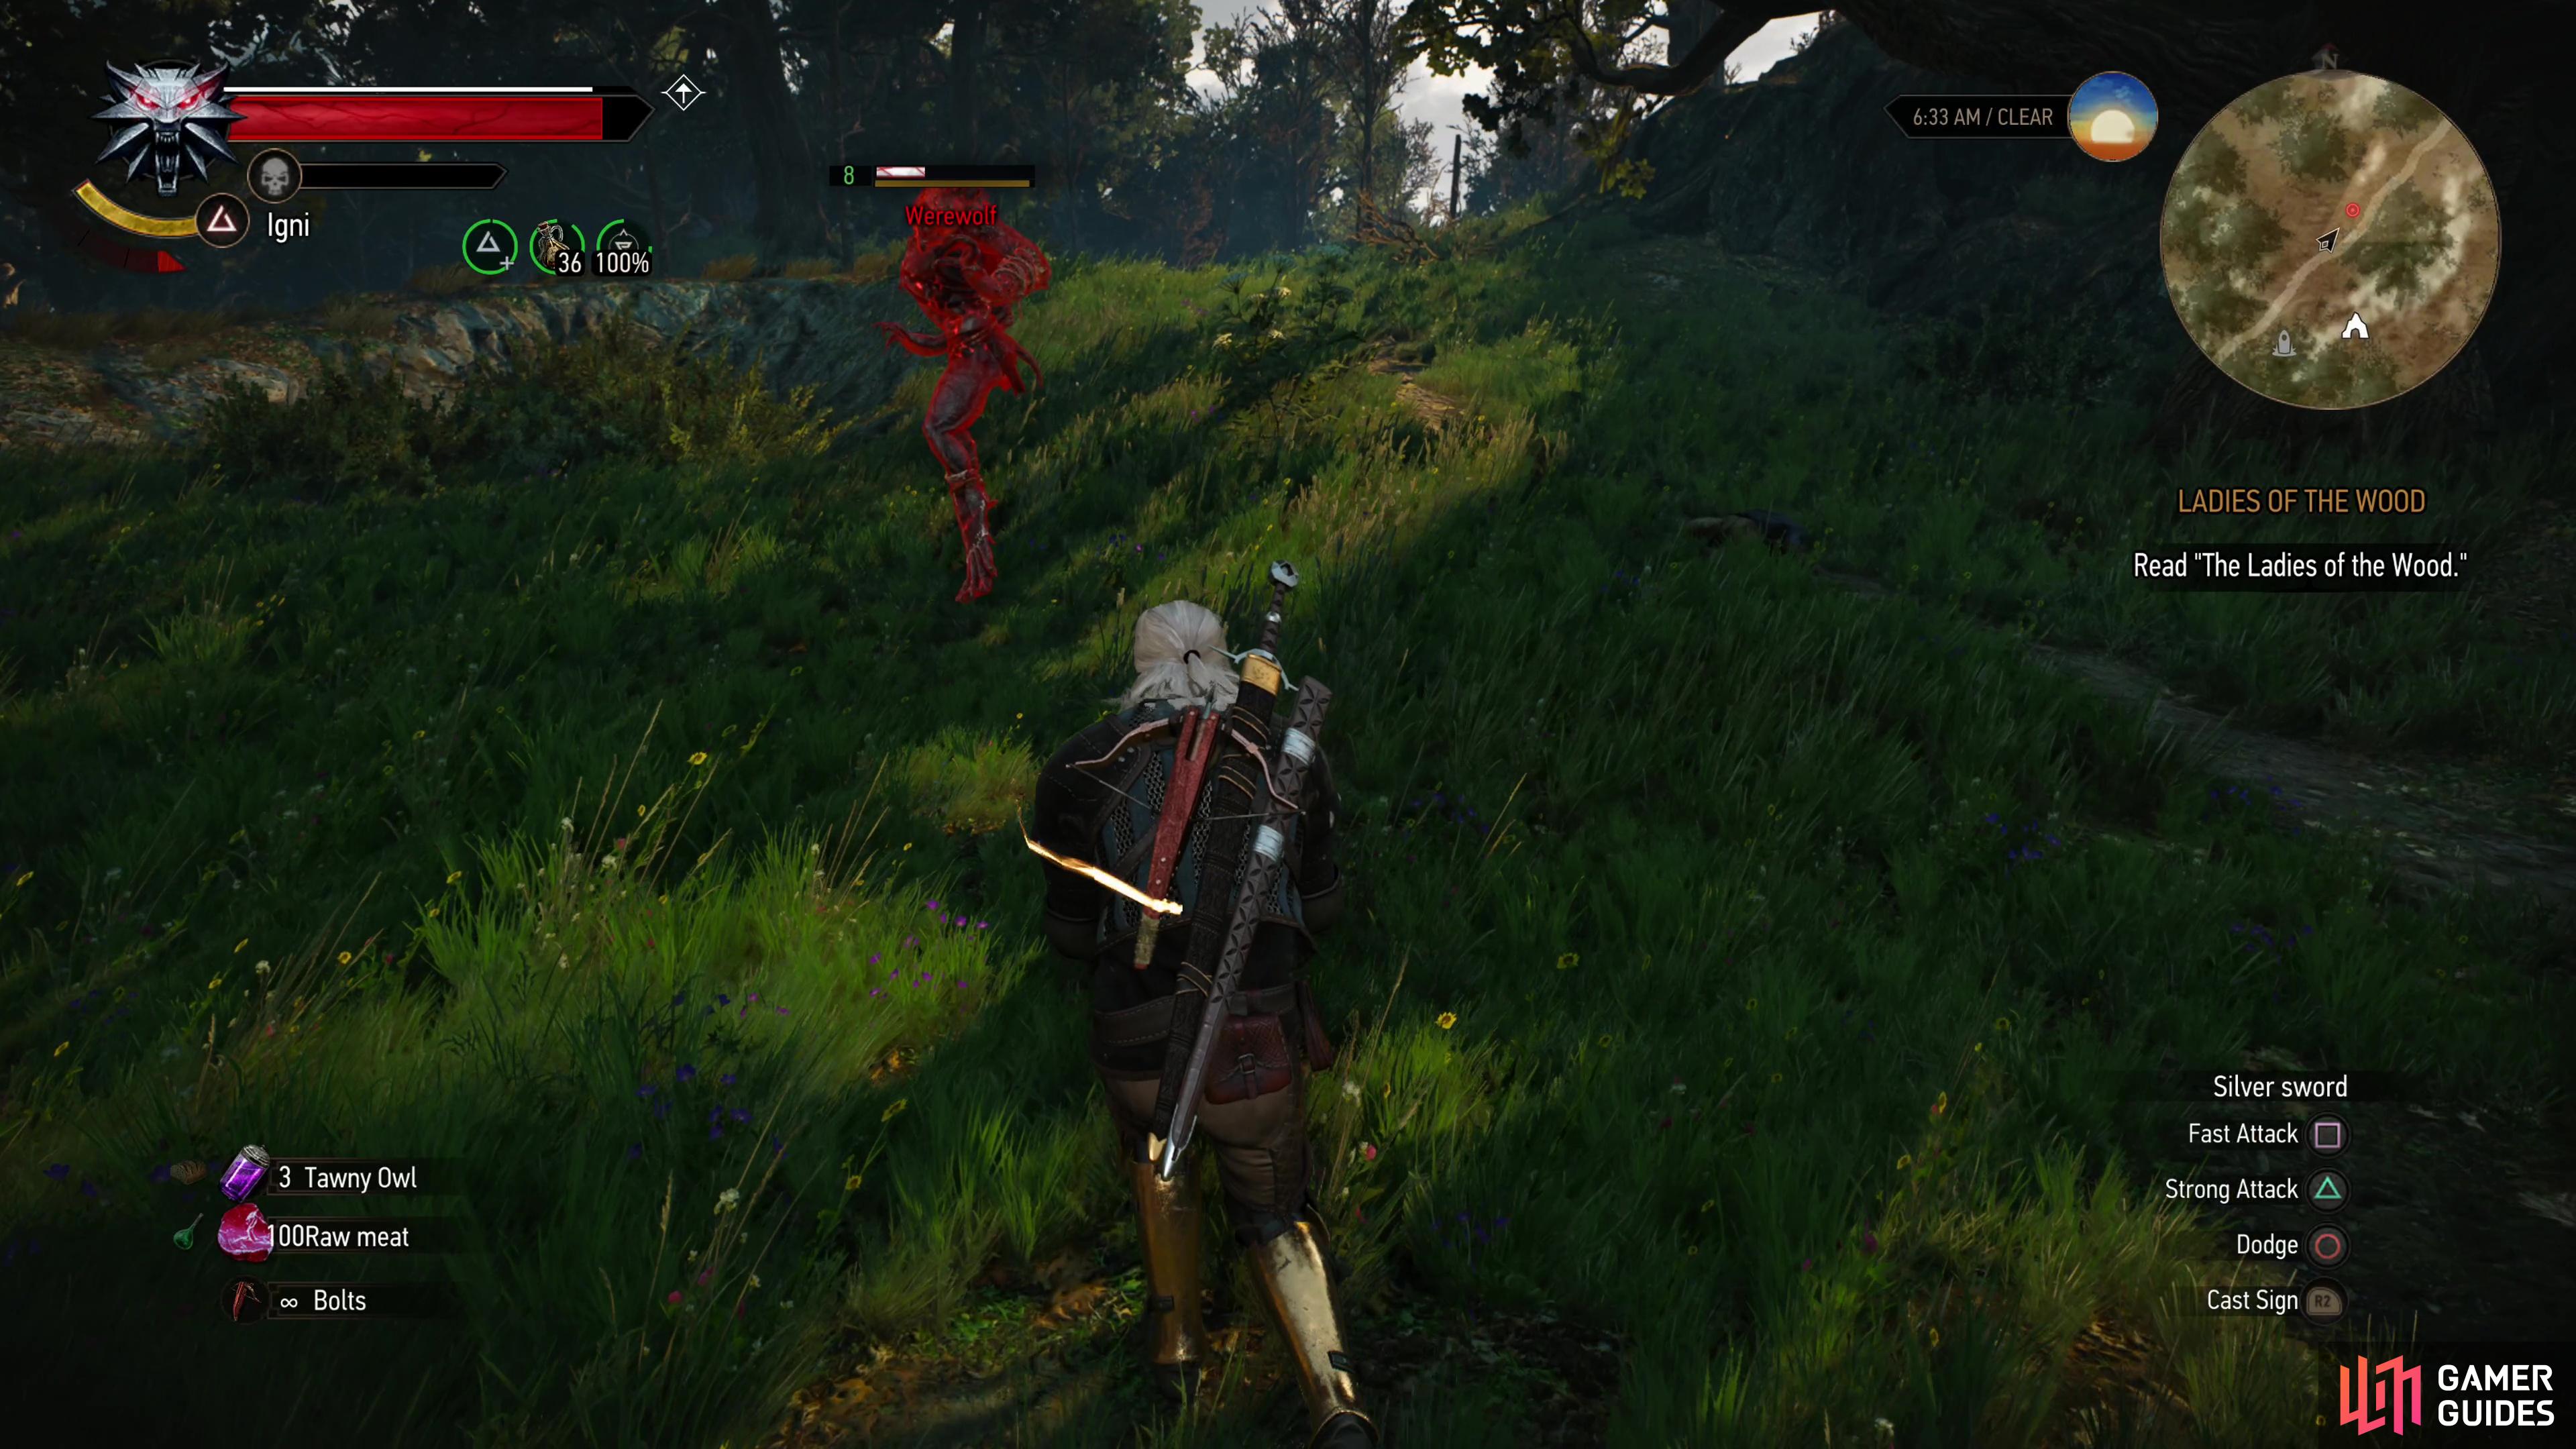
As mentioned earlier, the whispering hillock is southeast of The Orphans of Crookback Bog and south, southeast of the Ancient Oak. Just follow the road southeast from Downwarren and you should get there with little trouble, so long as you stay on the road and don’t, say, pick a fight with a Bilge Hag (Lv20) prowling east of the road. When you get near the Whispering Hillock a disembodied voice will threaten you, but aside from some ![]() Wolves (Lv5) prowling about, the voice doesn’t seem to be capable of deterring you. If you talked to the Ealdorman during Ladies of the Wood, then The Whispering Hillock should start, if not, not. It doesn’t matter much either way.
Wolves (Lv5) prowling about, the voice doesn’t seem to be capable of deterring you. If you talked to the Ealdorman during Ladies of the Wood, then The Whispering Hillock should start, if not, not. It doesn’t matter much either way.
Kill the Werewolf
Kill the Wolves, then backtrack up the road past the ![]() Ancient Oak signpost and follow a trail southwest and you should find a Place of Power and a cave entrance, and prowling nearby is a
Ancient Oak signpost and follow a trail southwest and you should find a Place of Power and a cave entrance, and prowling nearby is a ![]() Werewolf (Lv8). You don’t technically have to defeat the Werewolf if you don’t want to, but if you can kill it you might as well, if for no other reason than it won’t be around to bother you anymore.
Werewolf (Lv8). You don’t technically have to defeat the Werewolf if you don’t want to, but if you can kill it you might as well, if for no other reason than it won’t be around to bother you anymore.
![]() Werewolves are fast, aggressive foes who primarily perform a leaping attack, but they’ll also lay into you with claw swipes if you get close. The problem with Werewolves is that they can cover ground so quickly as to make counter attacks difficult, even if you dodge their claws. Once again, the answer is
Werewolves are fast, aggressive foes who primarily perform a leaping attack, but they’ll also lay into you with claw swipes if you get close. The problem with Werewolves is that they can cover ground so quickly as to make counter attacks difficult, even if you dodge their claws. Once again, the answer is ![]() Quen - Quen’s exploding shield can be used to stagger the Werewolf, allowing you to retaliate more reliably. When pressured, Werewolves are keen to retreat and howl, causing them to glow red and regenerate health quickly. Hit them with
Quen - Quen’s exploding shield can be used to stagger the Werewolf, allowing you to retaliate more reliably. When pressured, Werewolves are keen to retreat and howl, causing them to glow red and regenerate health quickly. Hit them with ![]() Igni if you can to cancel their regeneration - chug a
Igni if you can to cancel their regeneration - chug a ![]() Tawny Owl if you’re having trouble keeping your Stamina up.
Tawny Owl if you’re having trouble keeping your Stamina up.


Confront the Spirit
Defeat the Werewolf, claim the Place of Power, then enter the cave despite the protests of the spirit haunting this place. When you reach a fork, note that some roots are blocking your path to the east, so continue south and go for a bit of a swim. Swim down the linear path ahead and use your Witcher senses to scan for chests - there are three of them underwater, and you are never prevented from surfacing to breathe, so you should have no trouble searching for treasure, diving to get it, then leisurely swimming to your destination.
Enter the chamber ahead and you’ll find the source of the voice - some clearly unnatural growth at the heart of the ancient oak. Exhaust the spirit’s dialog options to learn that this spirit isn’t fond of the Crones, is cavalier about the death it inflicts on innocents, and, if you talked to the Ealdorman at Downwarren, the spirit will also you of a consequence of not helping it. If you pick the option “I don’t believe you.” you’ll have to directly confront and kill the spirit, while responding with “I’ll help you.” will start another round of busywork, this time for the spirit. “Gotta think this over.” just stalls for time. We recommend picking the option “I’ll help you.”, as you’ll get even more options for resolving this quest when you return without losing any current options. If you haven’t talked to the Ealdorman at Downwarren, the quest The Whispering Hillock will finally start.
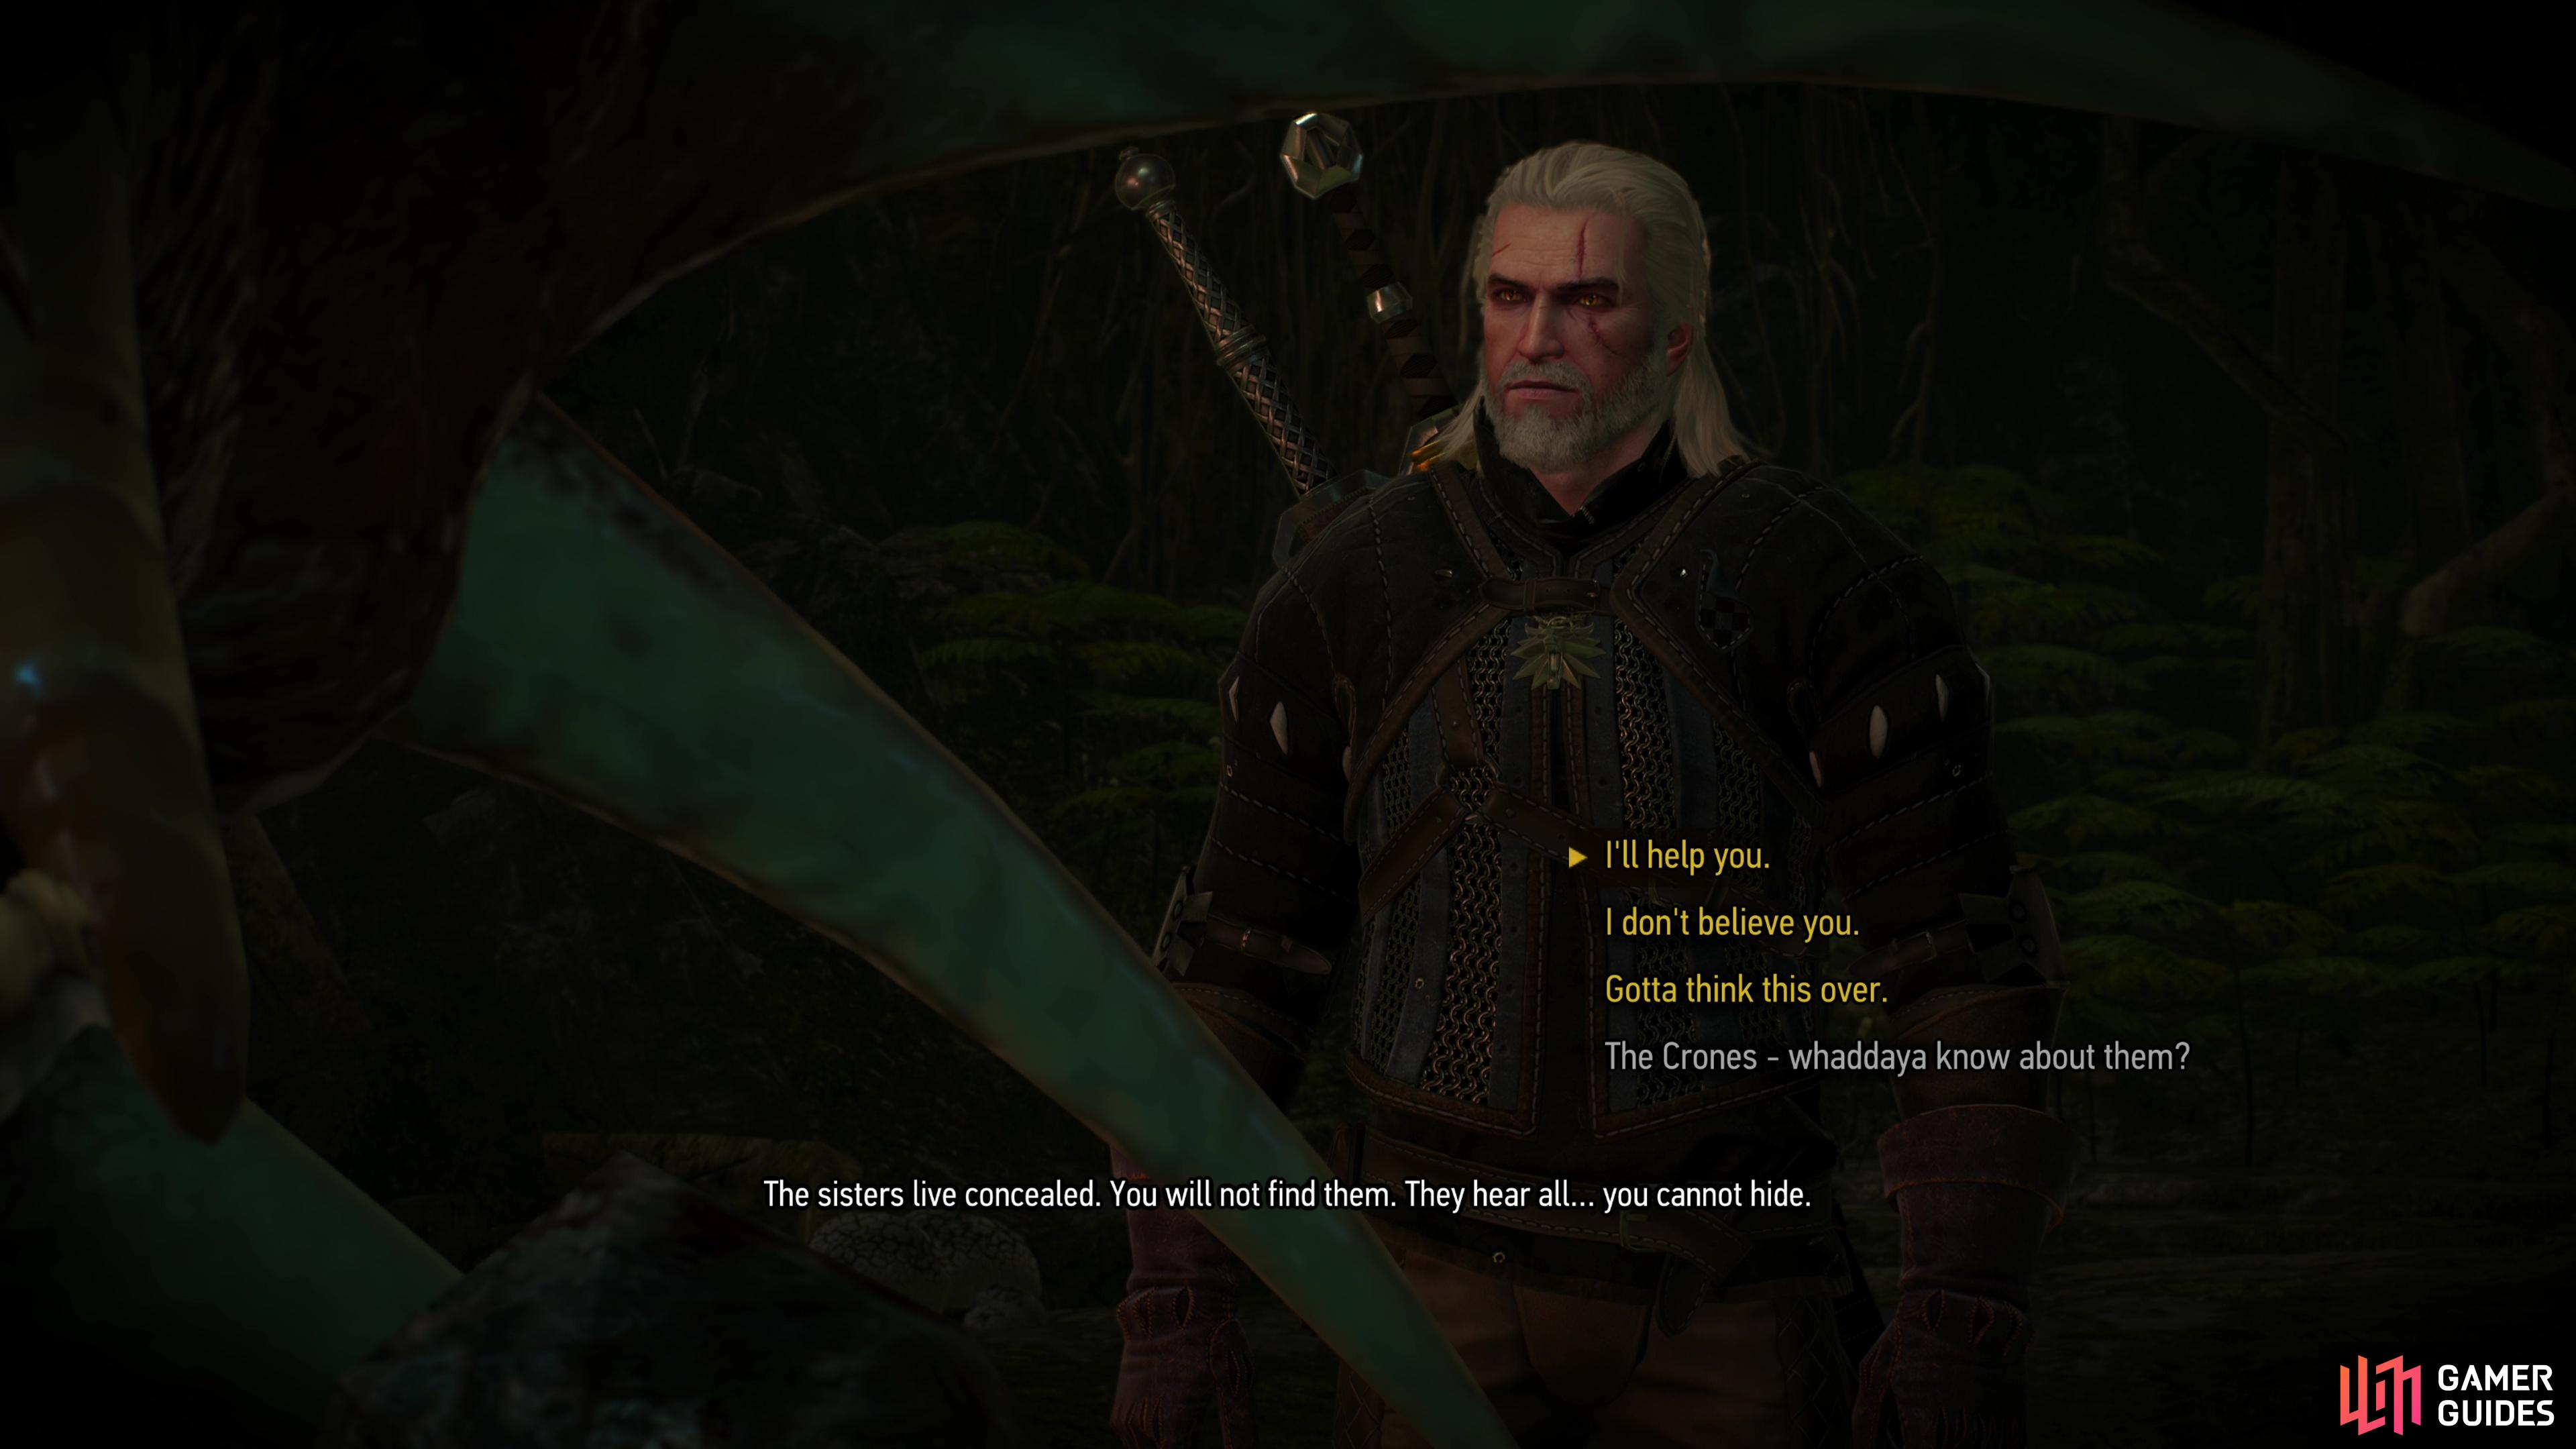
Swim through the cave to reach a large chamber, where some… creature is dwelling. Talk to the being and you’ll get to choose whether you want to fight it, or free it.
Find the Spirit’s Bones
Leave the cave and you’ll have two objectives: you need to find Raven’s ![]() Feathers and recover the spirit’s bones. The bones are closer, so we’ll grab those, first. Head west, northwest from the Ancient Oak signpost to find a search area midway between the Ancient Oak and
Feathers and recover the spirit’s bones. The bones are closer, so we’ll grab those, first. Head west, northwest from the Ancient Oak signpost to find a search area midway between the Ancient Oak and ![]() The Orphans of Crookback Bog. When you reach the search area, kill several
The Orphans of Crookback Bog. When you reach the search area, kill several ![]() Drowners (Lv6) and a
Drowners (Lv6) and a ![]() Water Hag (Lv8), then search the southern edge of the search area to find a tombstone - it’ll glow red under the scrutiny of your Witcher senses. Loot the tombstone to acquire the spirit’s bones, as you do. One down, two to go.
Water Hag (Lv8), then search the southern edge of the search area to find a tombstone - it’ll glow red under the scrutiny of your Witcher senses. Loot the tombstone to acquire the spirit’s bones, as you do. One down, two to go.


(1 of 3) Seek out the spirit’s bones northwest of the Ancient Oak.
Find a Raven’s Feather
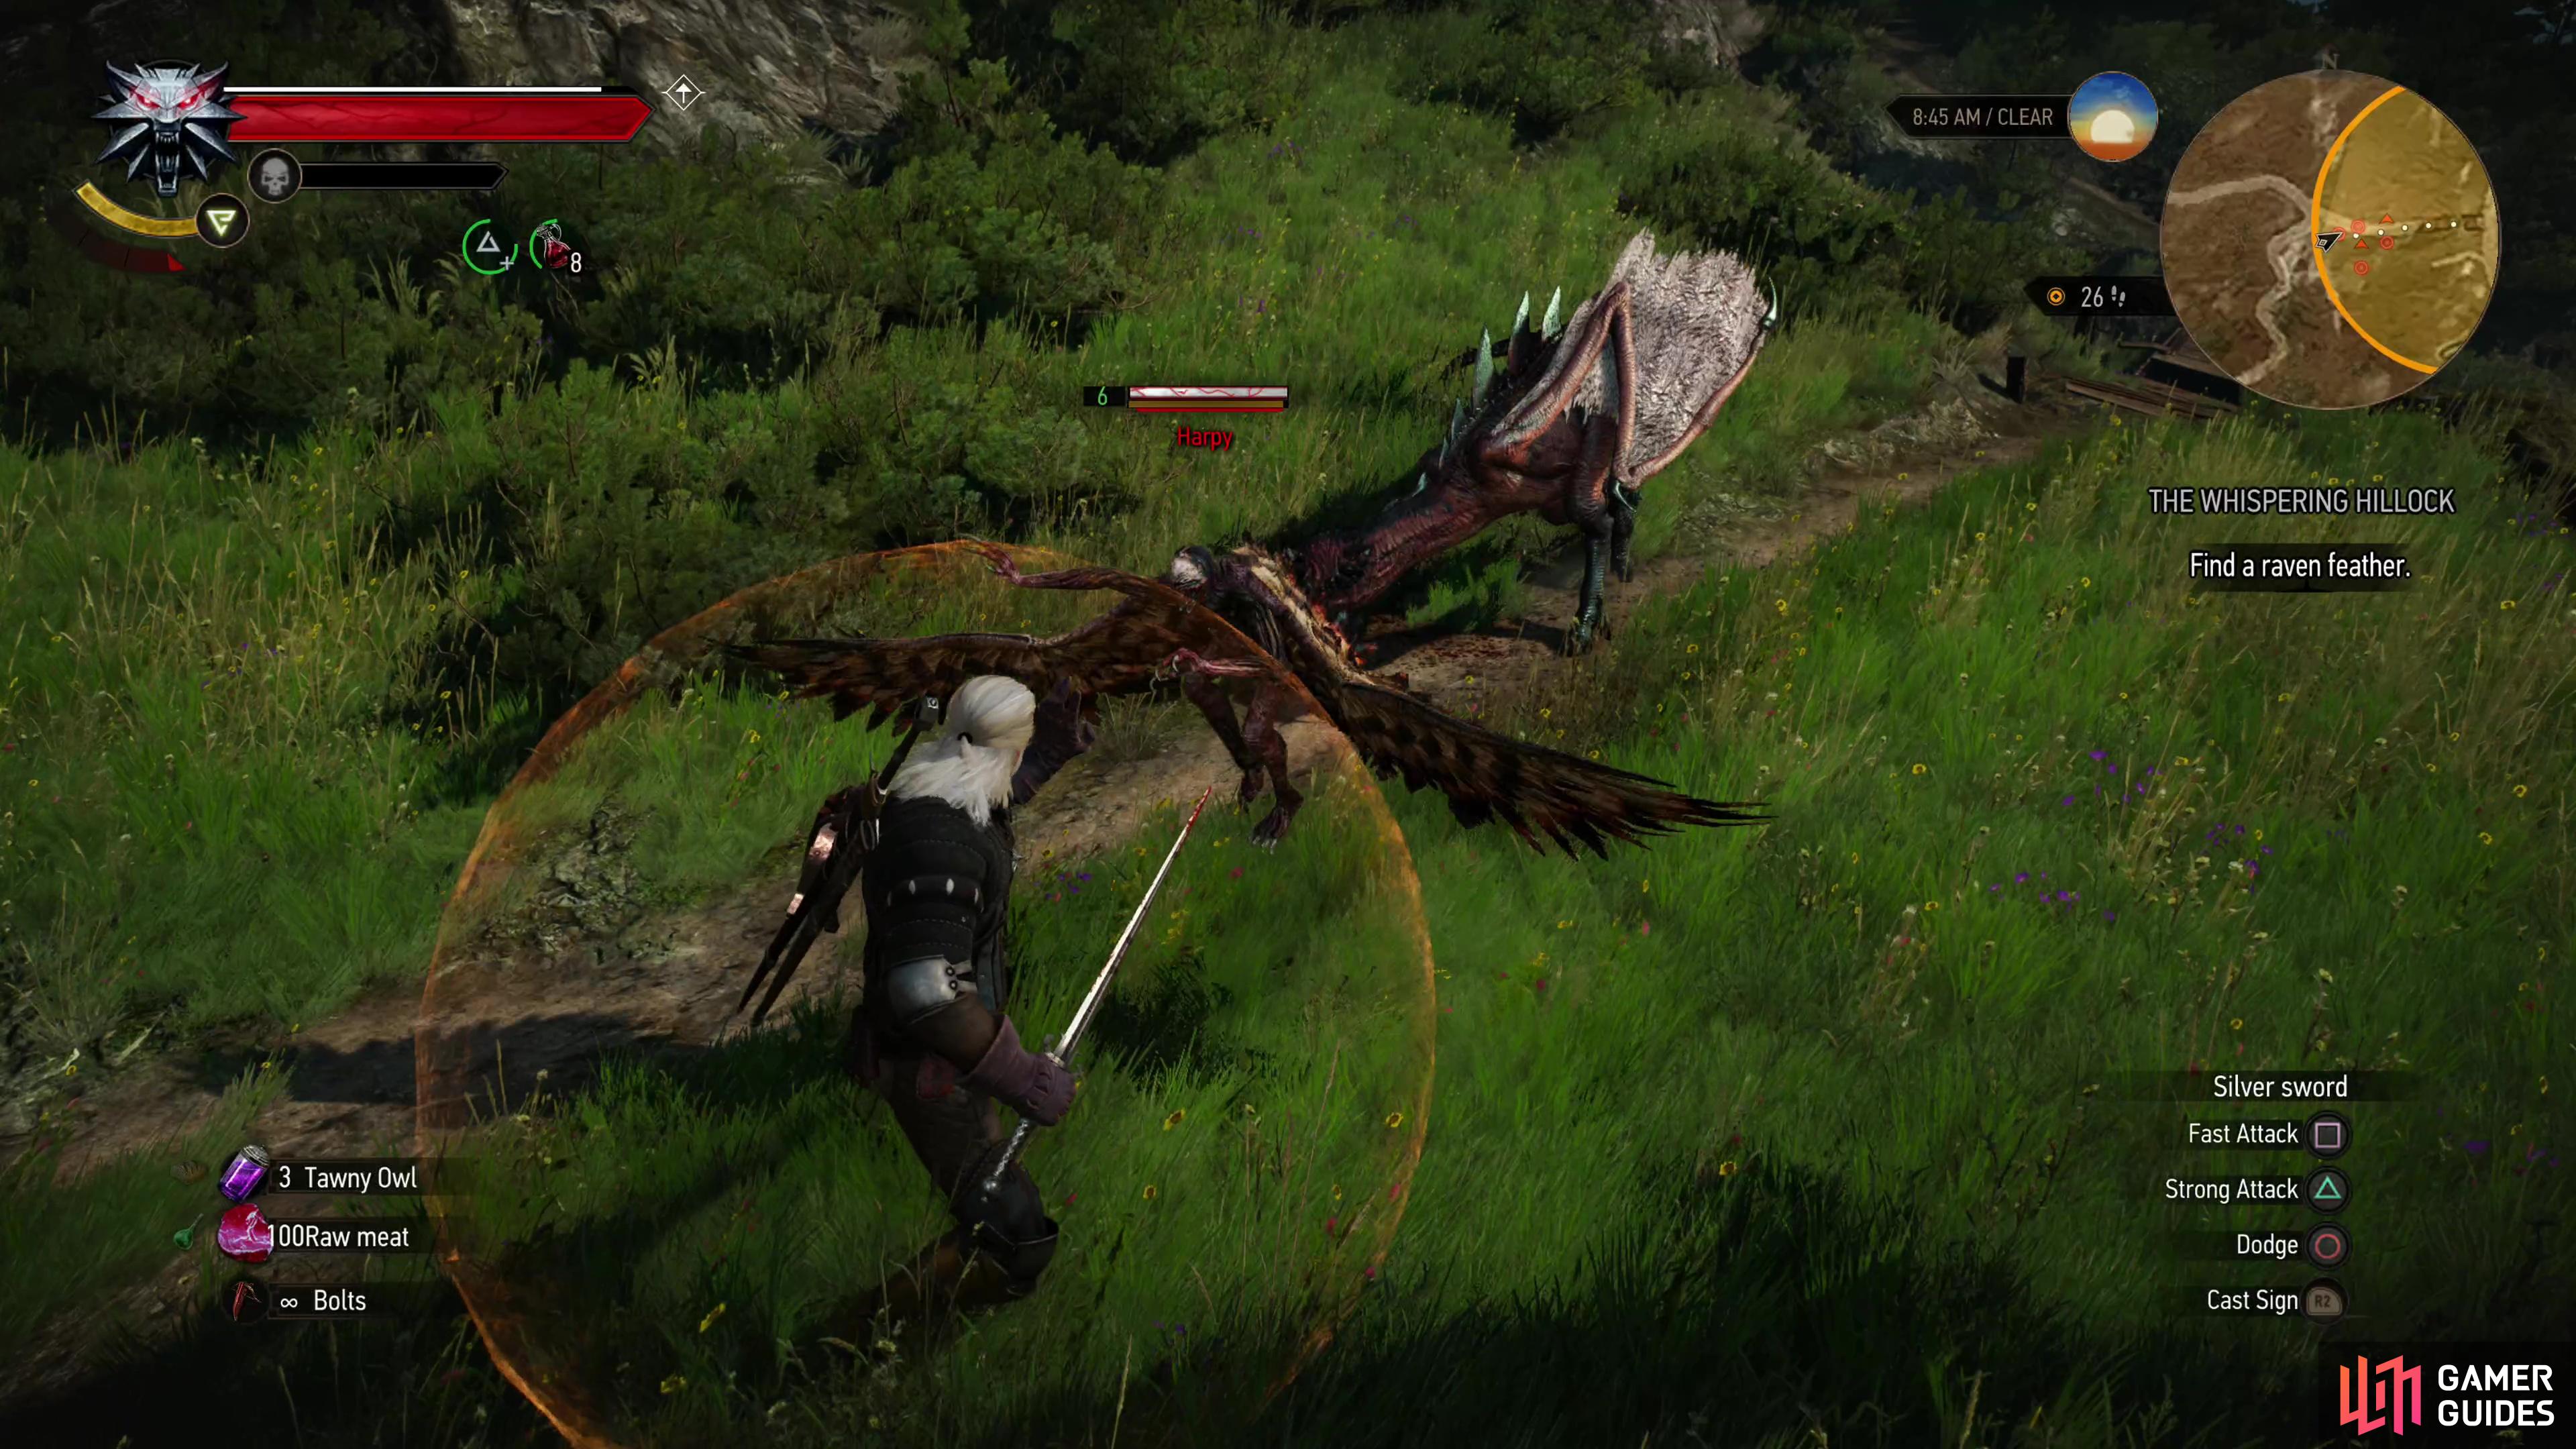
The Raven’s Feather you need is further afield, north of the Orphans of Crookback Bog, southwest of Downwarren. The easiest way to find the feather you need is by traveling to Downwarren, and from there following a road southwest out of town. Cross a stream, jump across a bridge, then kill some ![]() Harpies (Lv6) and possibly a
Harpies (Lv6) and possibly a ![]() Wyvern (Lv9) before turning your attention to a nest on the edge of a cliff. This nest contains both the Raven’s Feather you seek as well as a Sealed Urn, the latter of which you’ll need during the quest Ladies of the Wood. If you already started Ladies of the Wood, there’s a good chance you’ve already looted this nest, and hence already had the Raven’s Feather, in which case you can skip this objective entirely.
Wyvern (Lv9) before turning your attention to a nest on the edge of a cliff. This nest contains both the Raven’s Feather you seek as well as a Sealed Urn, the latter of which you’ll need during the quest Ladies of the Wood. If you already started Ladies of the Wood, there’s a good chance you’ve already looted this nest, and hence already had the Raven’s Feather, in which case you can skip this objective entirely.


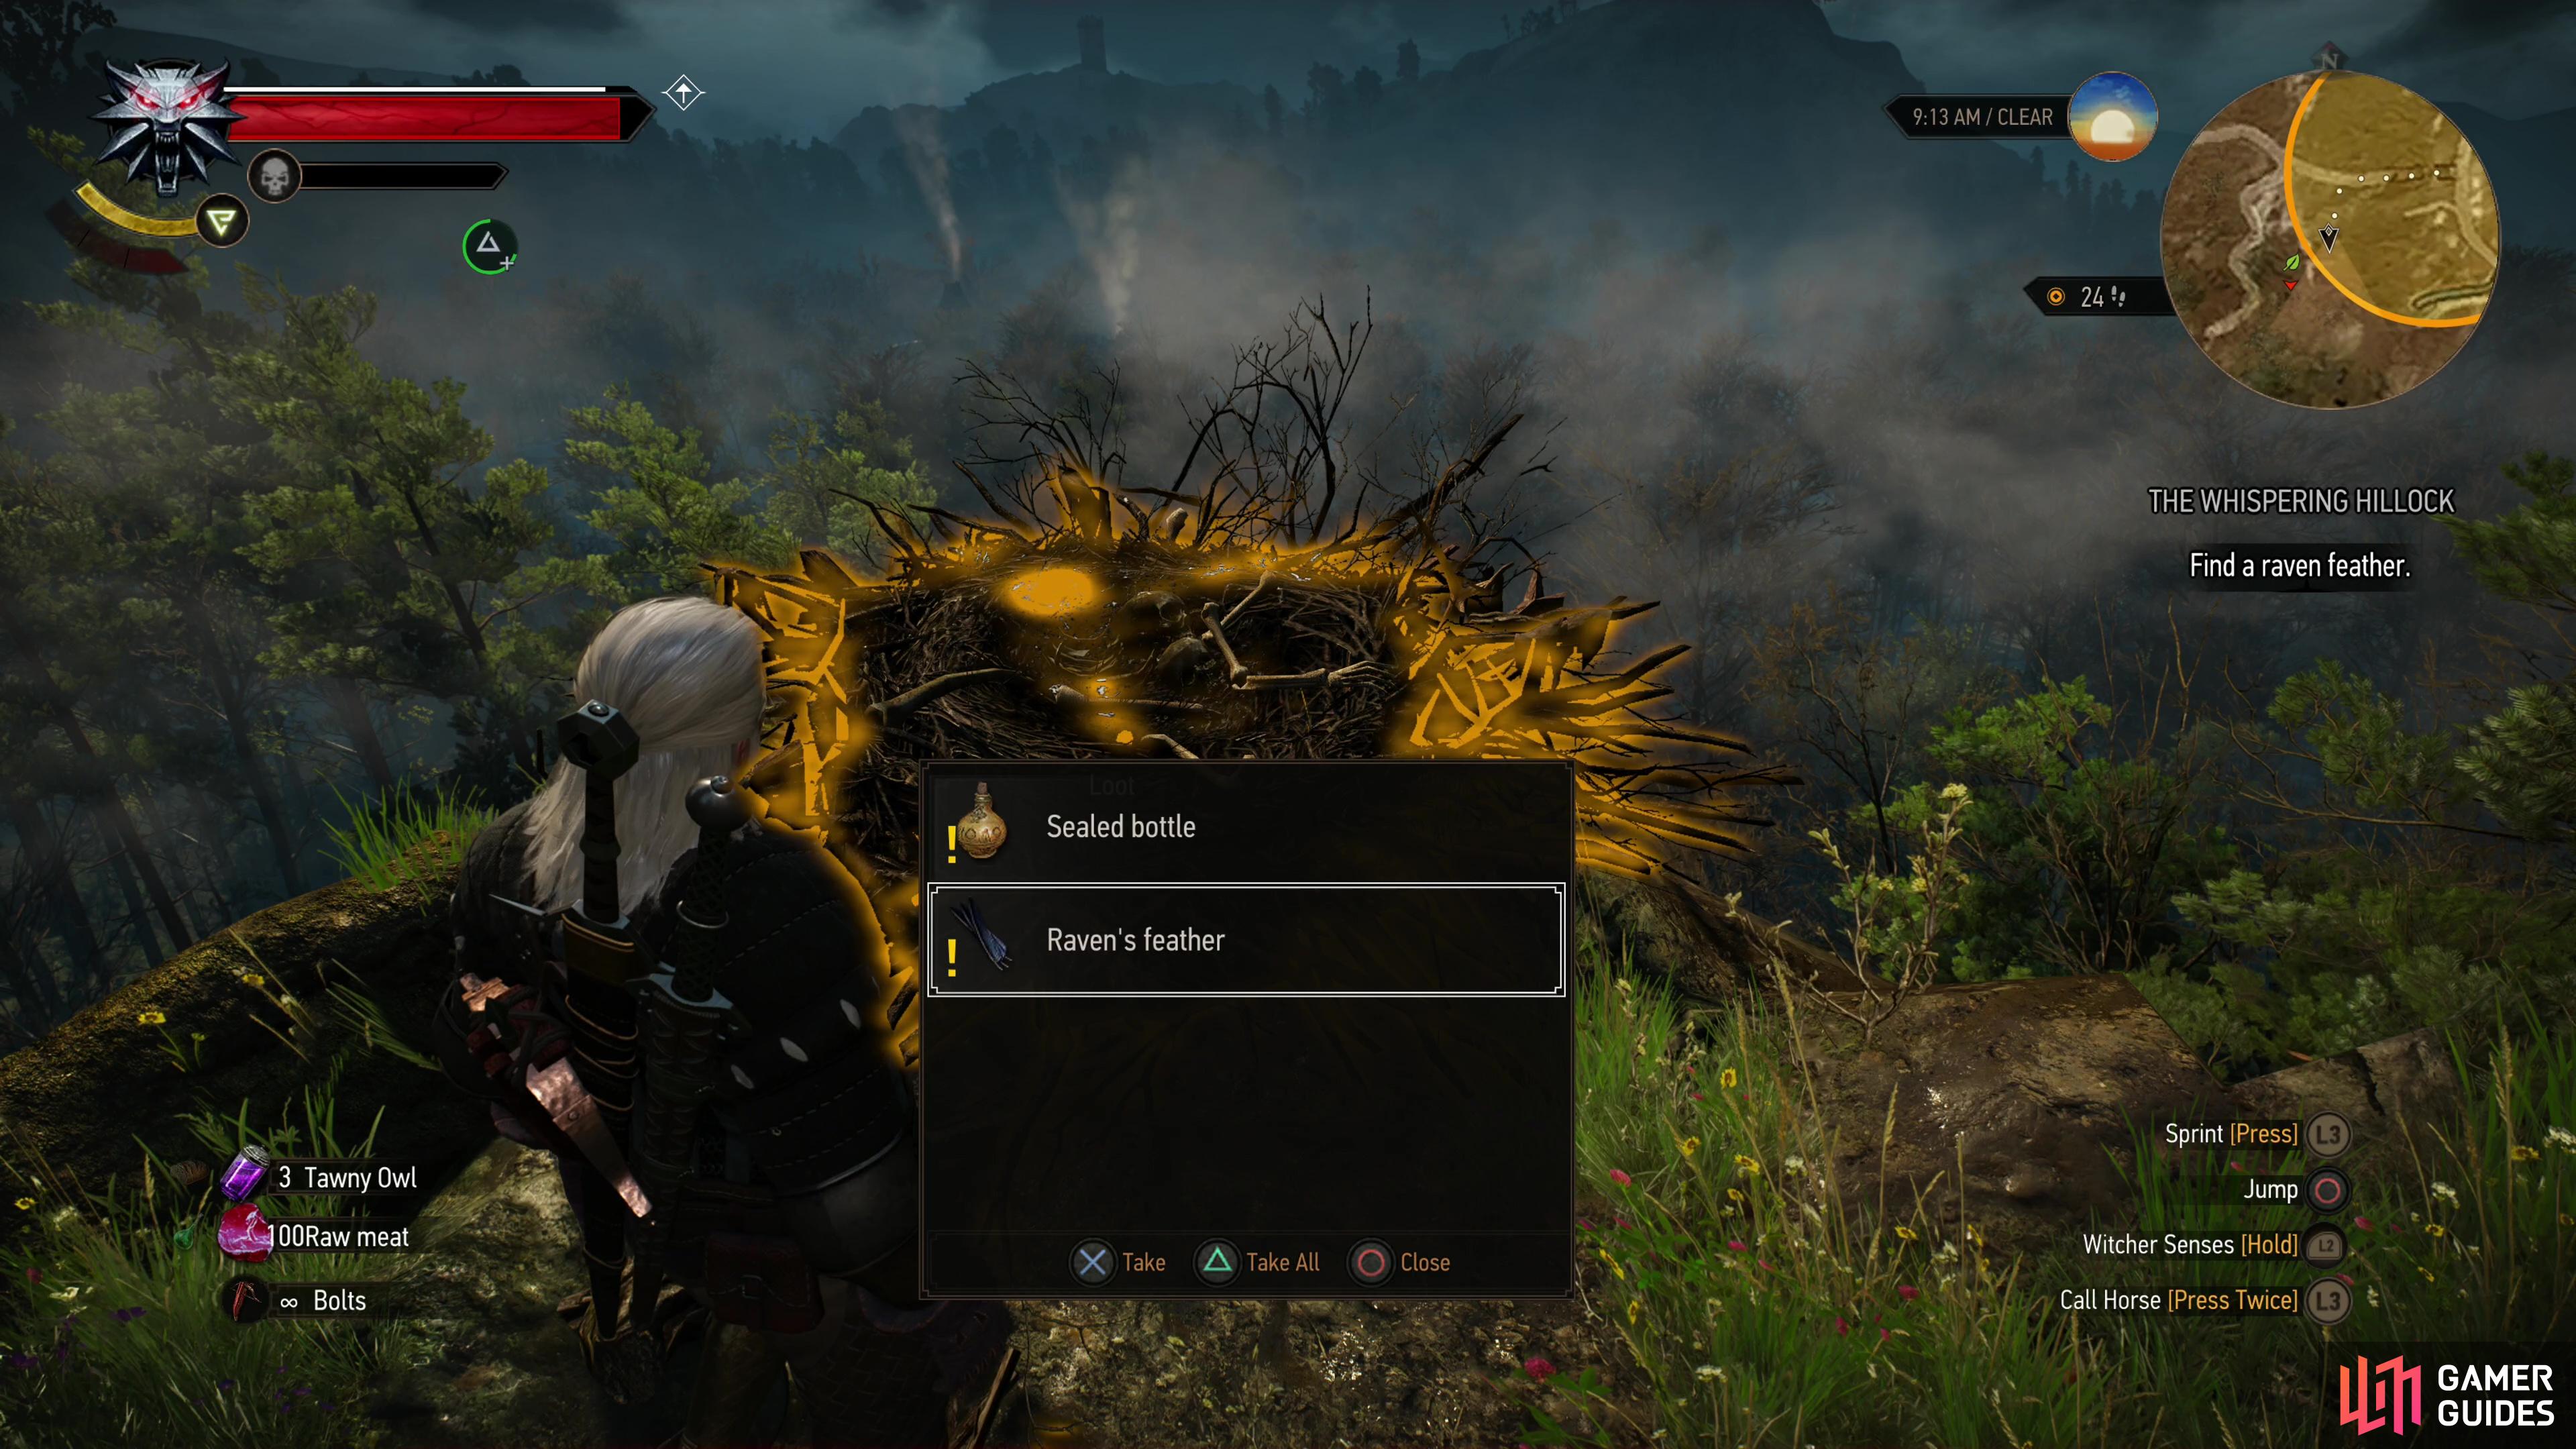
(1 of 4) To find a Raven’s Feather, head southwest from Downwarren,
Bring a Mare to the Spirit
After you have the Raven’s Feather and the spirit’s bones you’ll get a third objective - the spirit wants a black mare that dwells south of its lair. Return to the Ancient Oak signpost and follow the road south until you reach the search area. You’ll find plenty of black mares roaming around in the search area - don’t overthink this, just get close enough to one for its name to pop up (that’s be “Horse”, in case you’re wondering) and hit the creature with ![]() Axii. Mount your newly tamed steed and ride back north to the Ancient Oak.
Axii. Mount your newly tamed steed and ride back north to the Ancient Oak.
You can’t enter the way you did last time - horses aren’t great climbers or swimmers - but you can use the exit the spirit opened up after you were done talking. Find the cave entrance northwest of the Ancient Oak signpost but before you enter, SAVE YOUR GAME. Now is when you’ll make a choice that will determine the fate of Downwarren, the Bloody Baron and his wife, and the orphans of Crookback Bog.


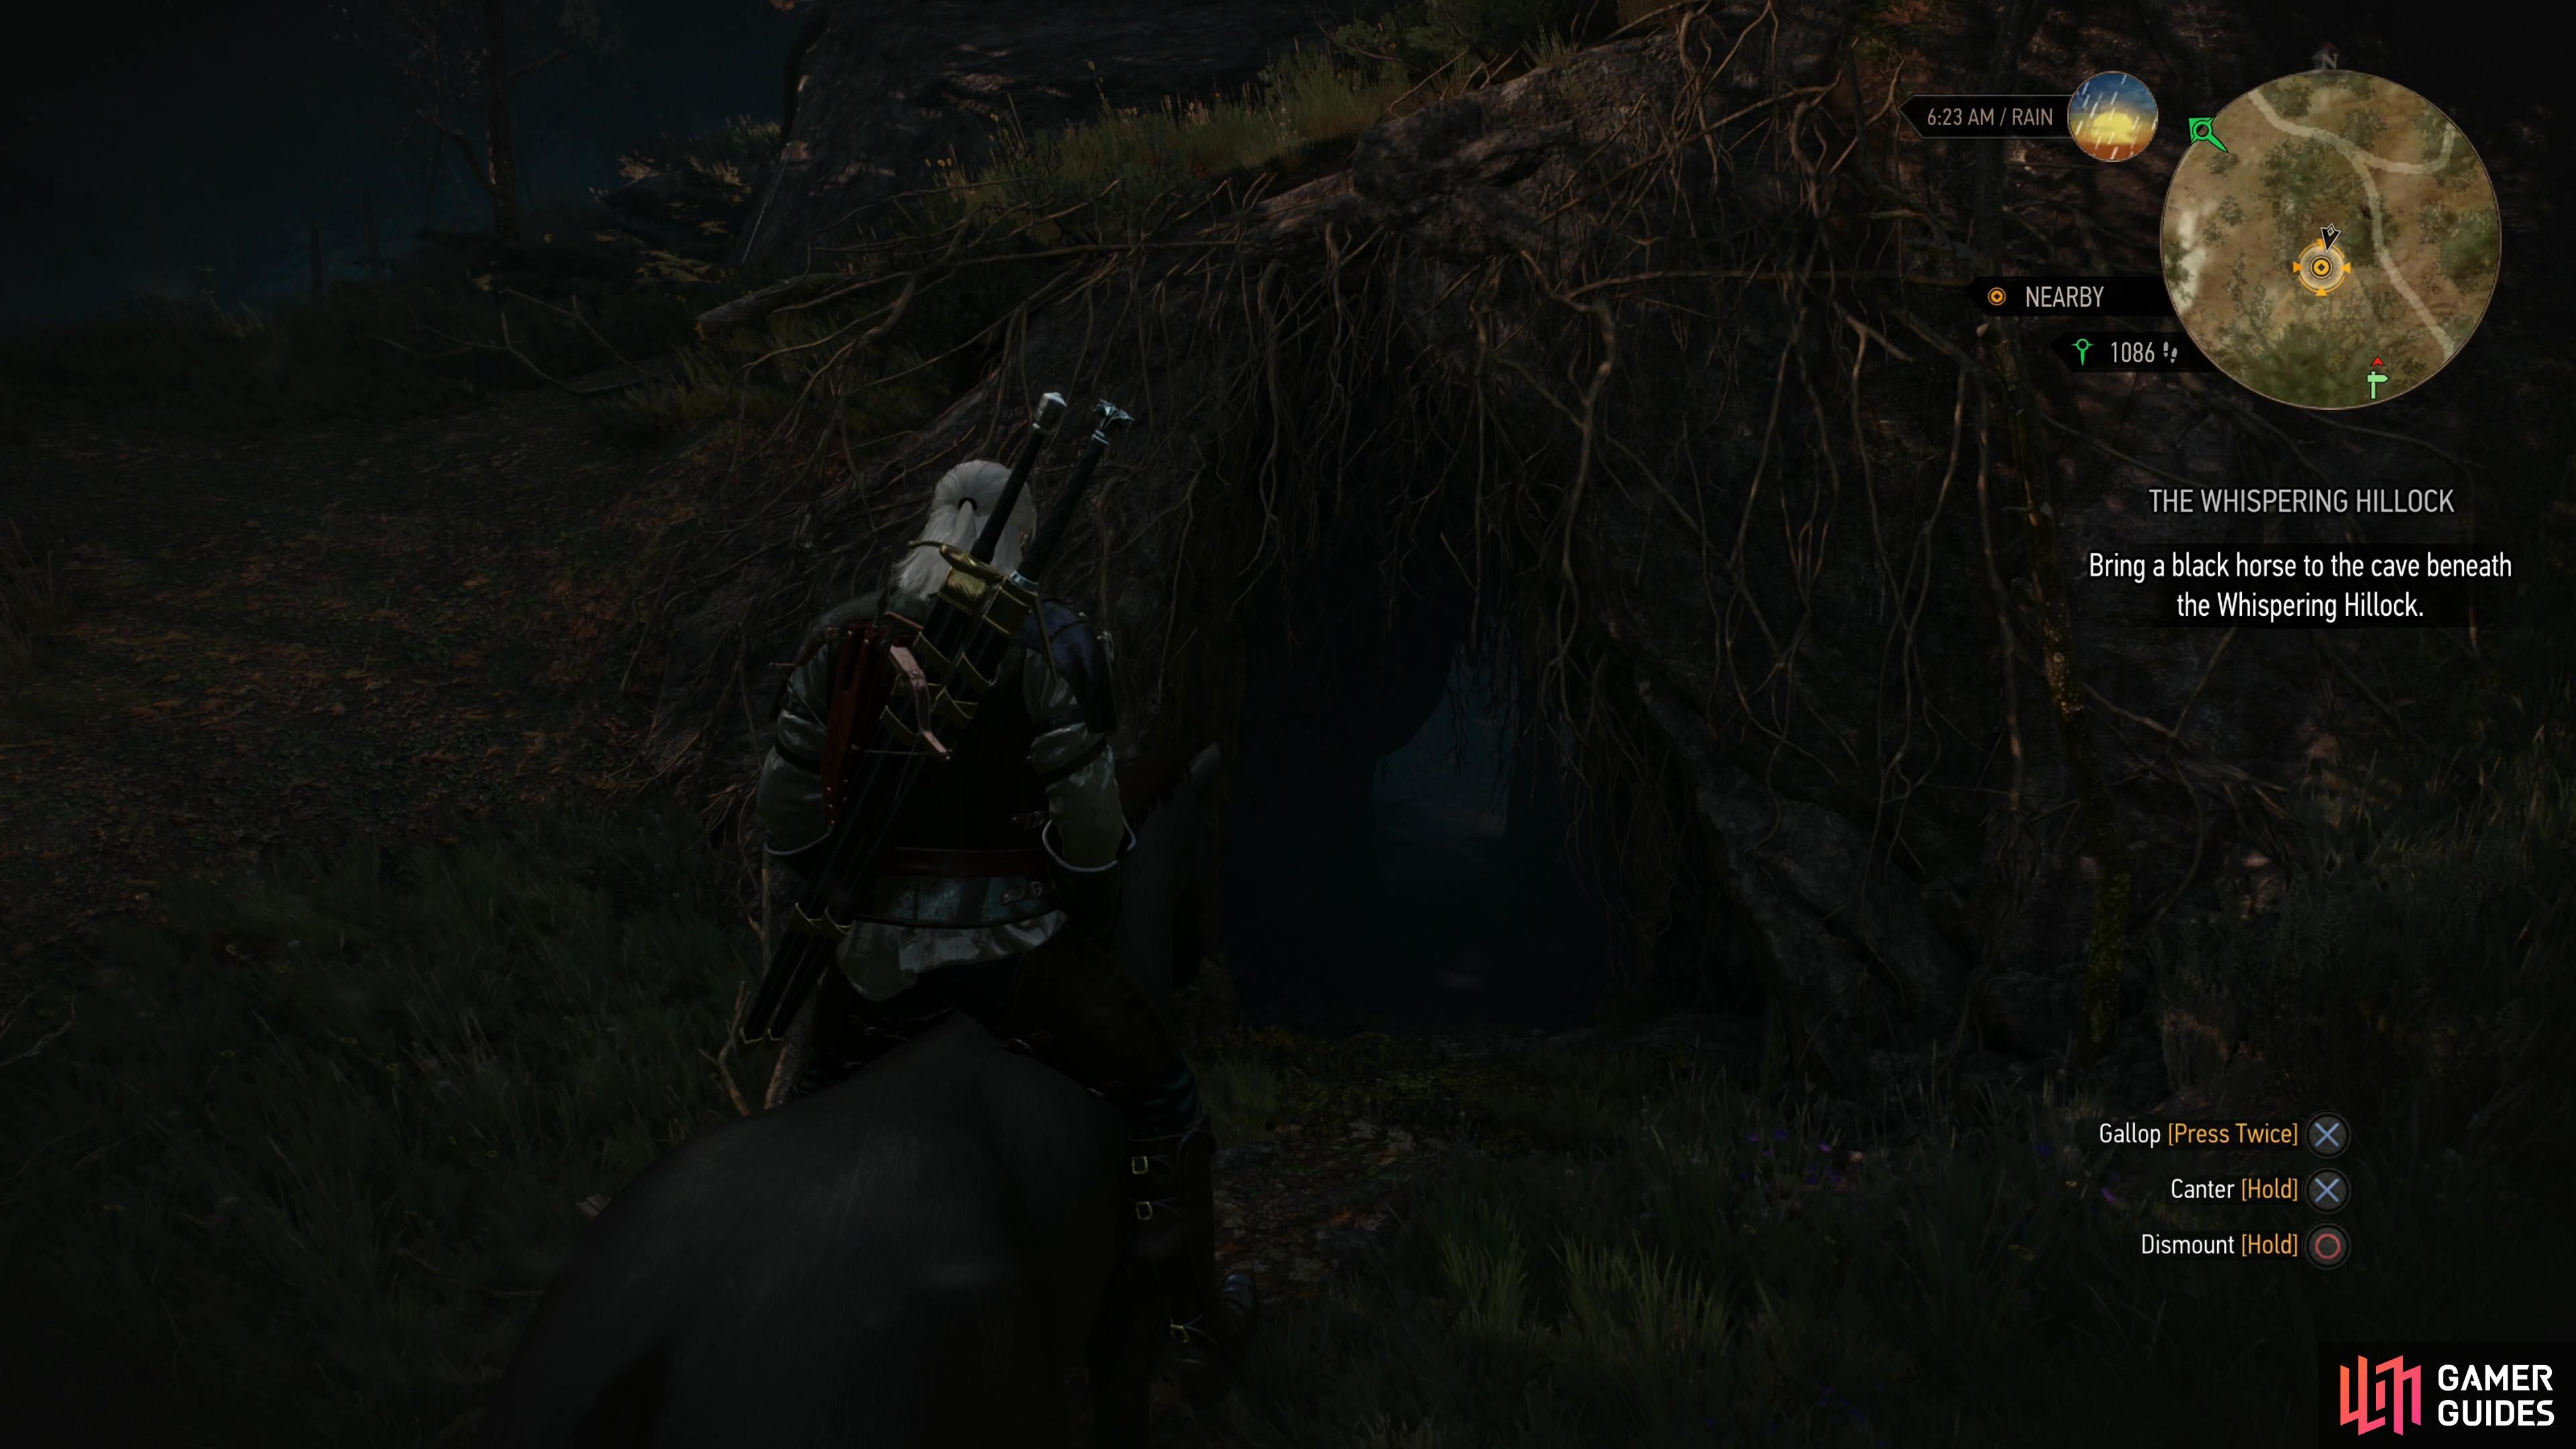

(1 of 4) After obtaining a Raven’s Feather and the spirit’s bones, you’ll need to hunt a mare south of the Ancient Tree.
Choice: Kill or Free the Spirit
When you’re ready, ride the captive mare into the spirit’s chamber and after a scene you’ll get three options: [Start the ritual.] will free the spirit, [Trick the being in the tree and destroy it.] will kill the spirit without needing to fight it, or “Actually, I’m gonna kill you.” will pick a fight, and is functionally identical to if you’d have picked a fight during your first encounter. If you free the spirit or trick the spirit, the entire matter will be resolved through dialog and cutscenes, only if you opt to conventionally fight the spirit is there more gameplay before the quest ends.
Destroy the Tree’s Heart
If you choose to fight the spirit in the tree, you’ll begin what seems like a proper boss battle. Your foe, the “Tree’s Heart” even has a proper health bar and everything! As far as boss fights go, this one’s a bit underwhelming, however, as the Tree’s Heart itself can’t attack, resorting to summoning ![]() Endrega Workers (Lv6). It’ll always summon three, and when they’re defeated, it’ll summon another before taking a long pause, then repeating the cycle. That’s it. That’s the bosses’ entire offense.
Endrega Workers (Lv6). It’ll always summon three, and when they’re defeated, it’ll summon another before taking a long pause, then repeating the cycle. That’s it. That’s the bosses’ entire offense.
Kill the Endrega Workers, then attack the Tree’s Heart. You’ll need to cut through some roots before you can damage it, and it may not seem like you’re doing anything, but you are. Between Endrega waves, swing at the heart. Eventually you’ll get through the roots and deal damage. At around 50% of its life it’ll regrow its roots, forcing you to cut through them again, but once that’s done you just need to repeat the process above until the Heart is destroyed.

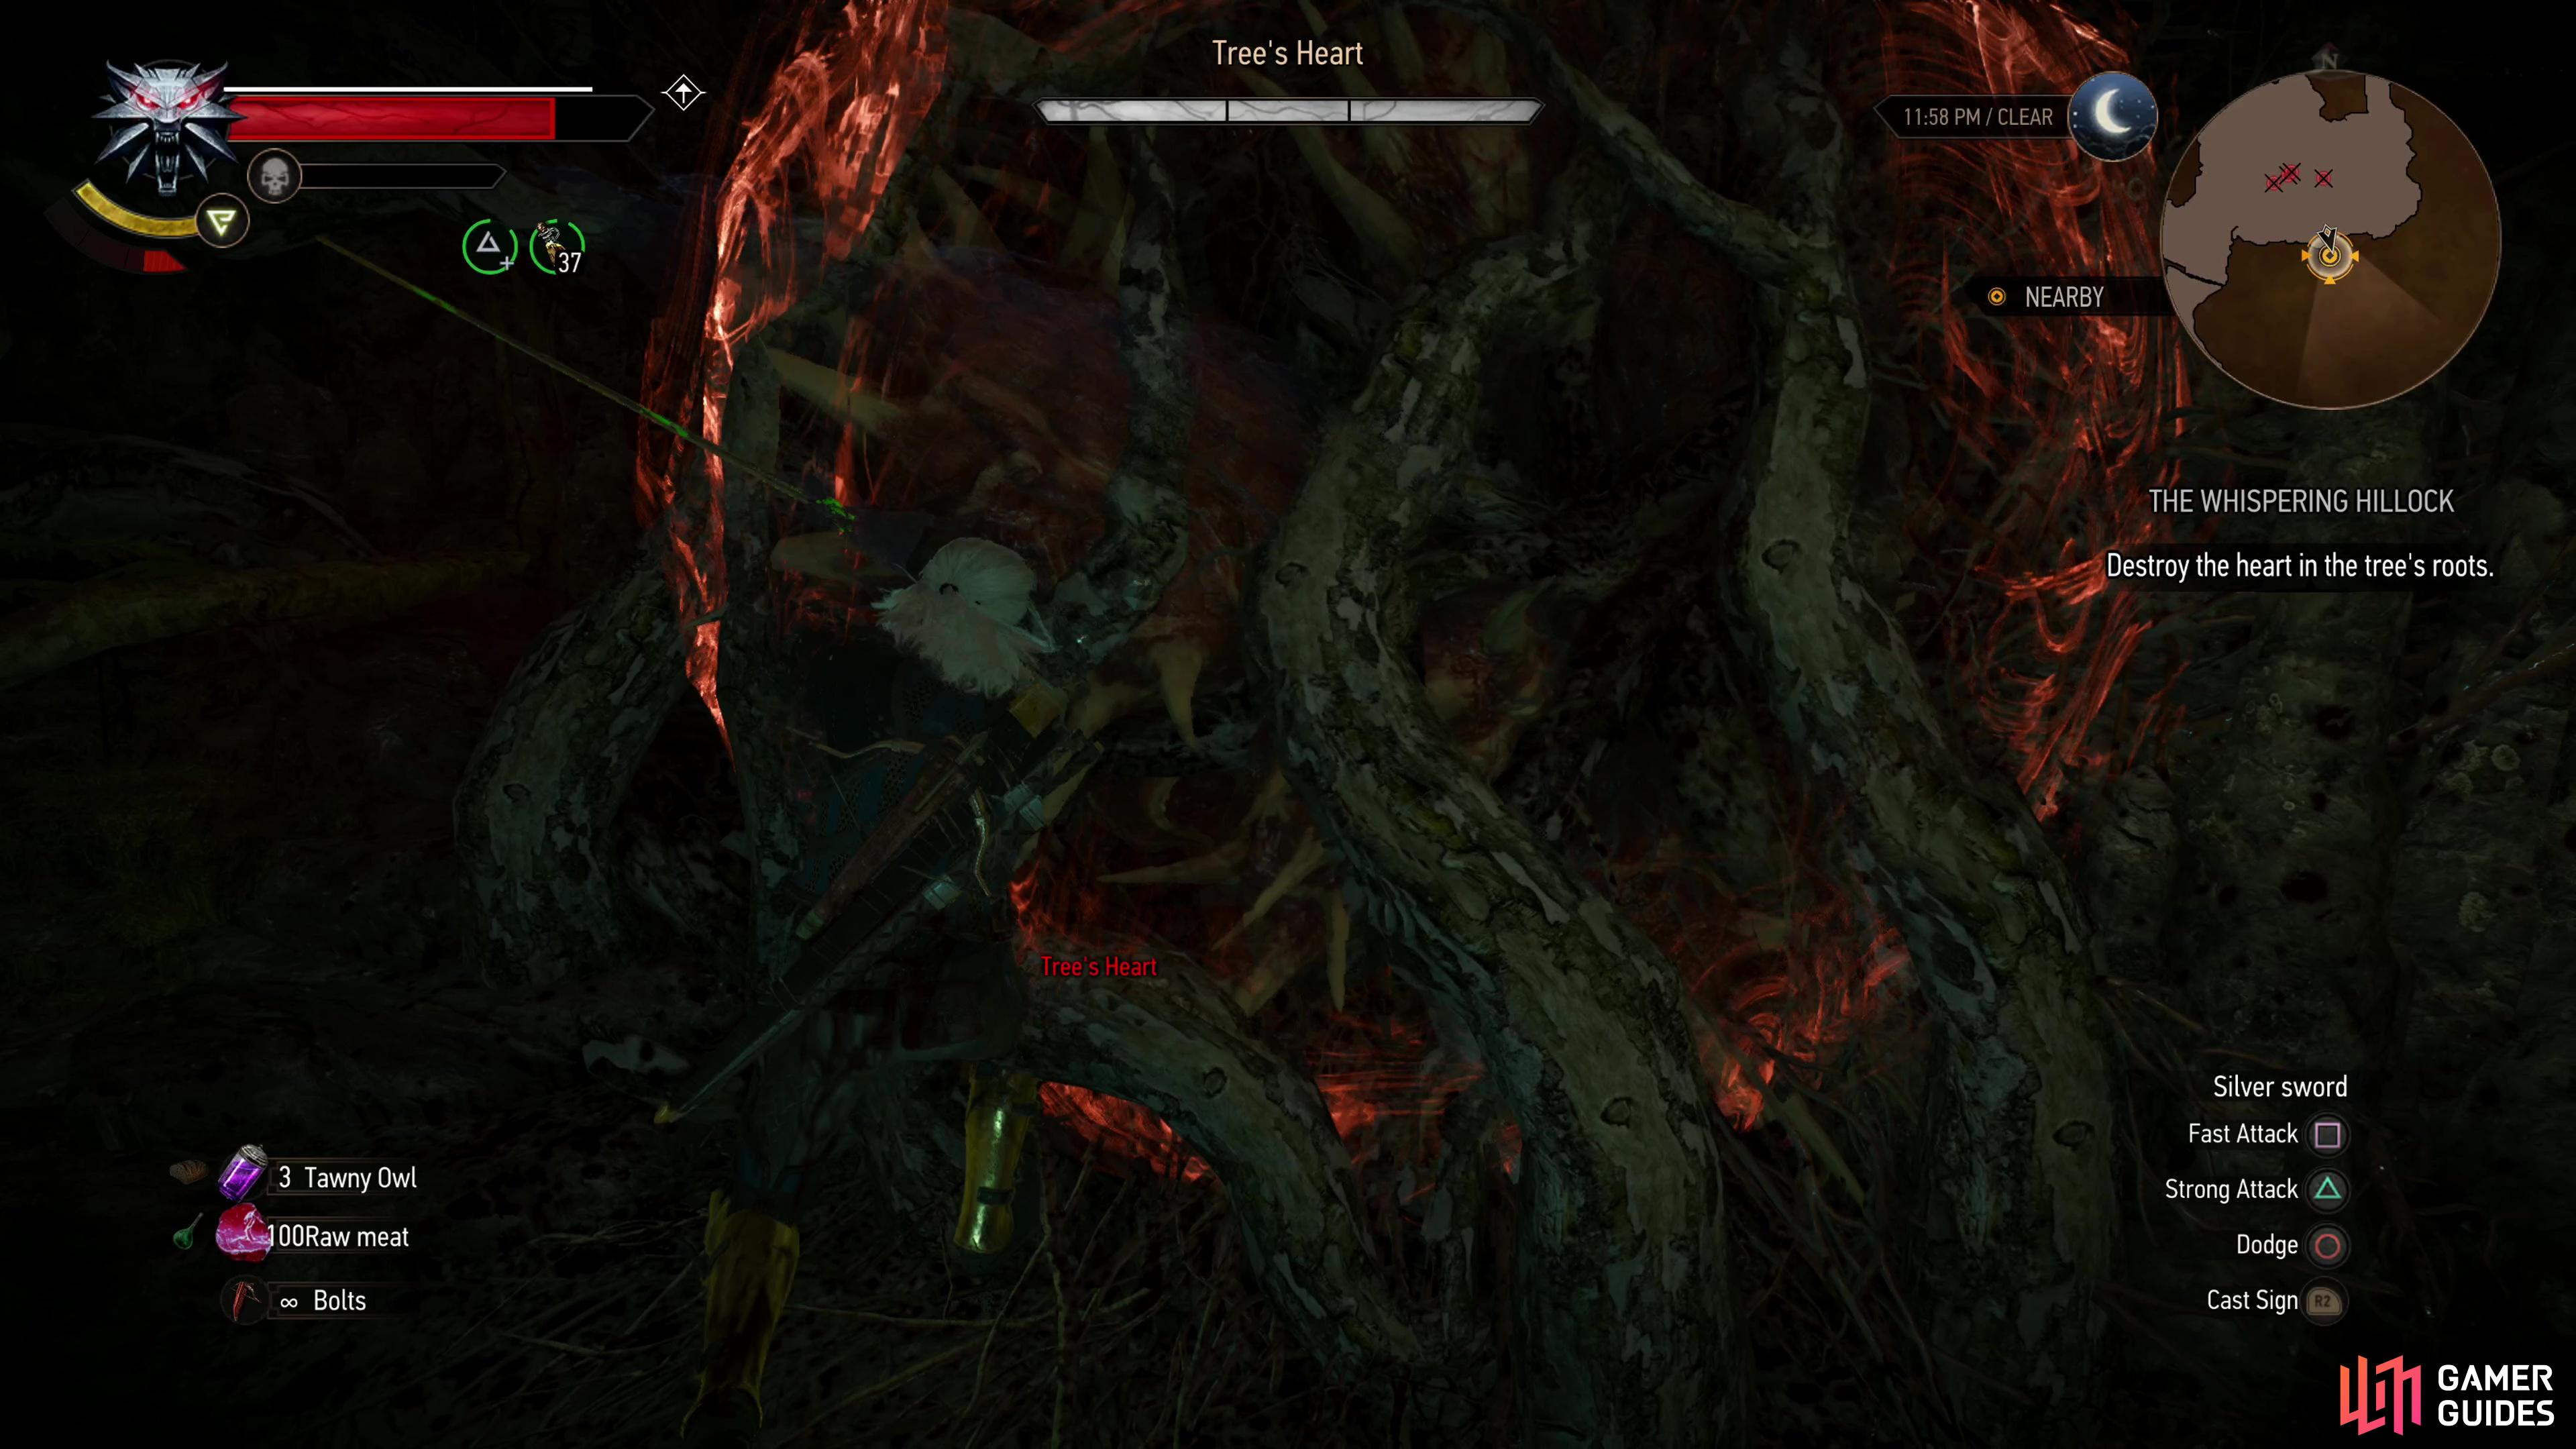

(1 of 3) The spirit’s only form of offense is by proxy, and unfortunately for it, its minions are mere Endrega Workers.
The Whispering Hillock Choices and Outcomes
When the spirit is slain or freed, this quest will end, and depending on your decision some outcomes are now set in stone regarding the Bloody Baron and his wife, the town of Downwarren, and the orphans of Crookback Bog. These will come to pass during the upcoming quest Return to Crookback Bog, but if you want to know what you’re getting into, check out the spoiler boxes, below.
Outcome: Killed the Spirit
The following outcomes will trigger if you killed the spirit, either through trickery or direct combat. It doesn’t matter if you’ve talked to the Ealdorman at Downwarren or not.
If you kill the spirit, the orphans of Crookback Bog will vanish from the orphanage - almost certainly taken by the Crones. It’s unlikely that ends well for the children, as one of the Crones called them “plump as piglets”, which denotes a… culinary interest in the orphans. Since the orphans weren’t rescued by the spirit, Anna won’t be punished, which means she’ll survive, but losing the children shatters what’s left of her sanity. No magic or curses here, just crushing emotional trauma, and the Bloody Baron elects to take his wife in search of treatment. Downwarren is spared of the spirit’s wrath, but the Cult of the Eternal Flame is busy imposing its own brand of oppression on the superstitious peasants.
Outcome: Freed the Spirit After Talking to the Ealdorman
This outcome only applies if you talked to the Ealdorman during Ladies of the Wood before starting The Whispering HIllock, and it’s likely the most common of the two “free the spirit” variants.
If you freed the spirit, the mare it possessed turned into “Black Beauty”, and it uses its speed to make good on its promise to save the orphans of Crookback Bog. Good for the children - they’ll later turn up in an orphanage in Novigrad, but Anna will be punished for losing the orphans by being turned into a hag. You can lift the curse on Anna, but her fate is sealed, and she’ll perish shortly thereafter, and in his grief the Bloody Baron will hang himself at ![]() Crow’s Perch. A mutually destructive relationship to the very end. In addition, the spirit will attack the village of Downwarren, driving many of the villagers violently mad. Aside from depriving you of access to the merchant who dwelt here, Downwarren’s desolation is surprisingly unimportant.
Crow’s Perch. A mutually destructive relationship to the very end. In addition, the spirit will attack the village of Downwarren, driving many of the villagers violently mad. Aside from depriving you of access to the merchant who dwelt here, Downwarren’s desolation is surprisingly unimportant.
Outcome: Freed the Spirit Before Talking to the Ealdorman
Perhaps the rarest set of outcomes, you’ll only get this if you free the spirit before talking to the Ealdorman at Downwarren, meaning you’ll effectively just have to stumble across and complete The Whispering Hillock as a stand-alone quest.
The spirit will possess the mare and become “Black Beauty”. Despite claiming that the dead villagers littering the Whispering Hillock were just nature running its course, the spirit proves that to be a lie by going out of its way to attack Downwarren, same as in the other variant. The merchant will be dead, but that’s the largest gameplay consequence. The children won’t be rescued from the Crones, either, which was arguably the most compelling reason to free the spirit in the other route. On the plus side, Anna won’t be turned into a hag and will survive, and consequently the Bloody Baron won’t commit suicide, just like in the “Kill the Spirit” route.
Whatever choice you made and the now immutable consequences of those choices, The Whispering Hillock ends. If you talked to the Ealdorman of Downwarren, then Ladies of the Wood will become active again, itself all but complete, pending a few more conversations. If you did not talk to the Ealdorman before starting The Whispering Hillock, you’re free to do whatever you wish, no strings attached. When you finally do get around to Ladies of the Wood you won’t have to get the Sealed Urn, but otherwise the quest should play out the same way.

 Sign up
No Comments